Blog

How To: Northwest Style Flower Carving Tutorial

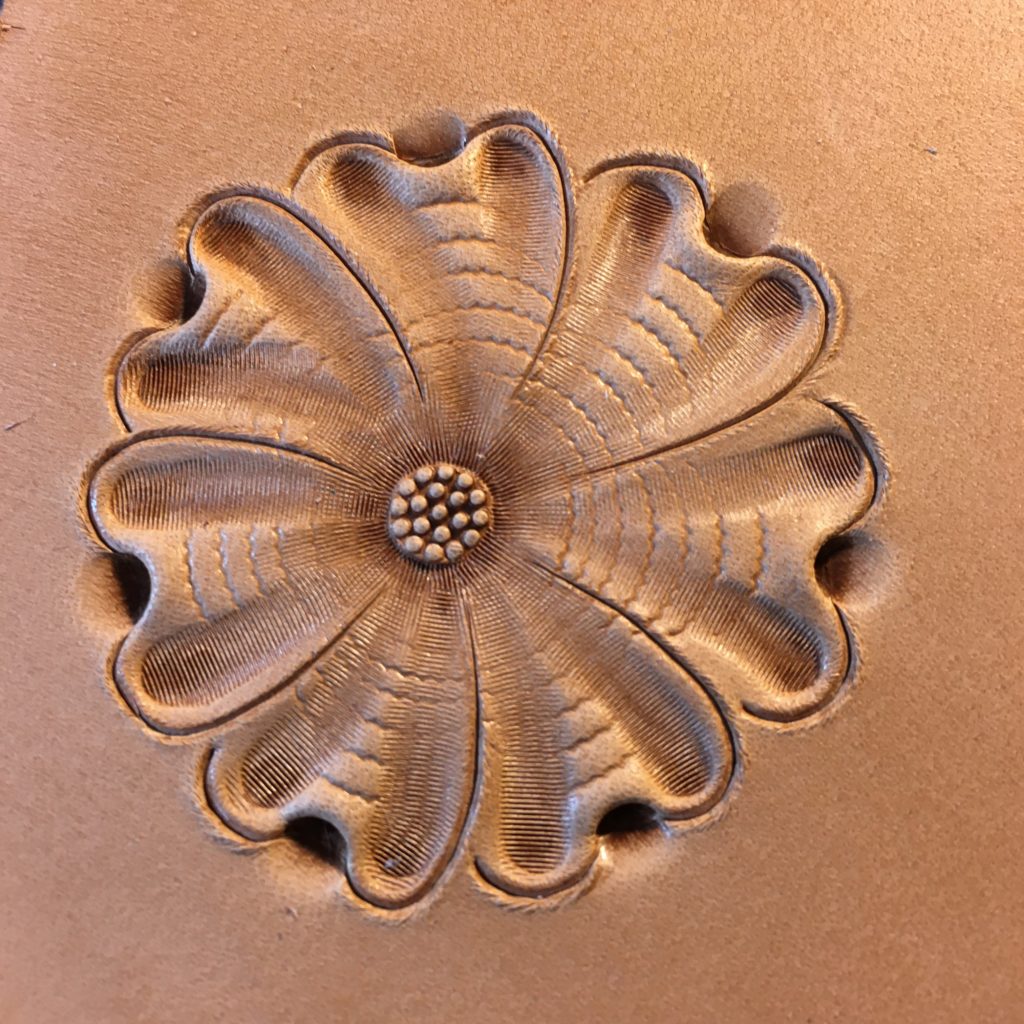
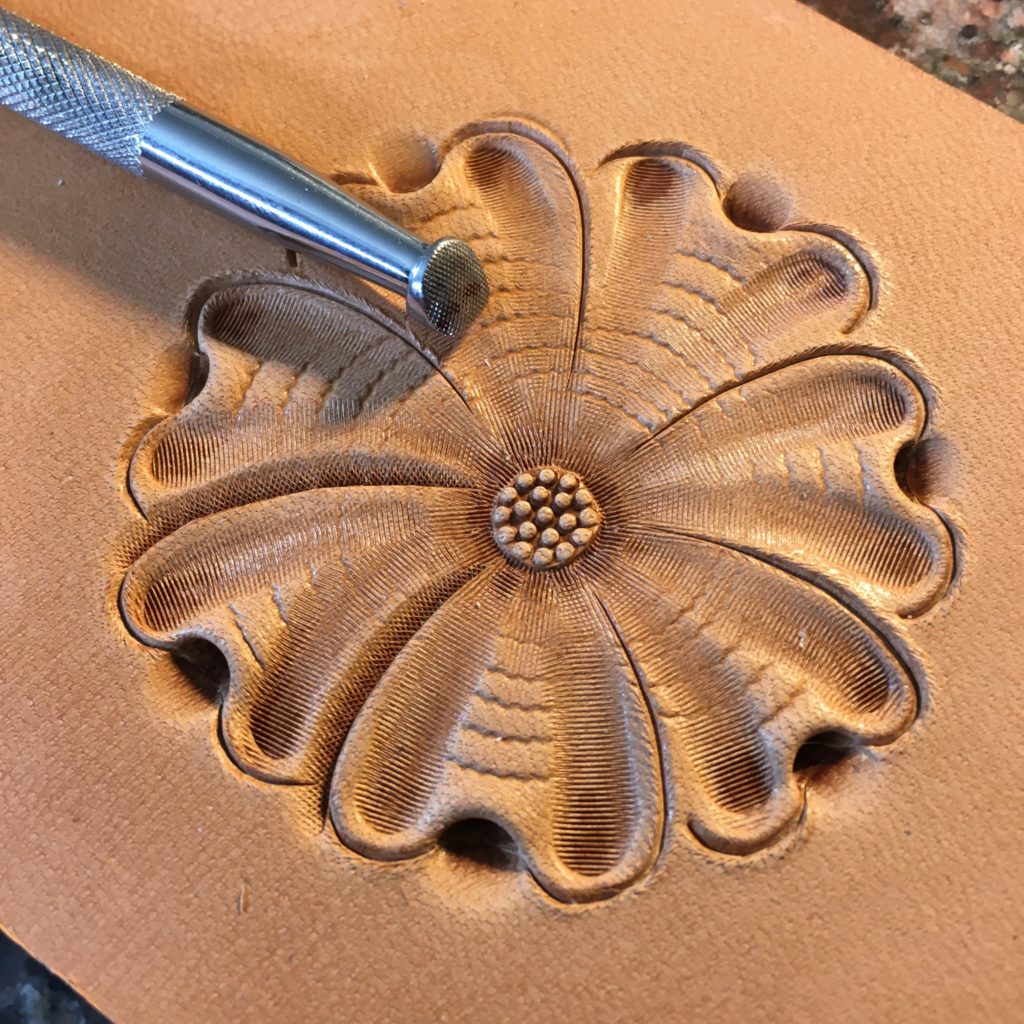
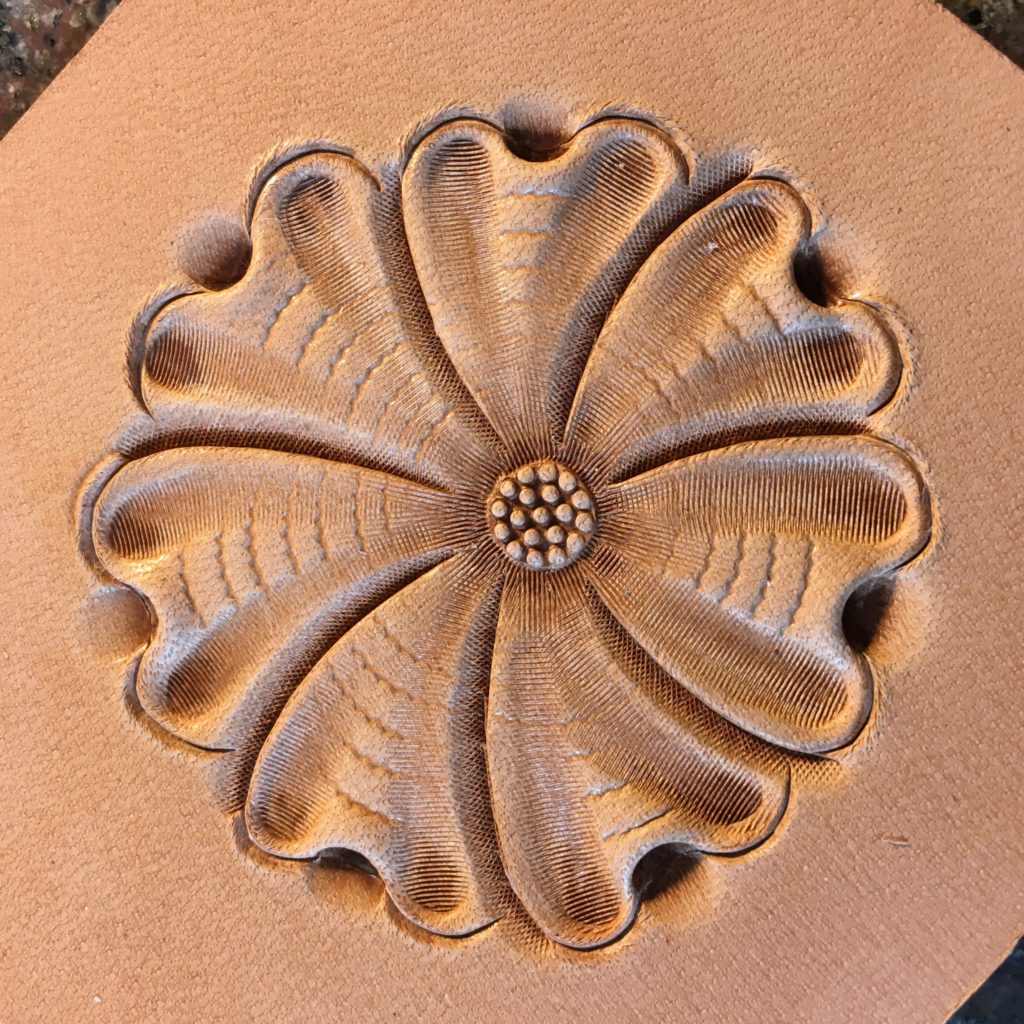
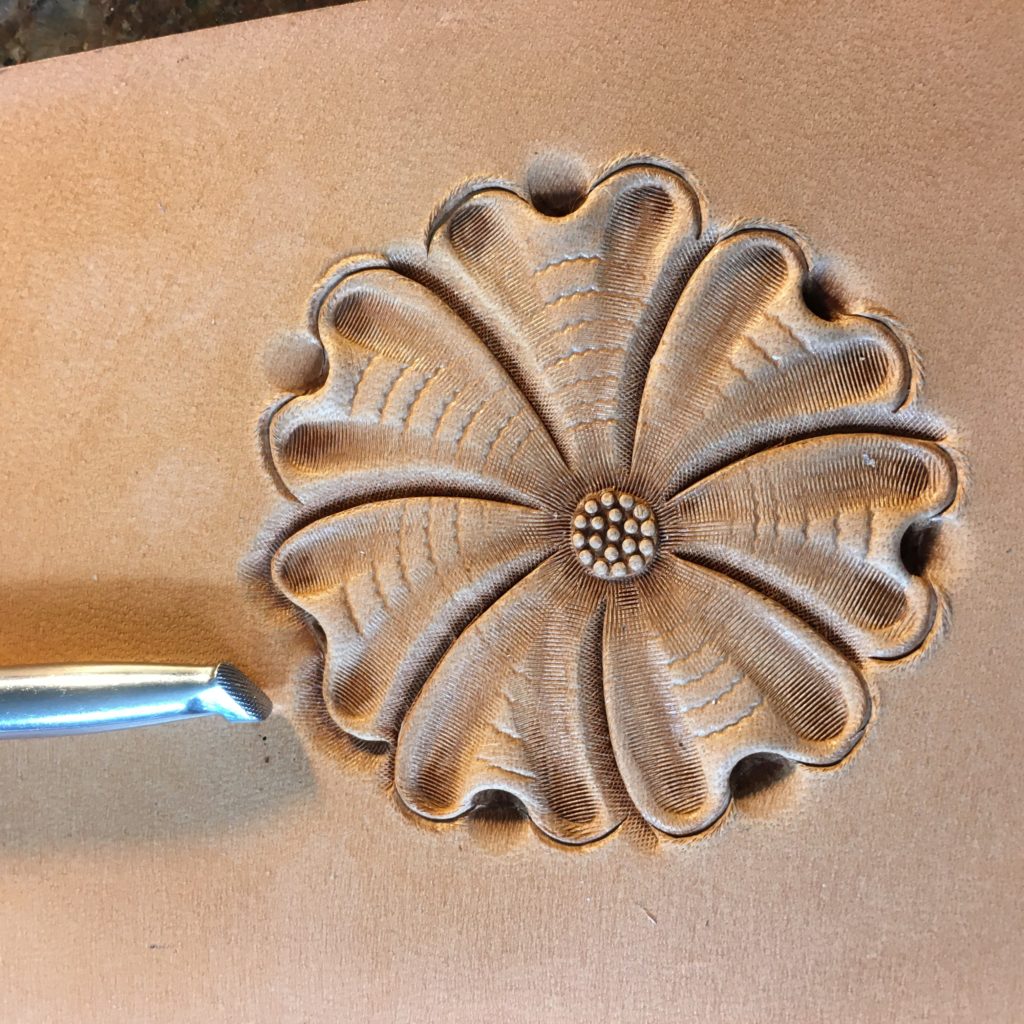
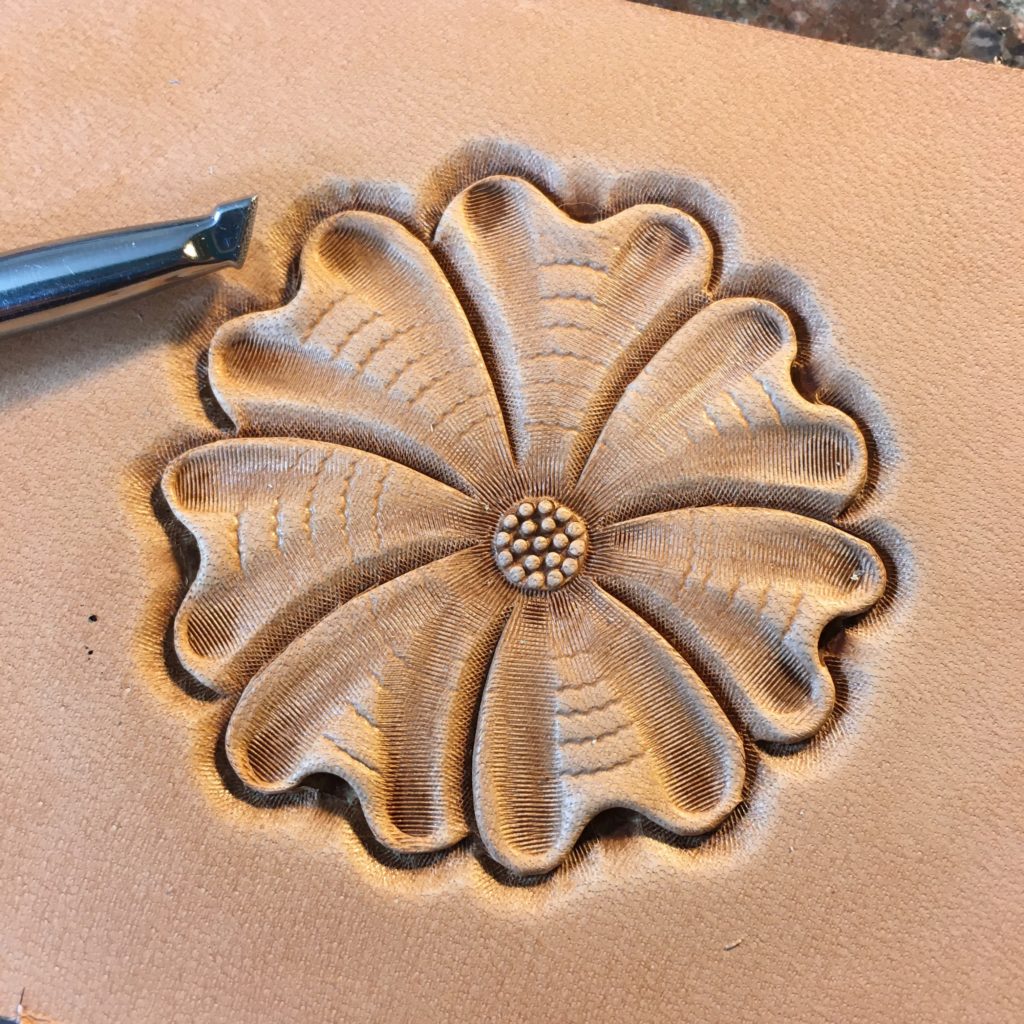
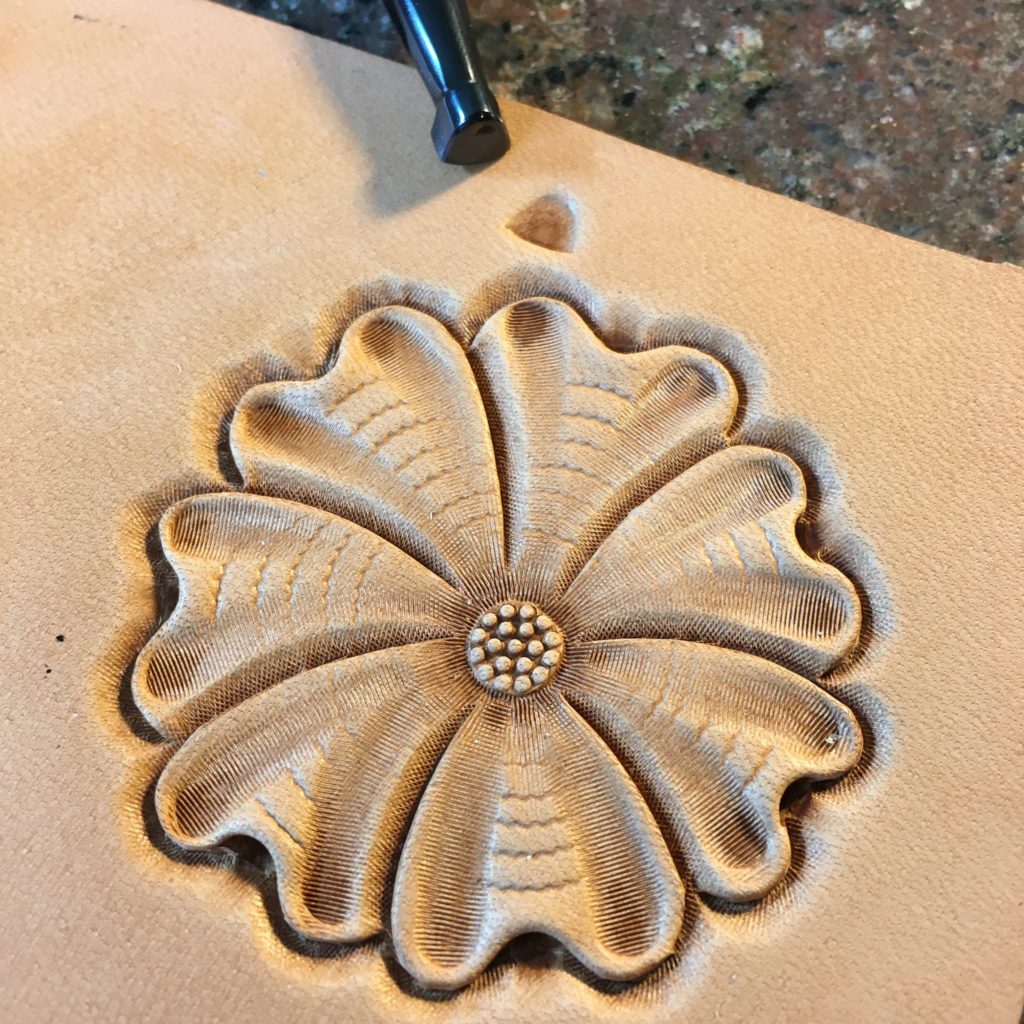
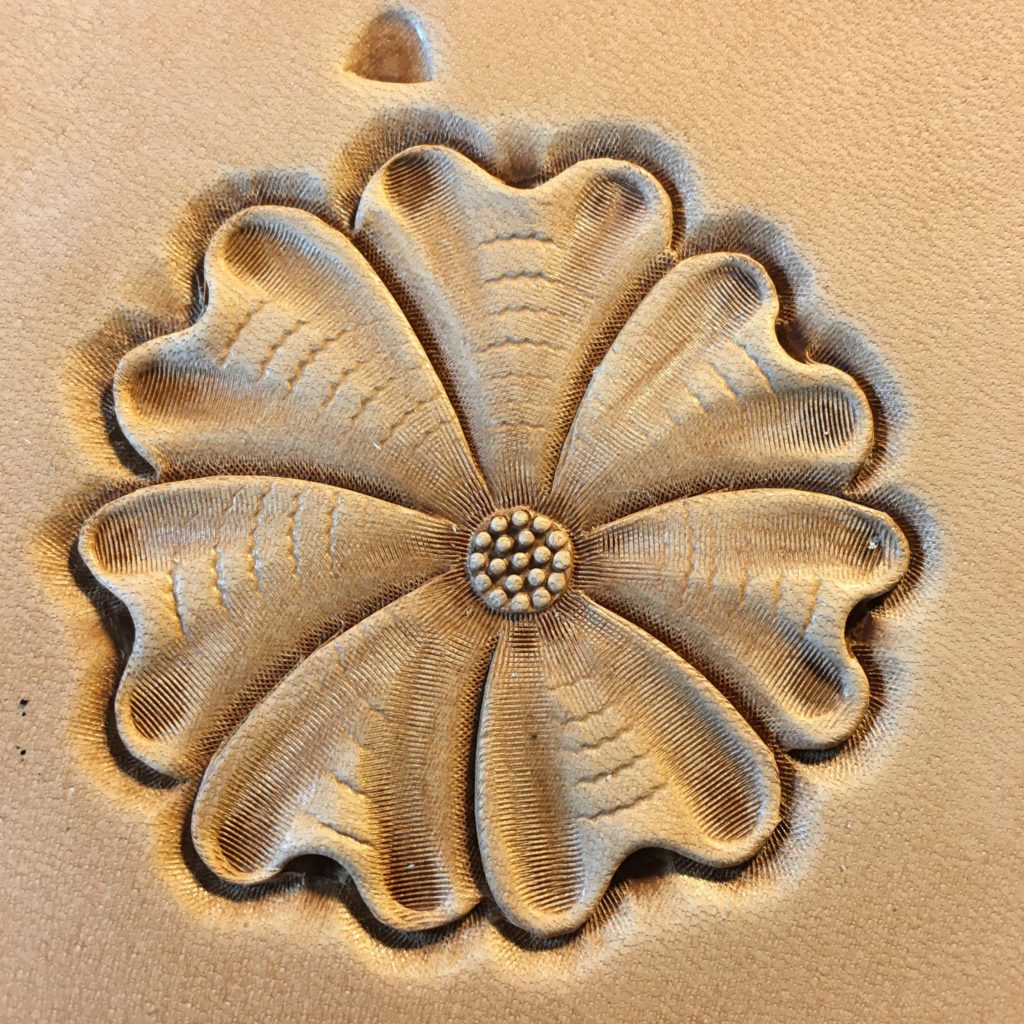
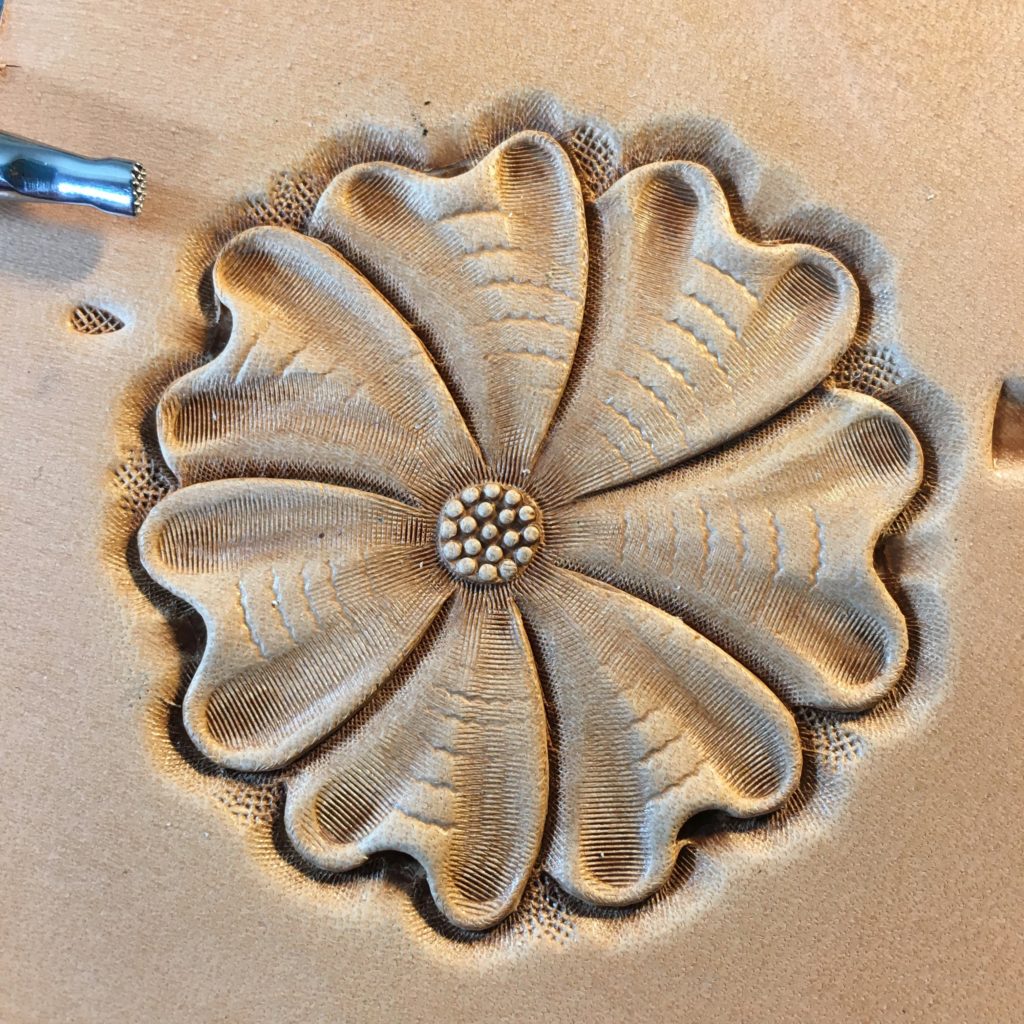
This tutorial will show you step by step how to carve a traditional Northwest style four petal flower in leather. Grab some leather, your tools and follow along!
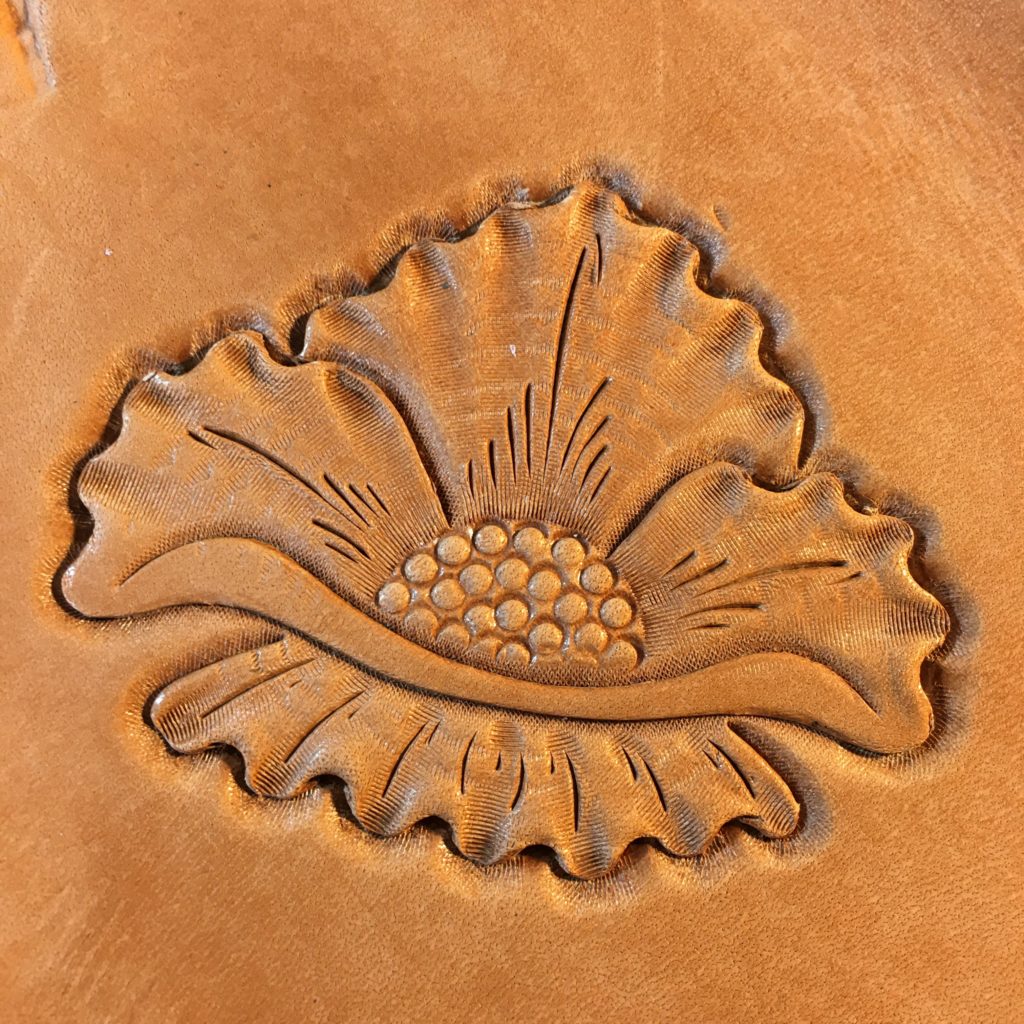
Floral carving in leather

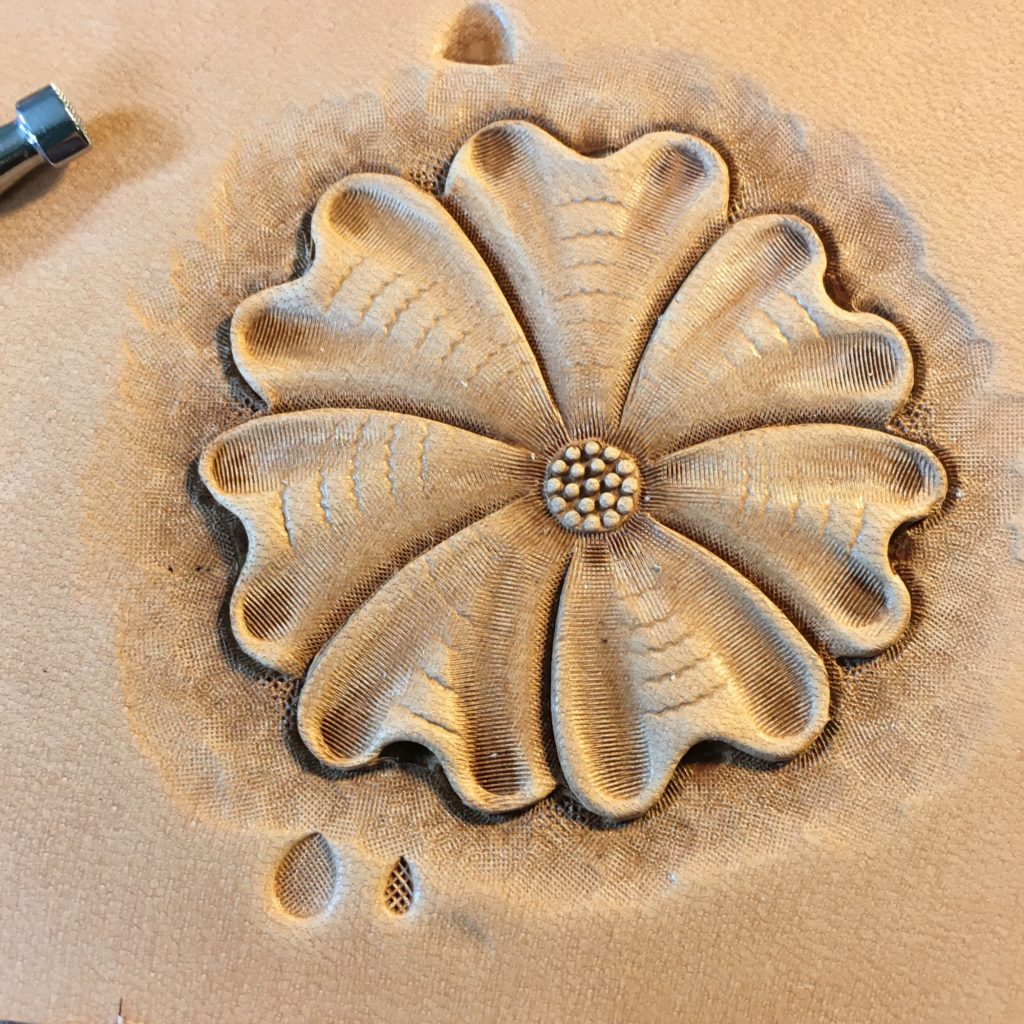
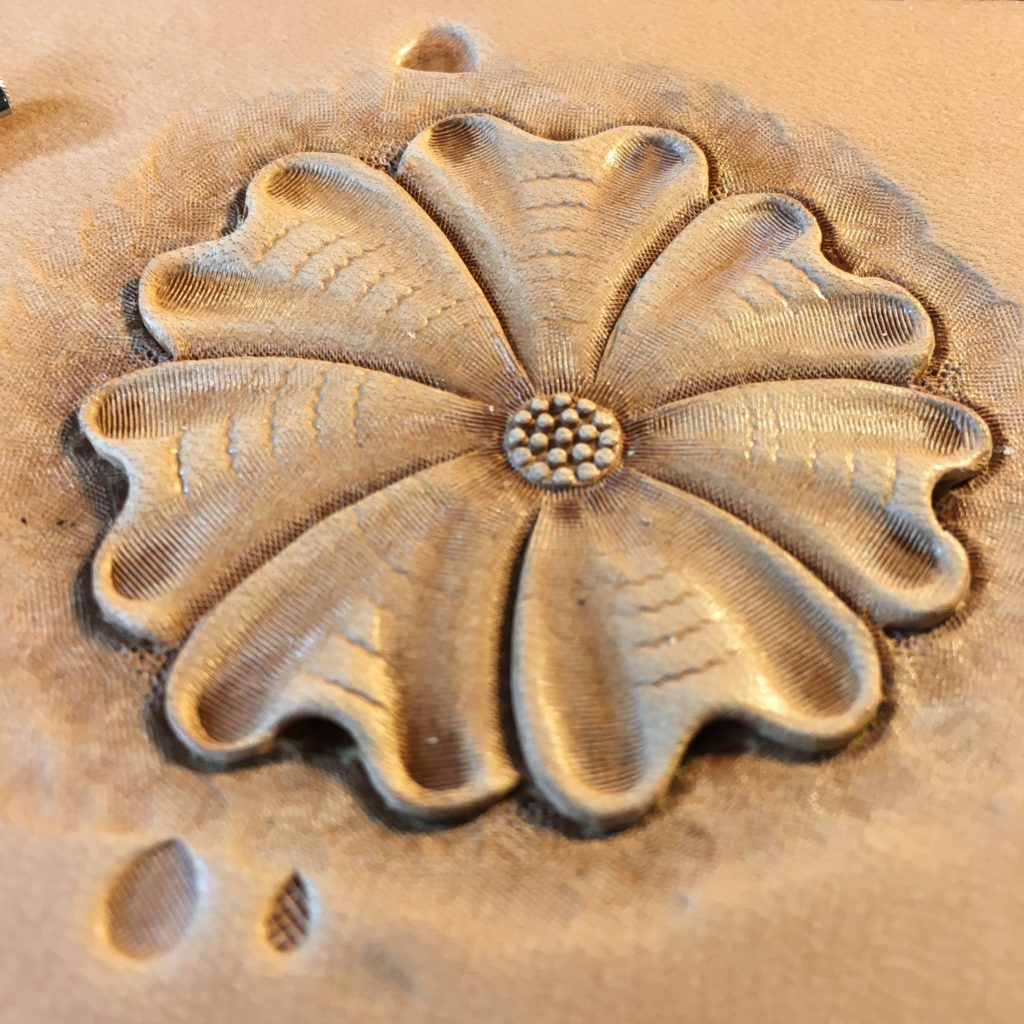
This flower is different from the one in the first tutorial and different from the kind you normally see in Sheridan Style Carving.  Instead of using a flower center stamp the center of this flower is made with a tool called a seeder.  The center is much bigger and the flower is viewed at an angle instead of from above like we usually depict them in floral carving.  This flower comes from a different style of floral carving called the Northwest Style because it was developed in saddle shops of the US Pacific Northwest.

Be sure to go back and look through the first tutorial in this series that I published previously.  I won’t cover all the details I brought up before while discussing the tools this time around but you can find all those details by clicking here.

A note on tools:  As I said in the first tutorial it’s more than likely you won’t have all the tools that I show here.  For the most part I’m staying away from very specialized tools as much as possible though for doing traditional floral carving there are a couple of fairly specialized tools used to get very specific effects (like a center shader.)  If you don’t have all these tools don’t worry.  Where possible I’ll point out alternate tools you could use.  In almost every case these tools are available at your local brick and mortar leather shop or online at your favorite tool maker.  It’s sometimes possible to find these tools used from reputable online sources for very reasonable costs.
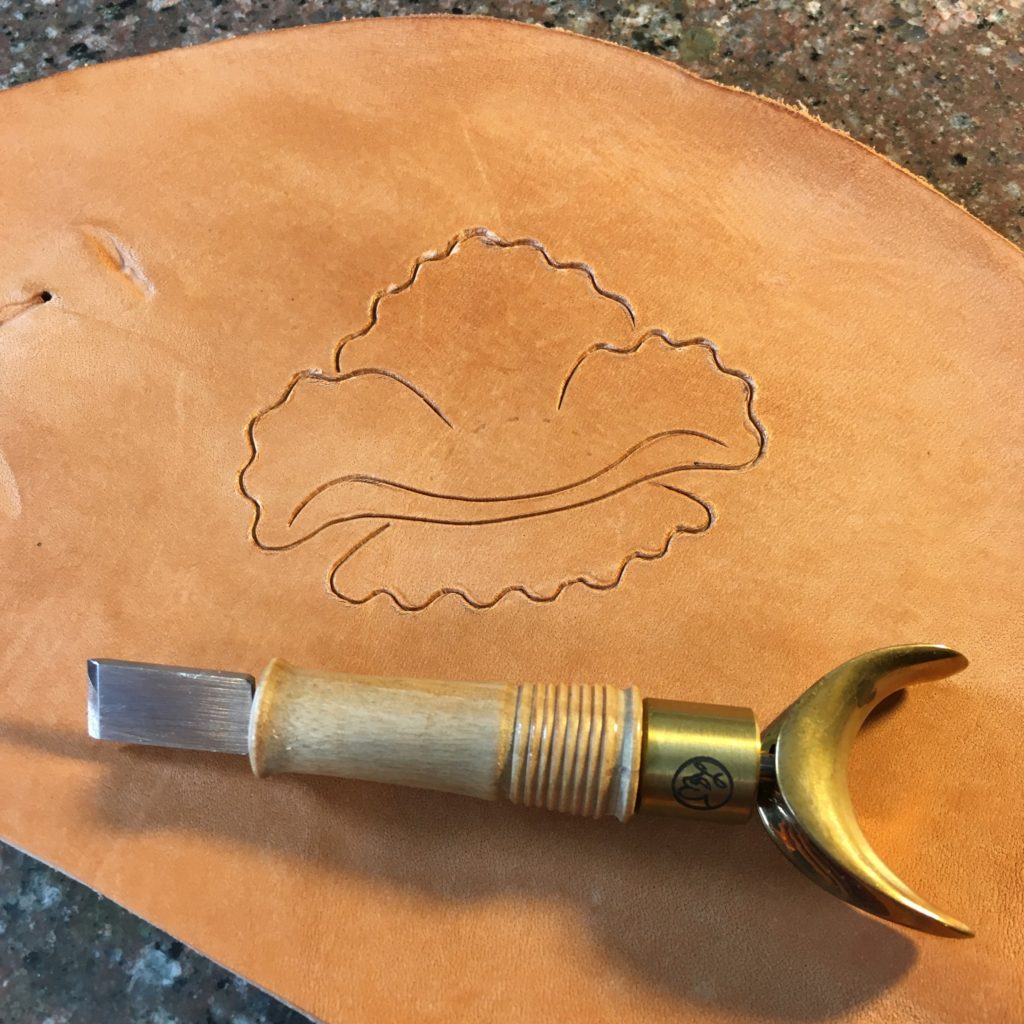
Leather and swivel knife
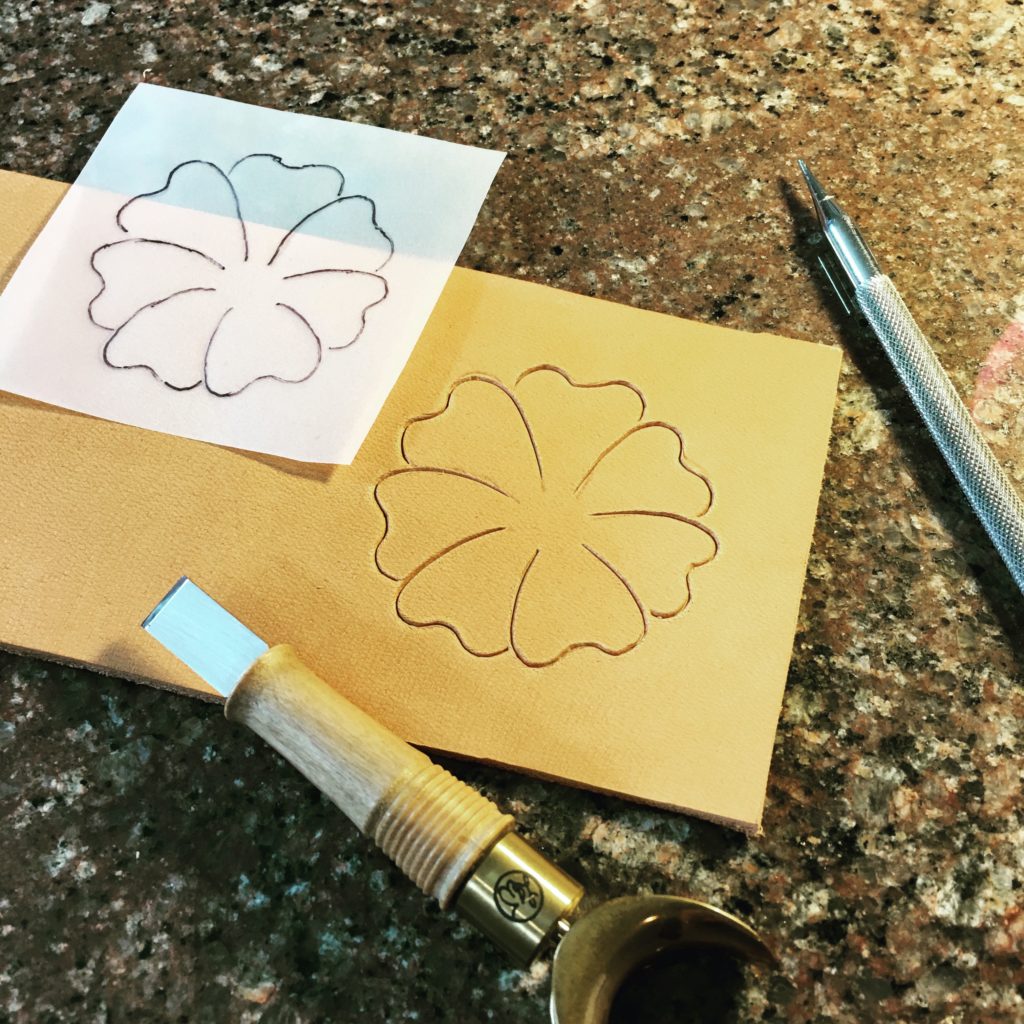
Initial carving with the swivel knife

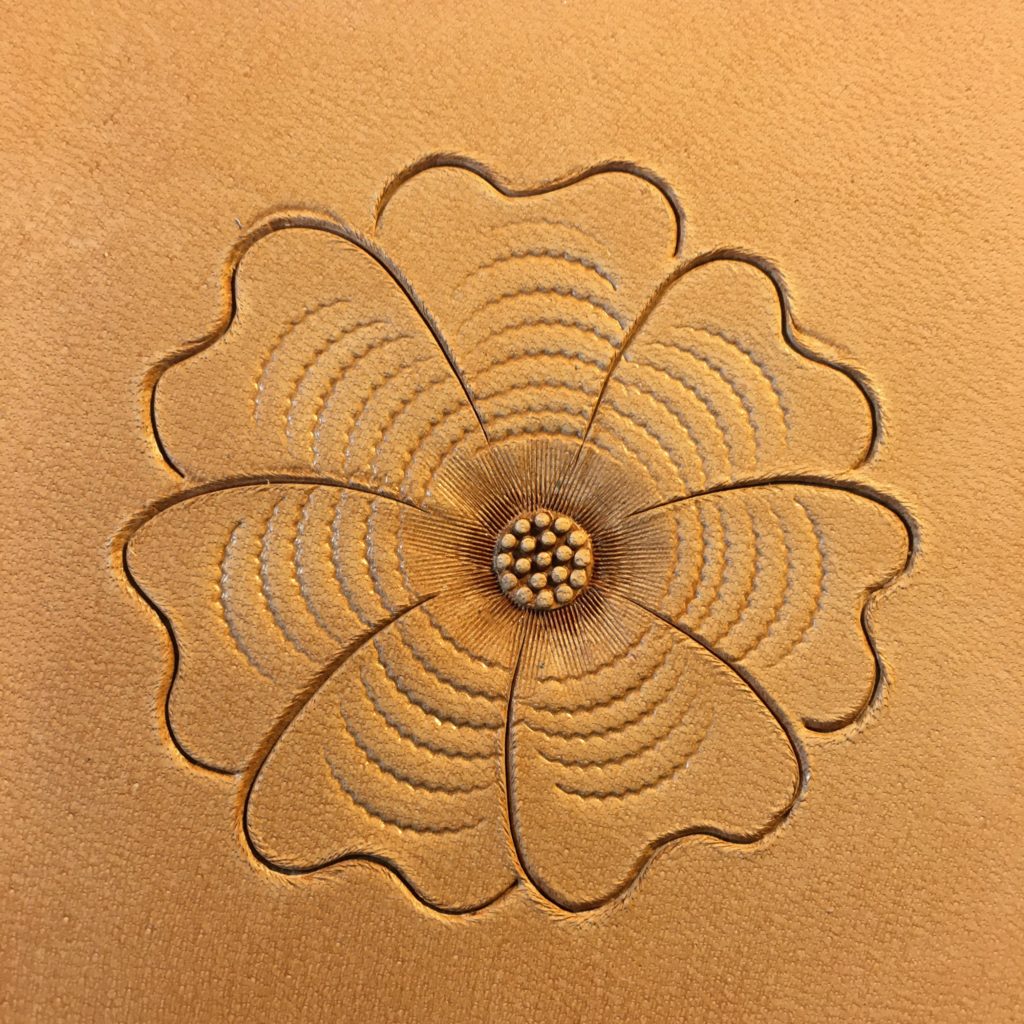
Step 1:  Tracing and carving.  Again I traced the design onto the damp leather and then carved it in with my swivel knife.  A note about how damp your leather should be:  let it dry out to the point where it almost comes back to the color it was before you dampened it.  Most people start off tooling their leather when it is far too wet and they don’t get burnishing when stamping it.  Properly cased leather should darken like a bruise when a tool strikes it hard.

Step 2:  Outlining the flower center.  Again we’ll start with the flower center even though in this case technically the bottom petal is closer to the viewer.  Think of it like you are viewing this flower on edge. 
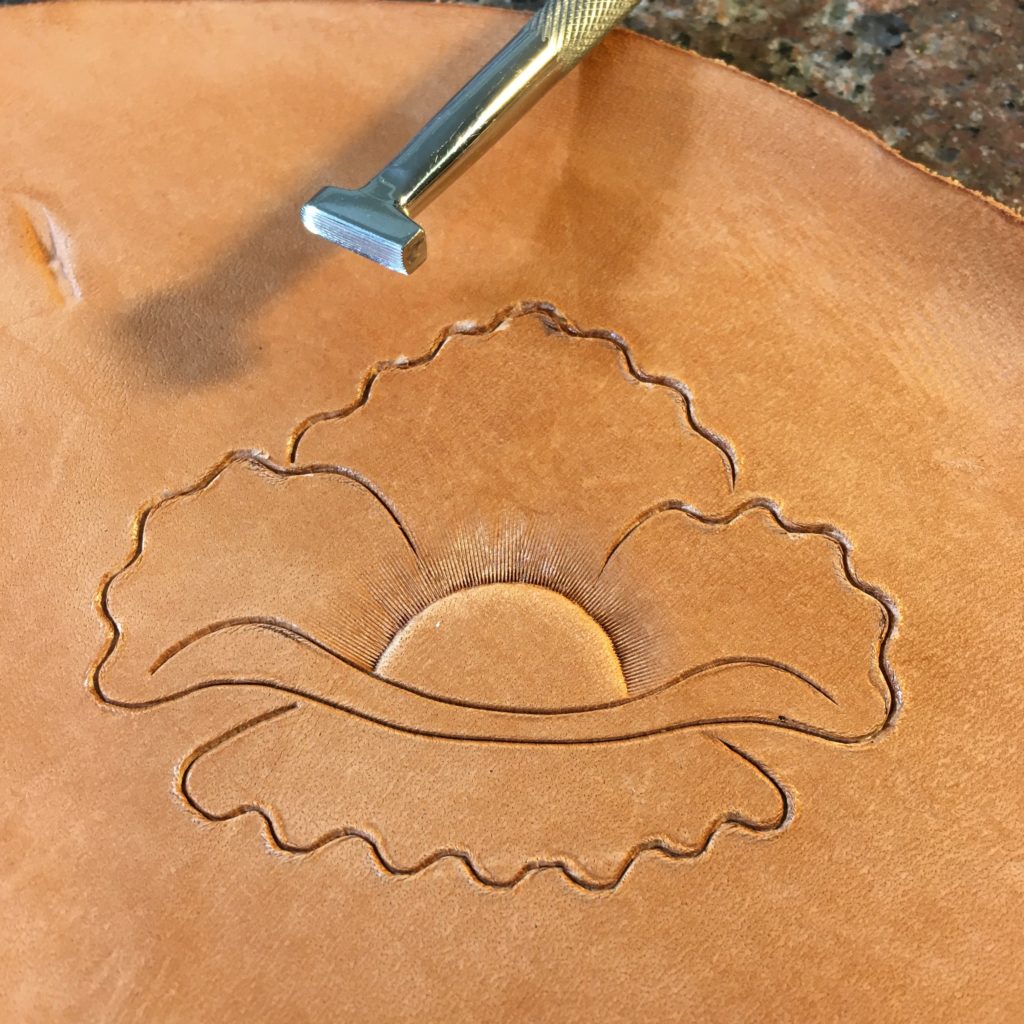
I always start with the center and work on the petals moving out from it.  I still use the center shader to outline the flower center like I did before.  When I traced the design onto the leather I put a dotted line where the edge of the flower center would be and now I’m using the center shader to bevel that line.  Of course if you don’t have a center shader a checkered or lined beveller will work.

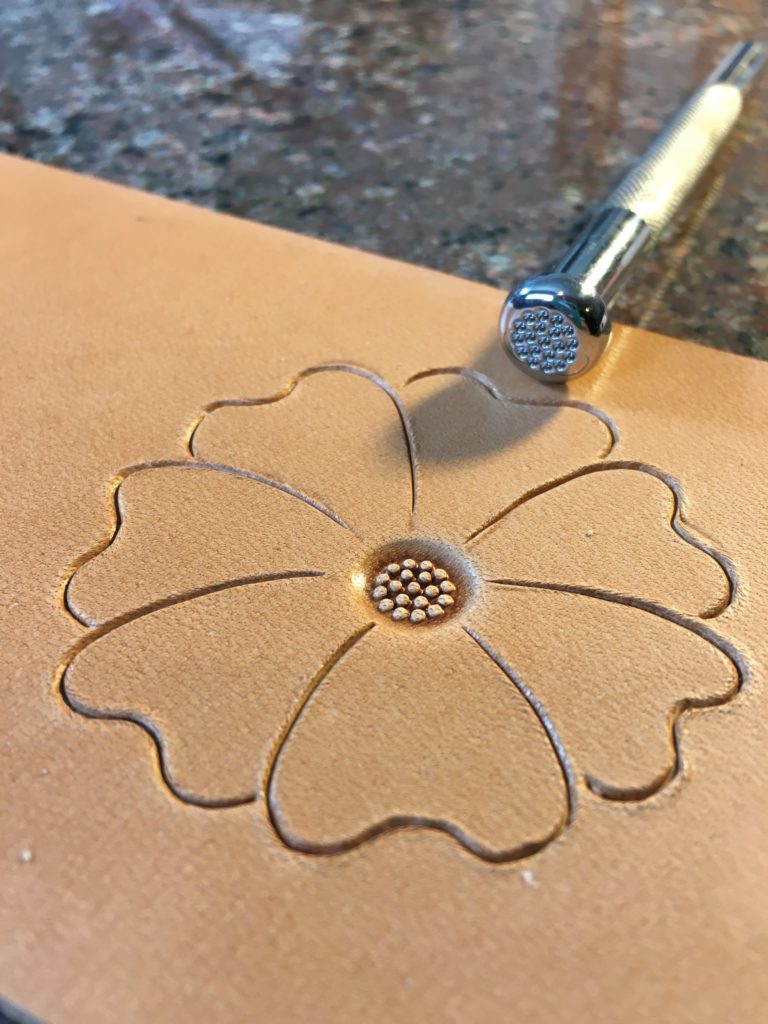
Step 3:  Seeding the center.  Here we introduce a new tool, the seeder.  They come in different shapes and sizes but most of them make a small round ‘seed’ that we will use to fill in the flower center.  I will stamp them in rows as neatly as I can, starting with the outer edge and working my way towards the center.
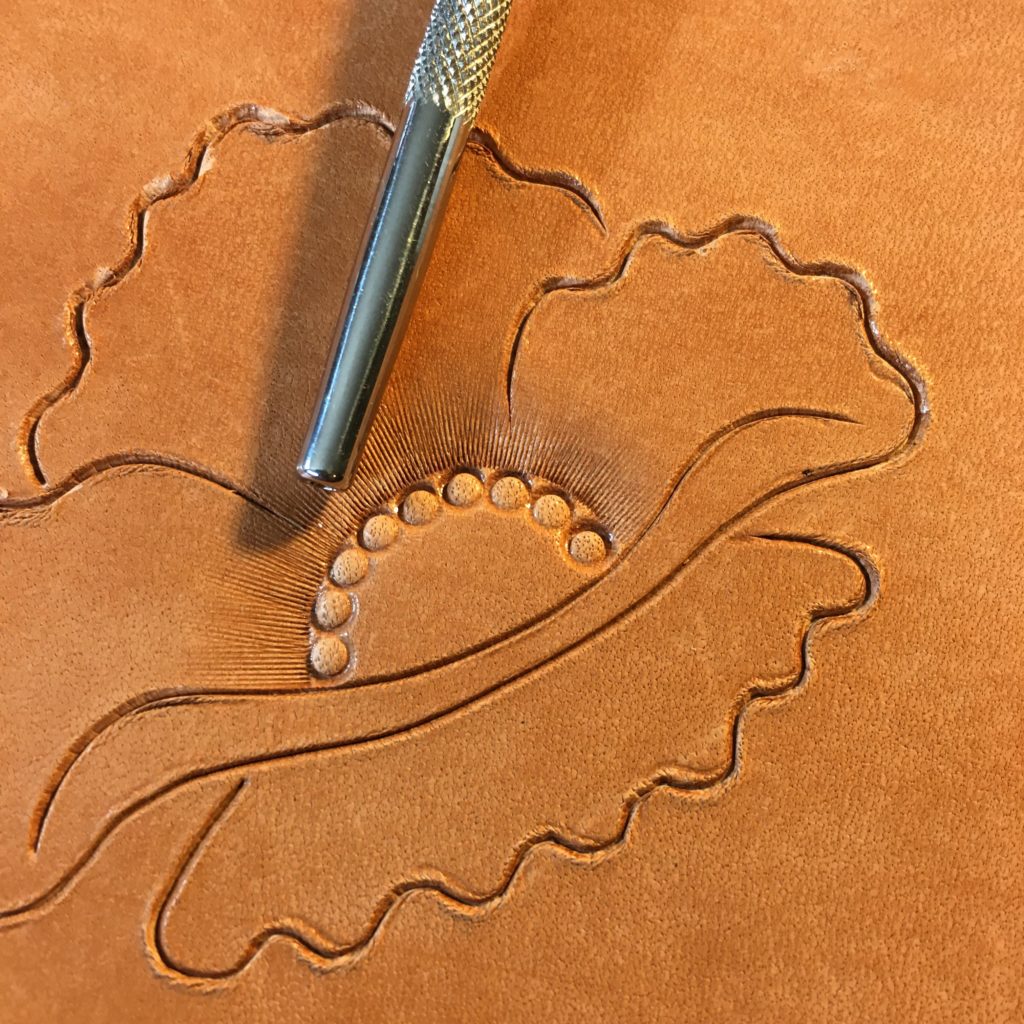
Step 3A:  After the first row I add another behind it, trying not to stamp over any of the seeds I already placed of the edge of the center.  It takes some skill to place these all in nice evenly spaced rows, a skill I am still trying to master.
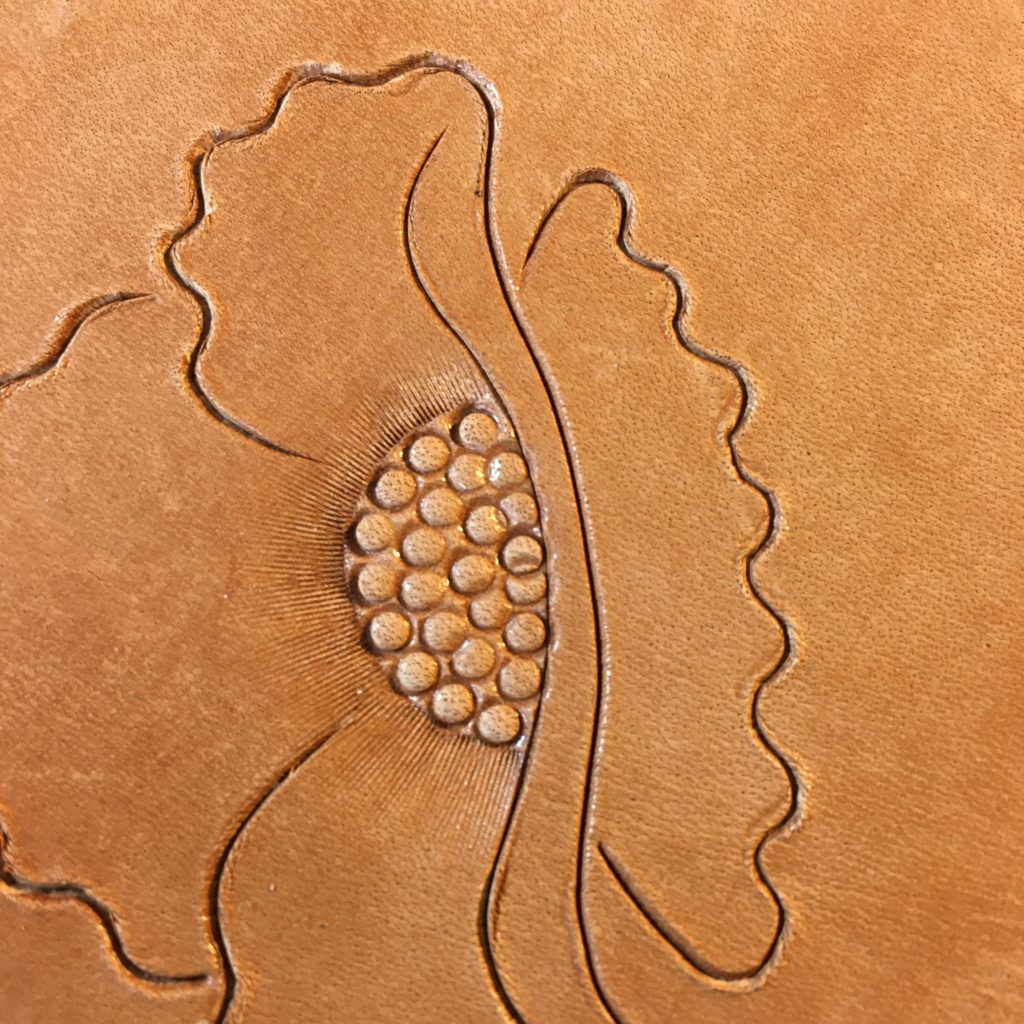
Step 4:  Beveling the petal in front of the seeds.  Once I’m done with the center I start on the petal directly below the line of seeds.  This represents a petal the viewer is seeing edge on, and I’m beveling the line that runs along the base of the flower center seeds into the petals on either side of the center. 
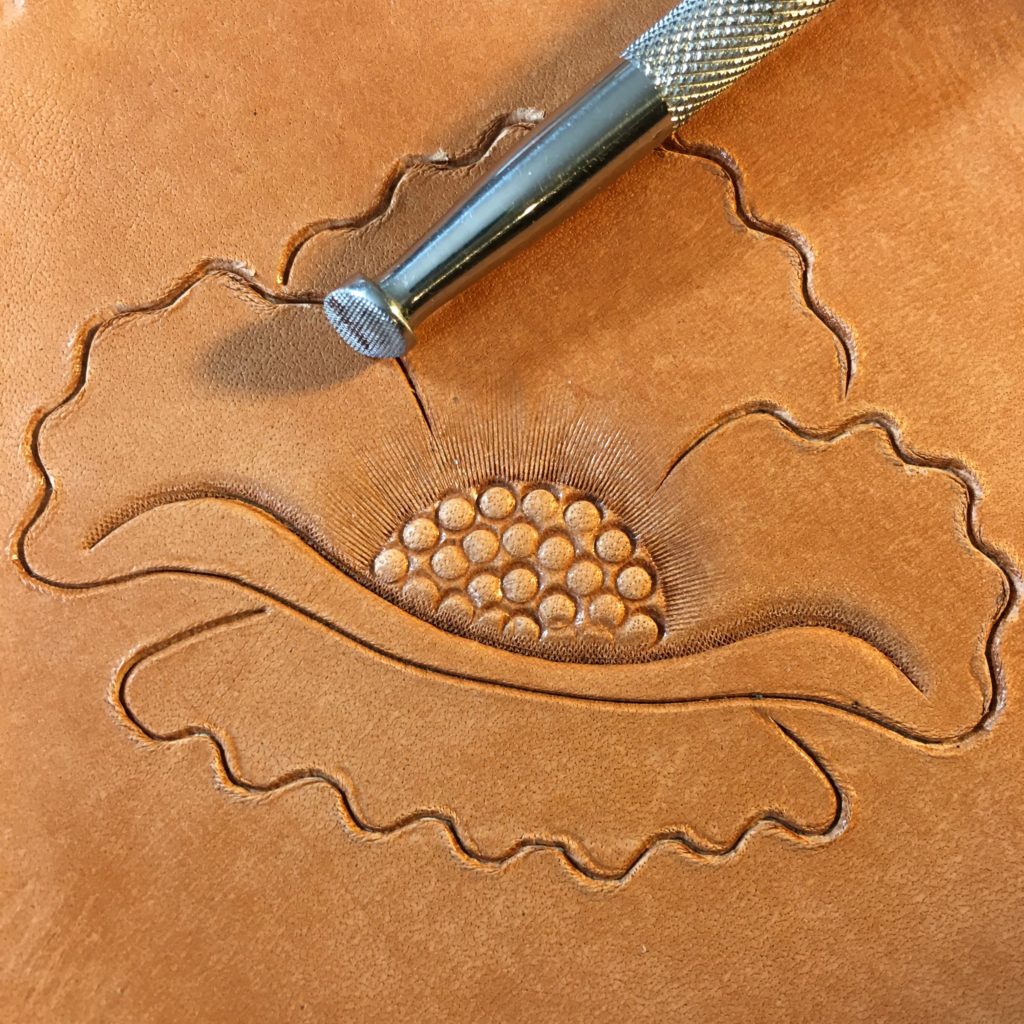
You want to bevel this line on the side that is TOWARDS the flower center because this petal is supposed to look like it’s opening from the center.  Beveling the other side of the cut would make it look like it’s below or behind the flower center, which would just look weird.

One reason I do the center before beveling this line is because you can get some seed marks on this petal and I’ll clean them off either with the beveling or with a little work from a modeling spoon.

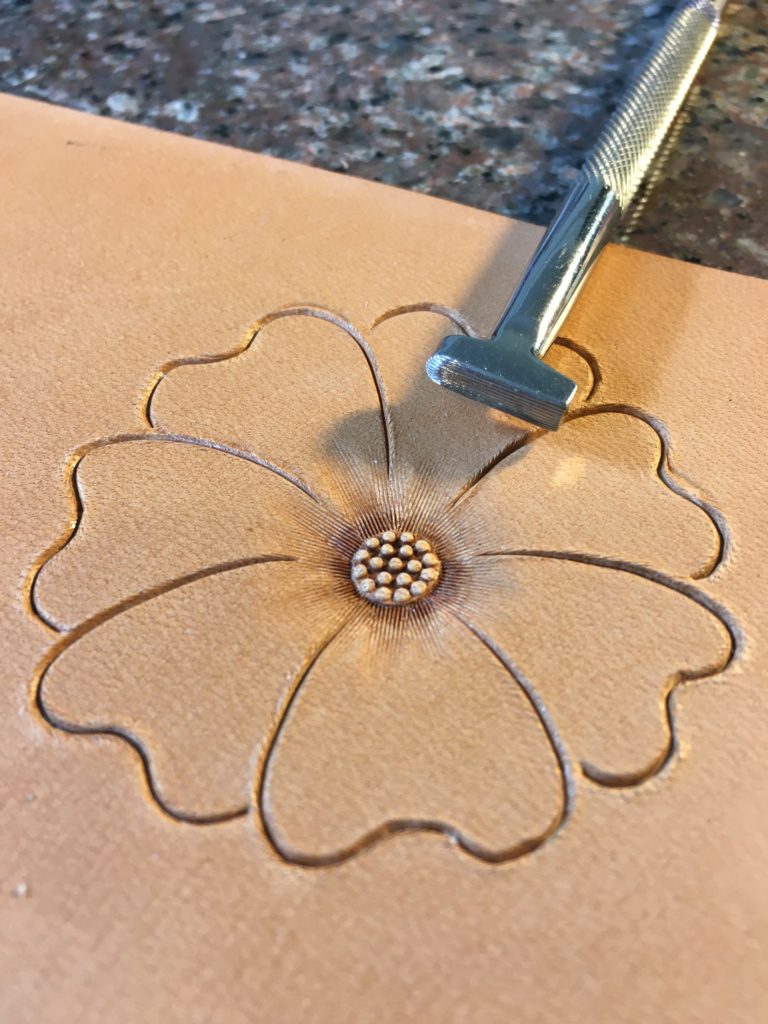
Step 5:  Stamping veiner marks on the petals.  Next I’m ready to add texture to the petals with the veiner. 
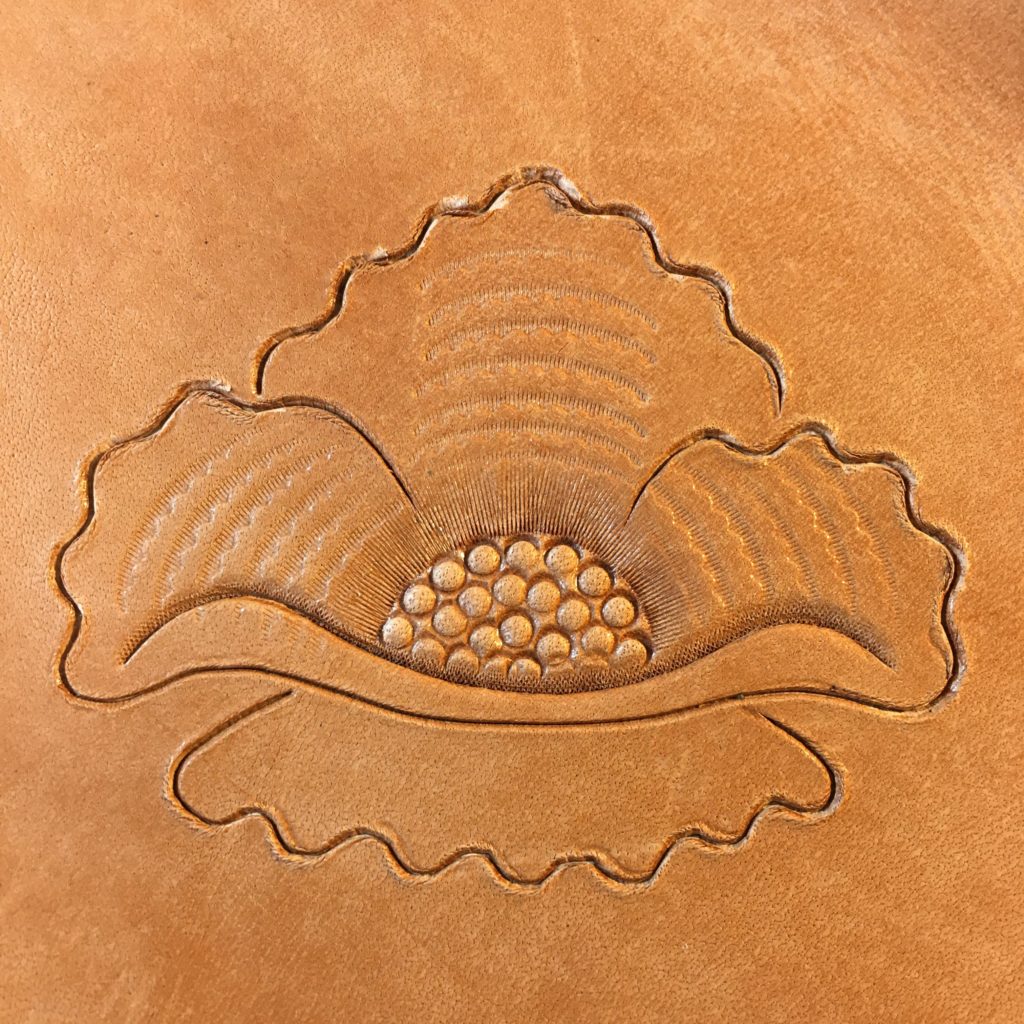
See the first tutorial for more details on this.  I’m doing the same thing here that I did on that flower.  The only differences on this one is that the long narrow petal just below the seeds doesn’t get any veiner marks.  Also I did put them on the petal at the very bottom, but I added them after I took this picture.  But you can see them in the next step.

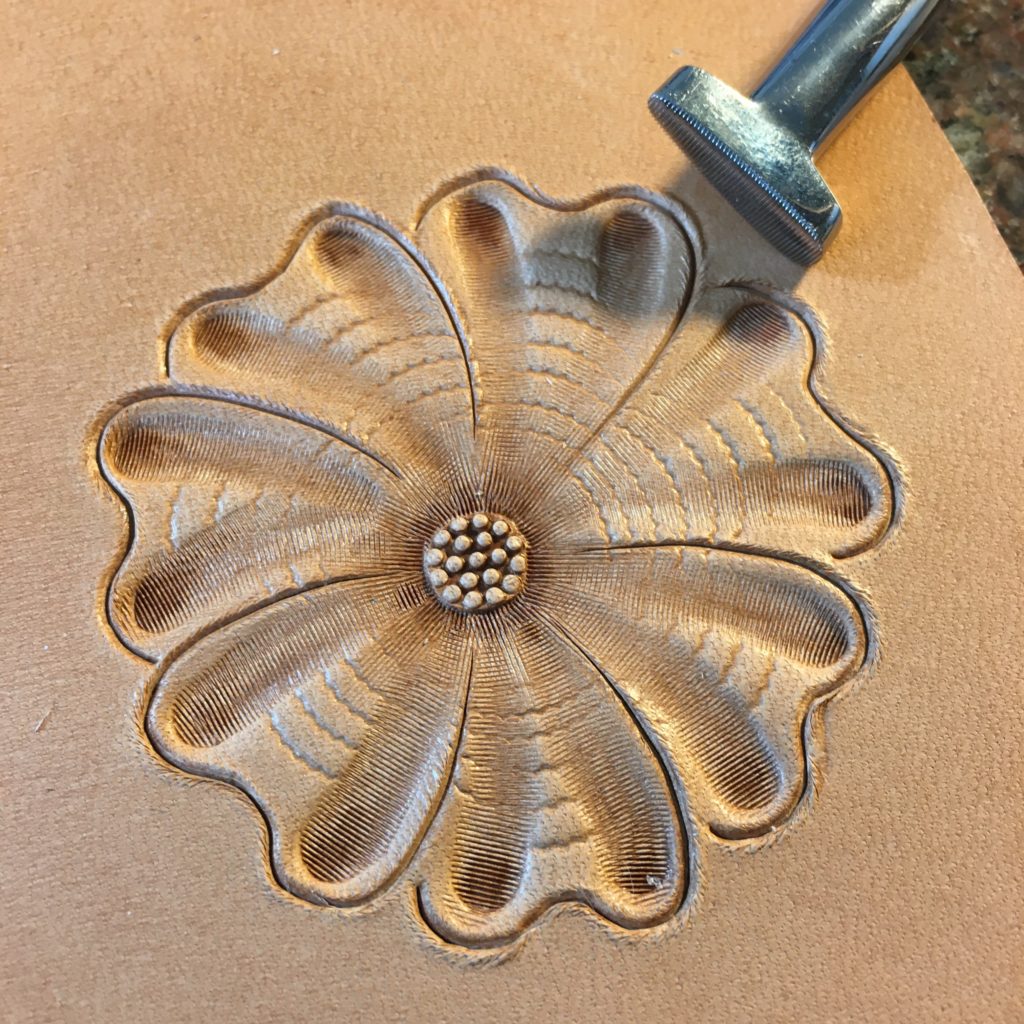
Step 6:  Shading the petals.  Just like the last flower I am using my thumbprint or pear shader tool along the petal edges to add relief to the petals.  I start at the tips and walk the tool back toward the center making lighter impressions as I go.. 
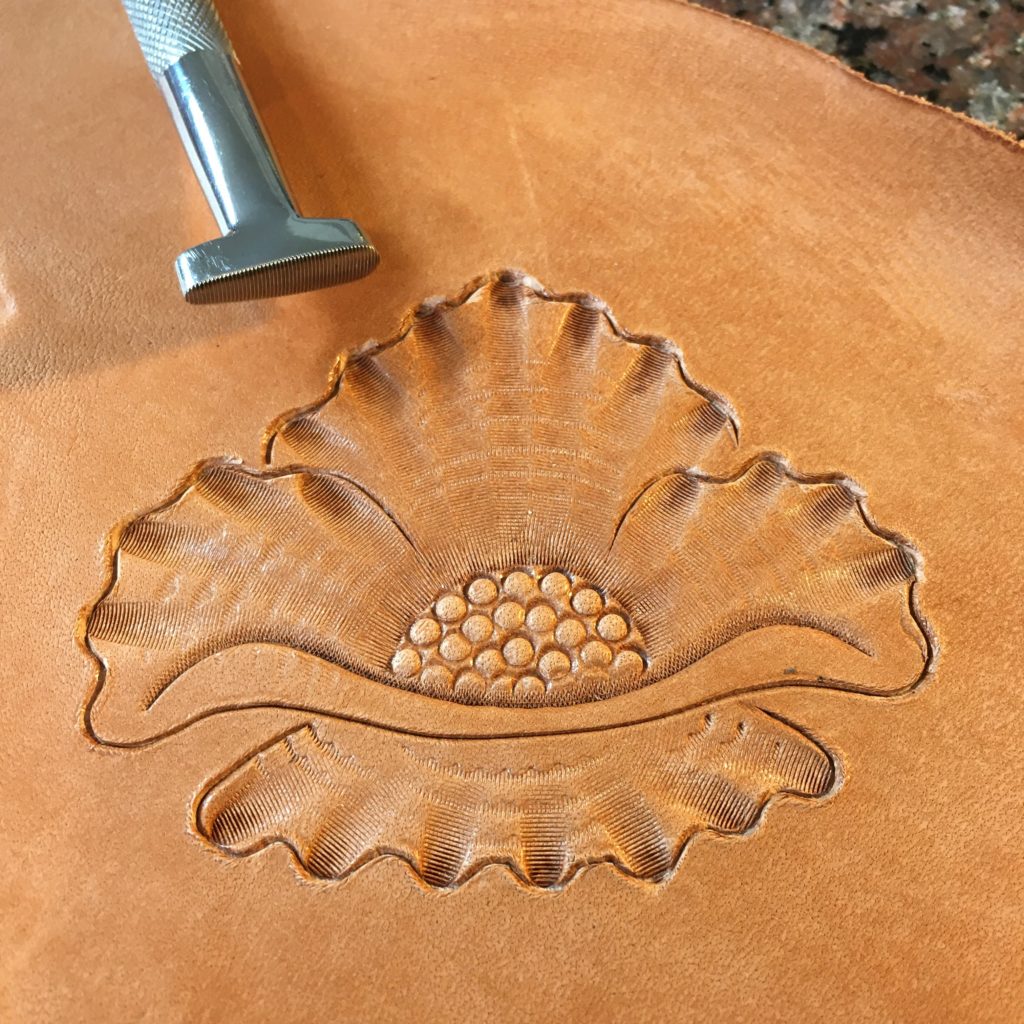
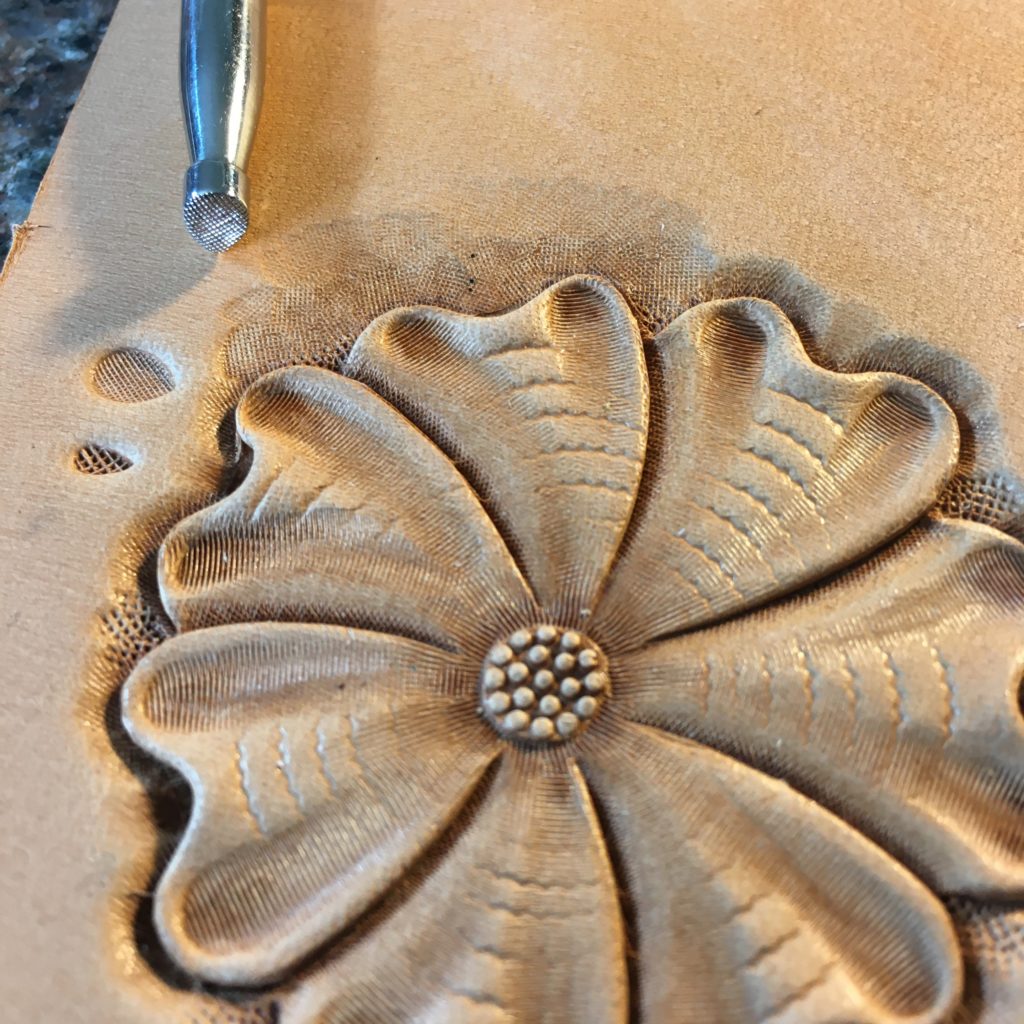
Notice on this flower I started the thumbprint right at the very edge of the petal.  I’m actually extending the tip of the tool just a bit past my knife cut.  This is another part of the Northwest style of carving.  The shader goes all the way to the edge of the petal.  Traditionally in Sheridan Style carving (which is the most common style these days) the shader or thumbprint mark stops just short of the edge of the petal.  Take a look at the flower in the first tutorial to see an example of the Sheridan style. 

Step 7:  Starting to bevel the petals.  First I’m going to bevel the bottom of that petal we’re seeing on edge.  This time we want to bevel the side of the cut line that is away from the flower center.
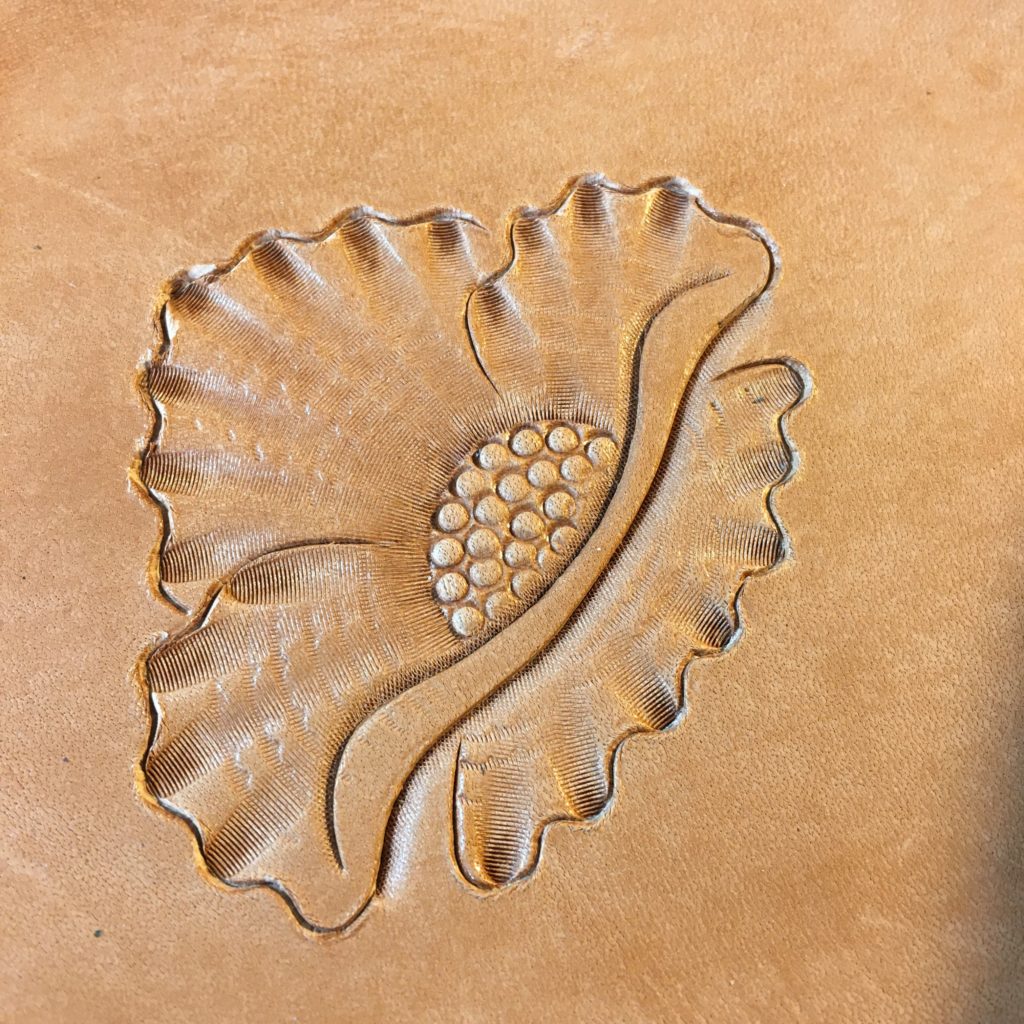
Step 8:  Next I’m going to use my undercut beveller in all the small scallops on these petals.  There are a lot more of these scalloped areas on this flower and it will end up with a lot more depth and movement than the flower in the first tutorial.  
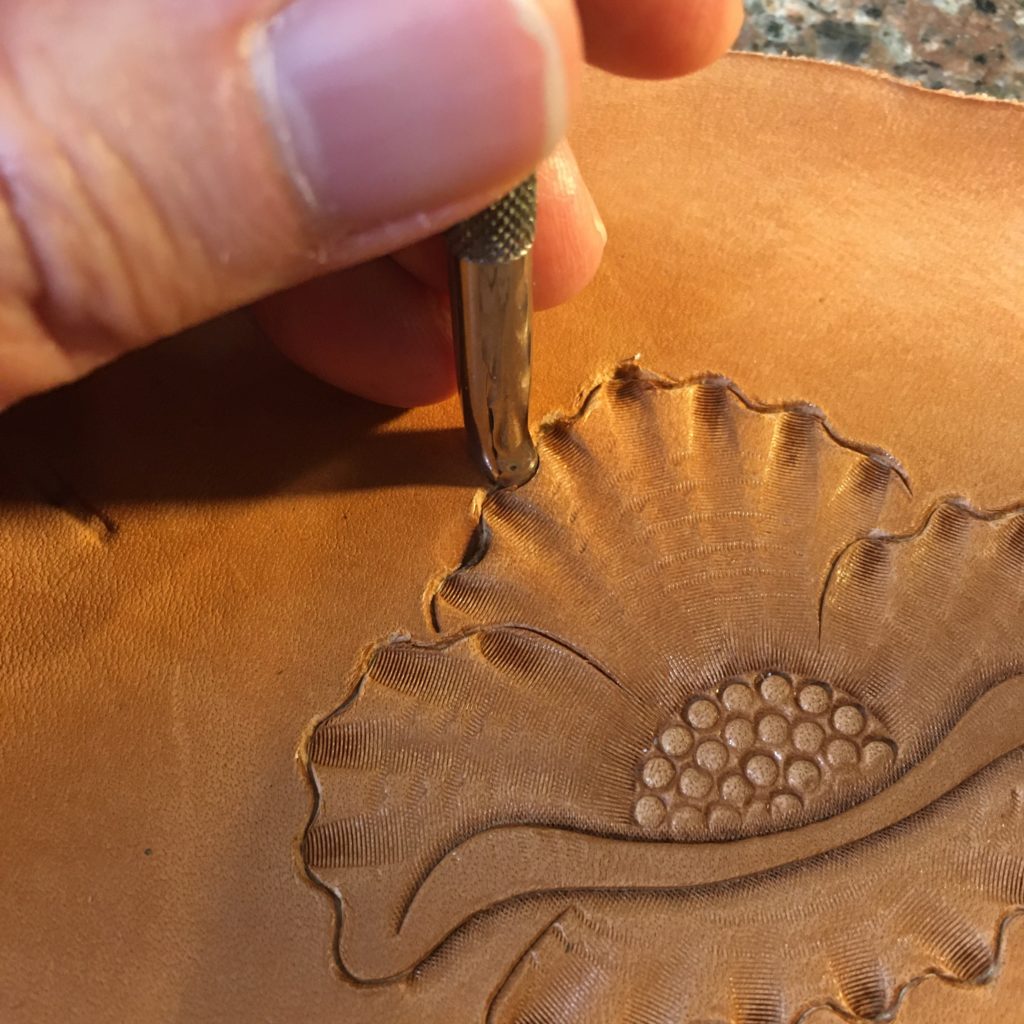
Step 8A:  All of the places I needed to lift up with the undercut beveller have been tooled now.  You are beginning to see the ripple effect along the edge that this flower is going to develop.
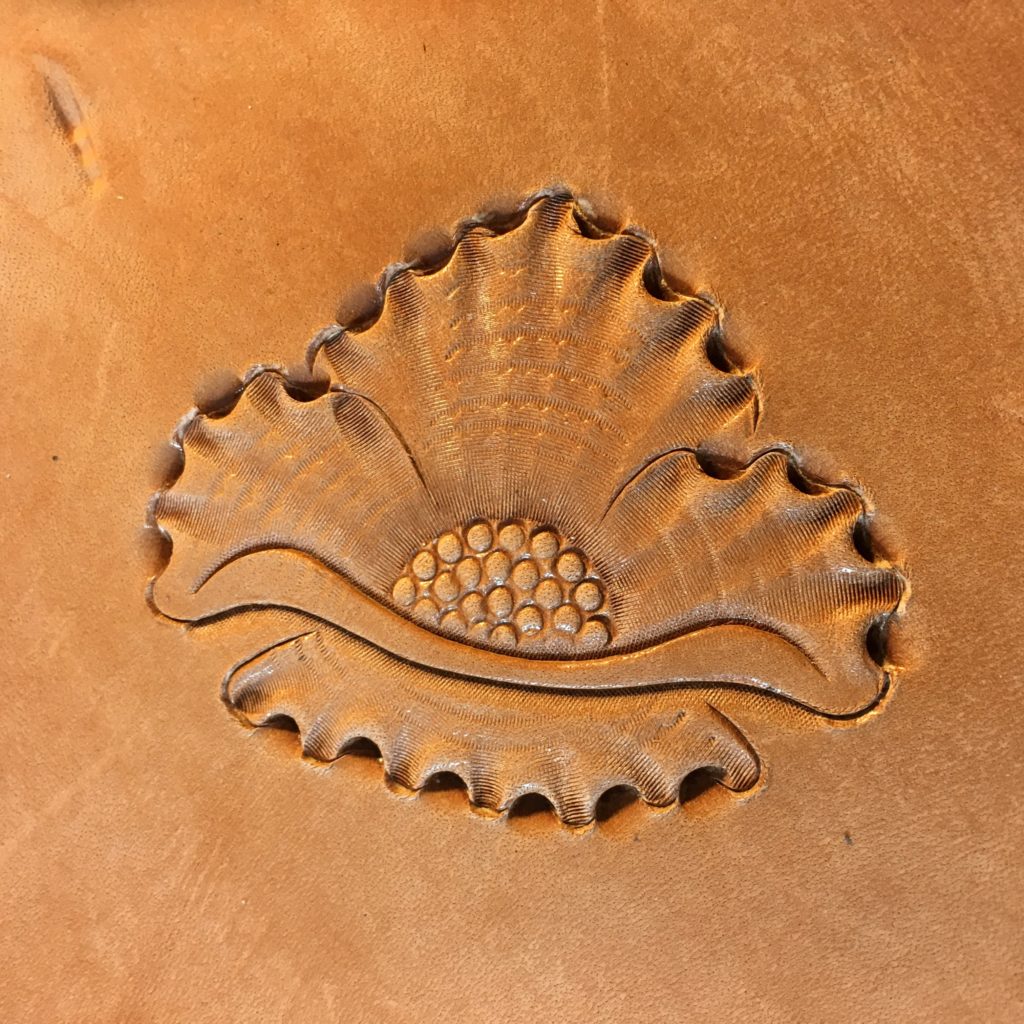
Step 9:  Beveling the tips of the bottom petal.  Now I’ve switched to my small standard beveller (see step 8 in the first flower carving tutorial) to bevel the small rounded tips of the petal. 
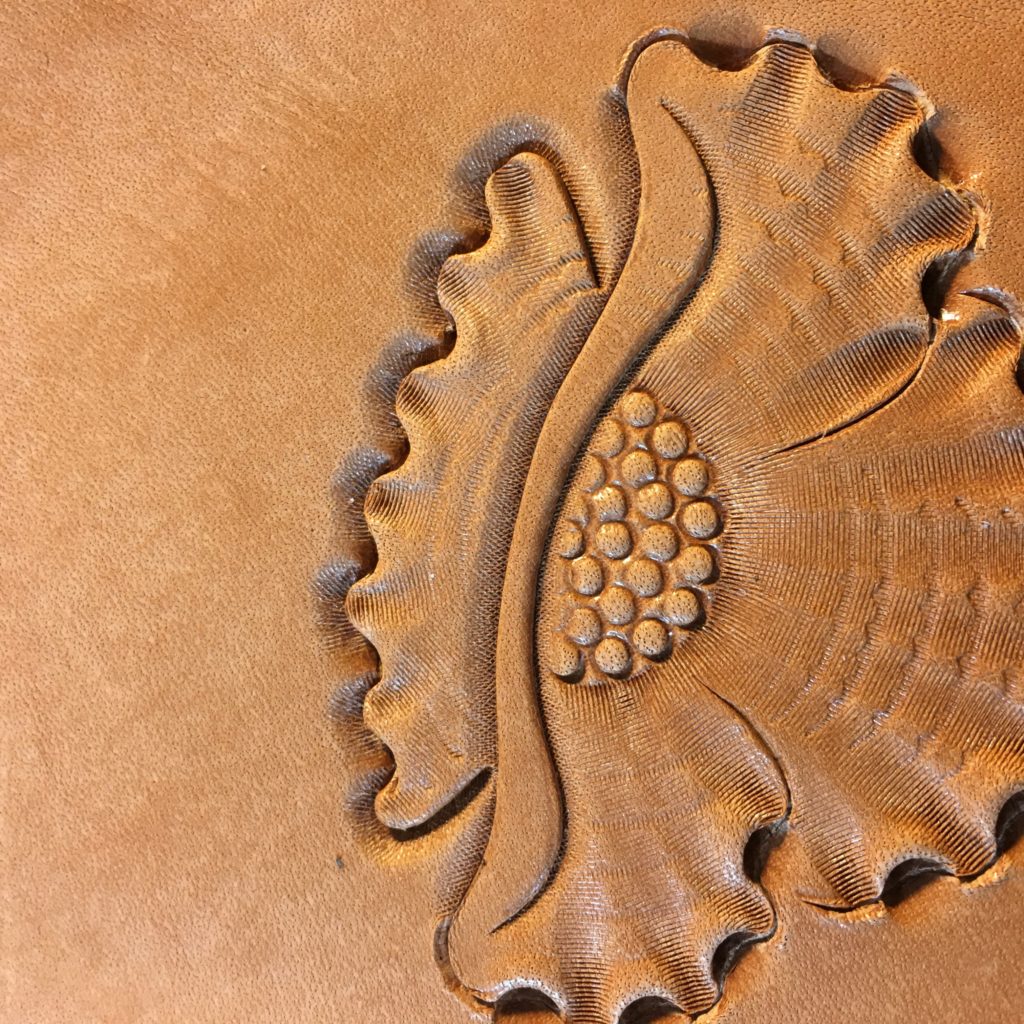
It takes small movements of the beveller to follow the tight curve here and not leave tool marks in the leather and get a smooth bevel.

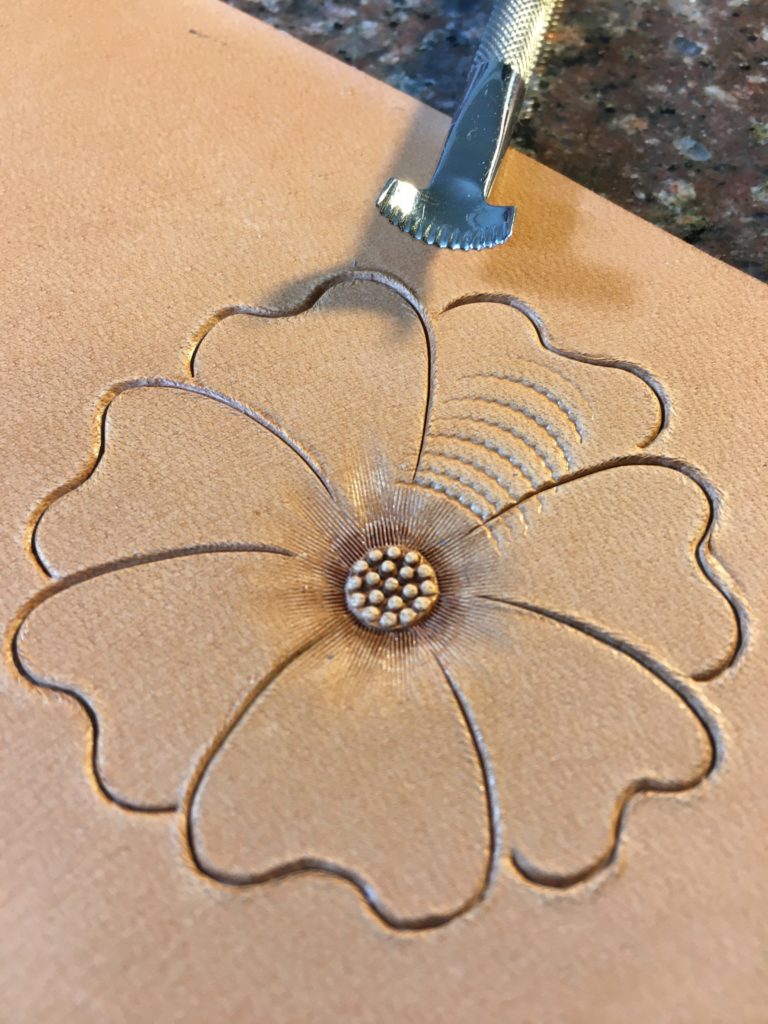
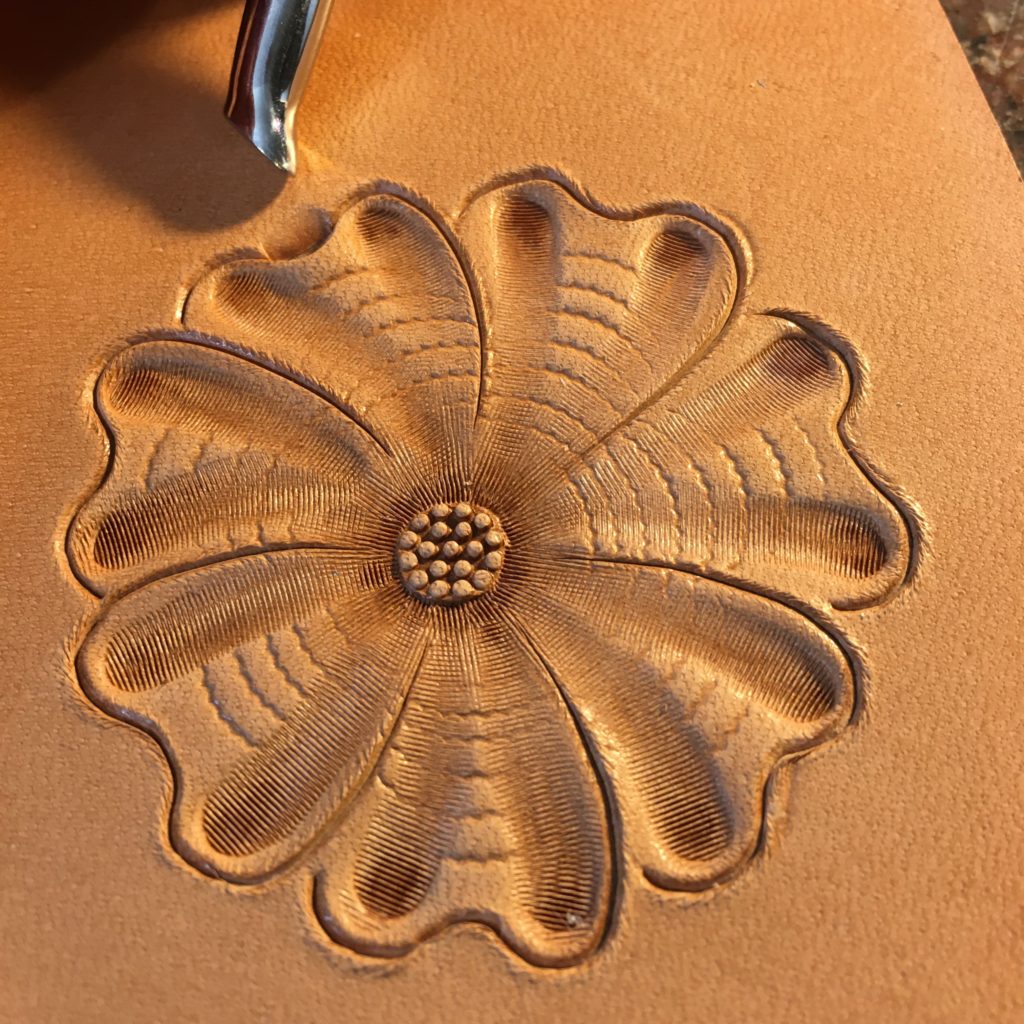
Step 10:  Looking at the bottom petal I thought it looked kind of plain where it met the petal above it, so I decided to come back with my thumbprint tool and add some shading from the center towards the thumbprint marks I had already made on the petal tips.  I made the new marks so they lined up with the ones from the tips.
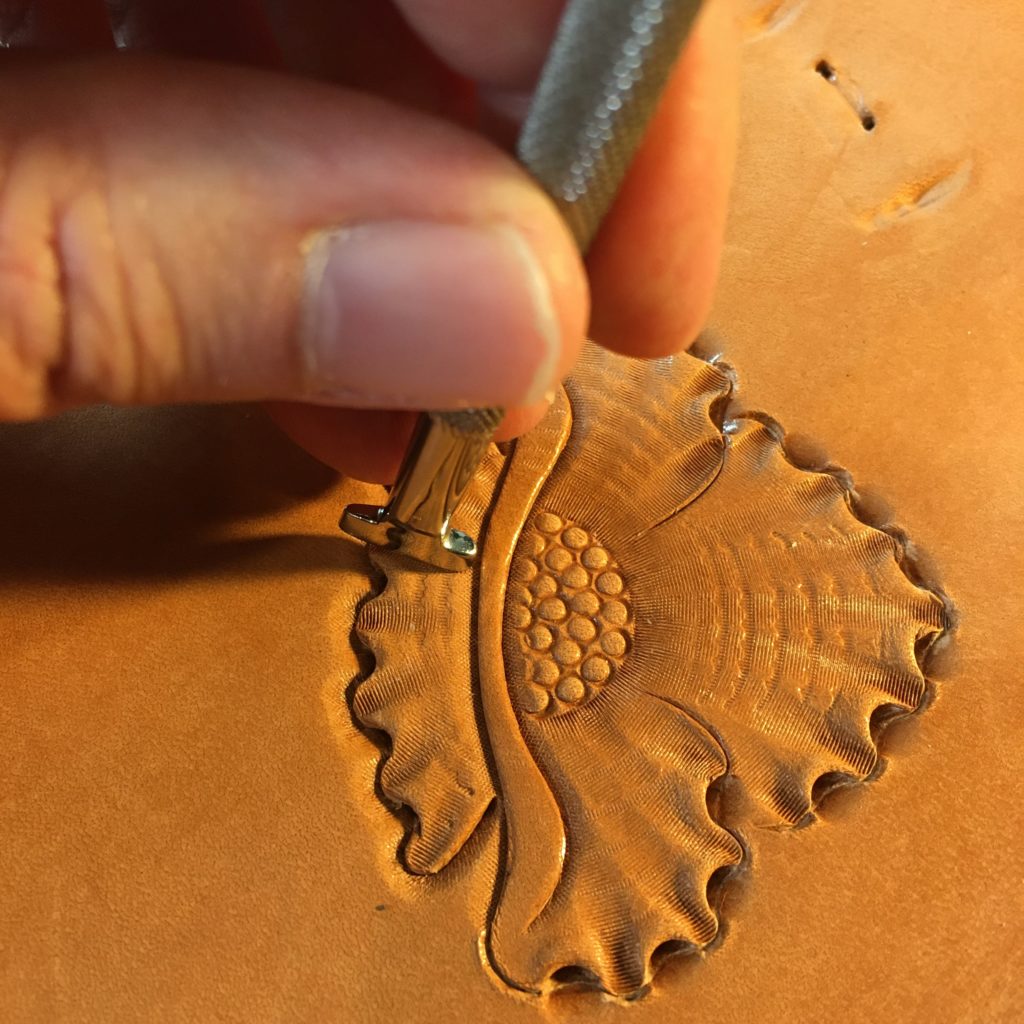
Step 10A:  This shows what the marks I added look like on the petal.
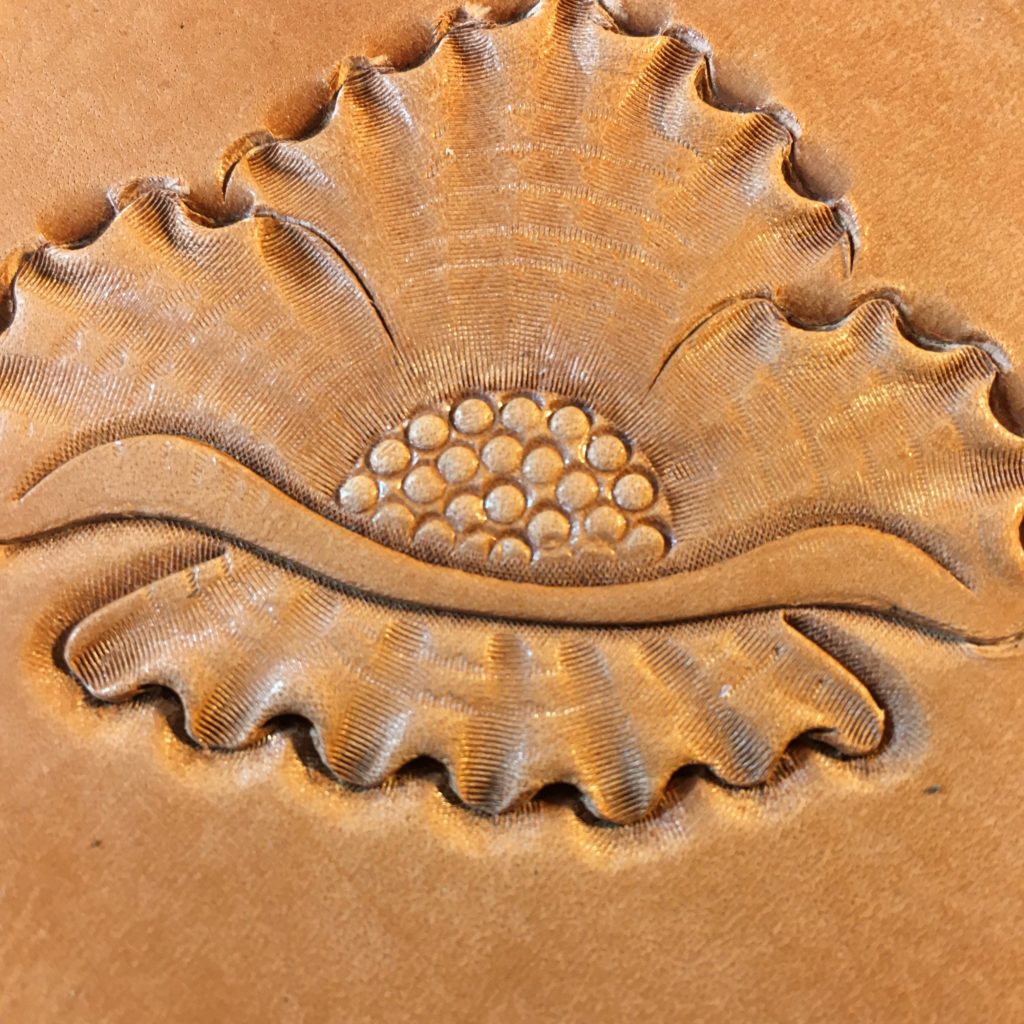
Step 11:  Now to bevel the two petals on either side of the flower center.  I did this the same way as the bottom petal using my small beveller.  
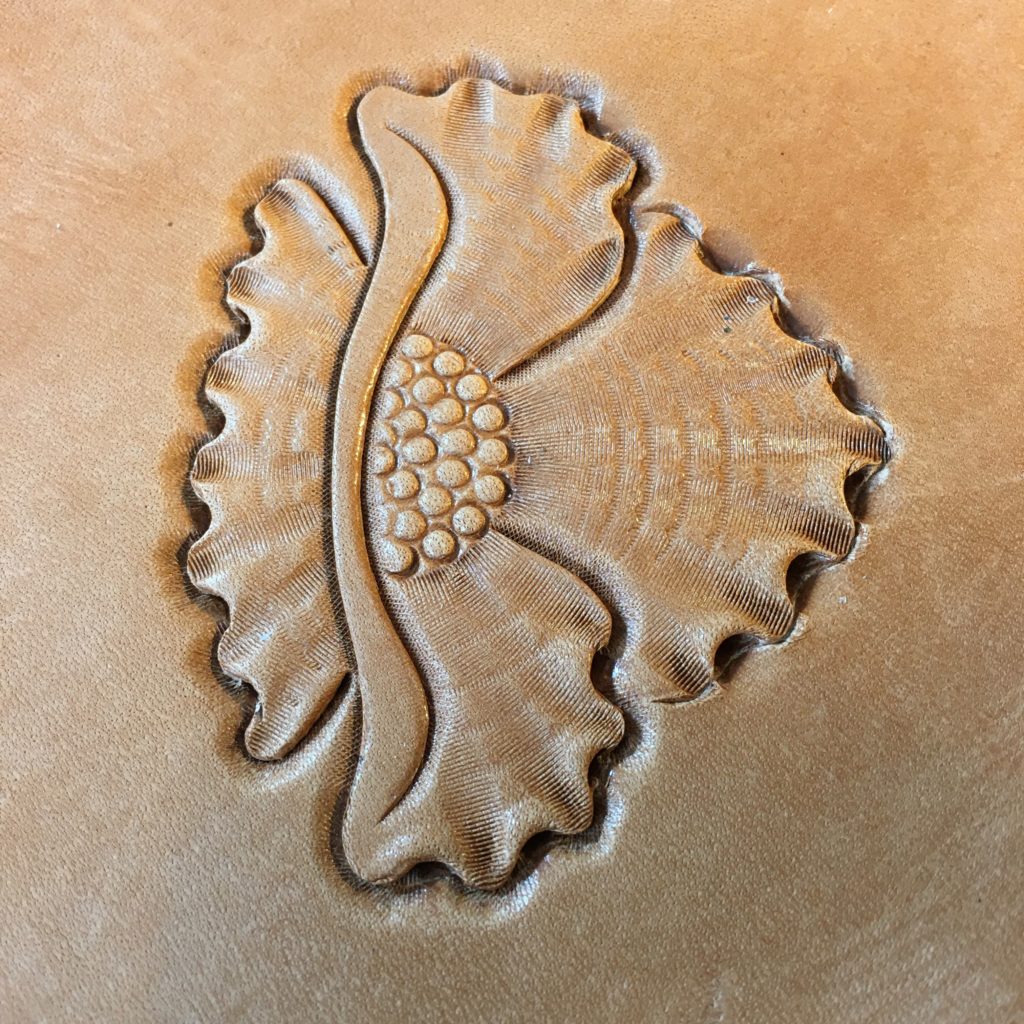
Step 12:  Beveling the edge of the top petal.  Since it is the ‘farthest’ part from the viewer and parts of it lie behind the two side petals it gets beveled last.
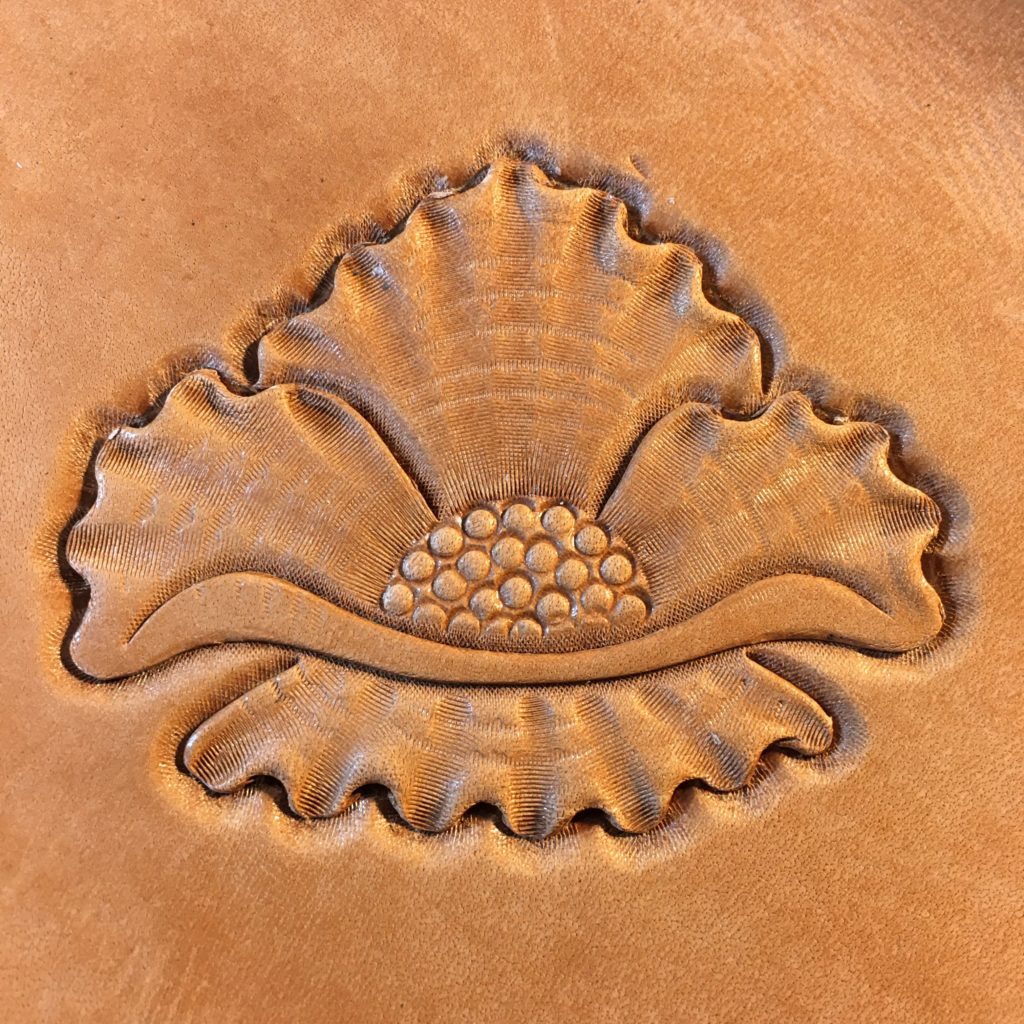
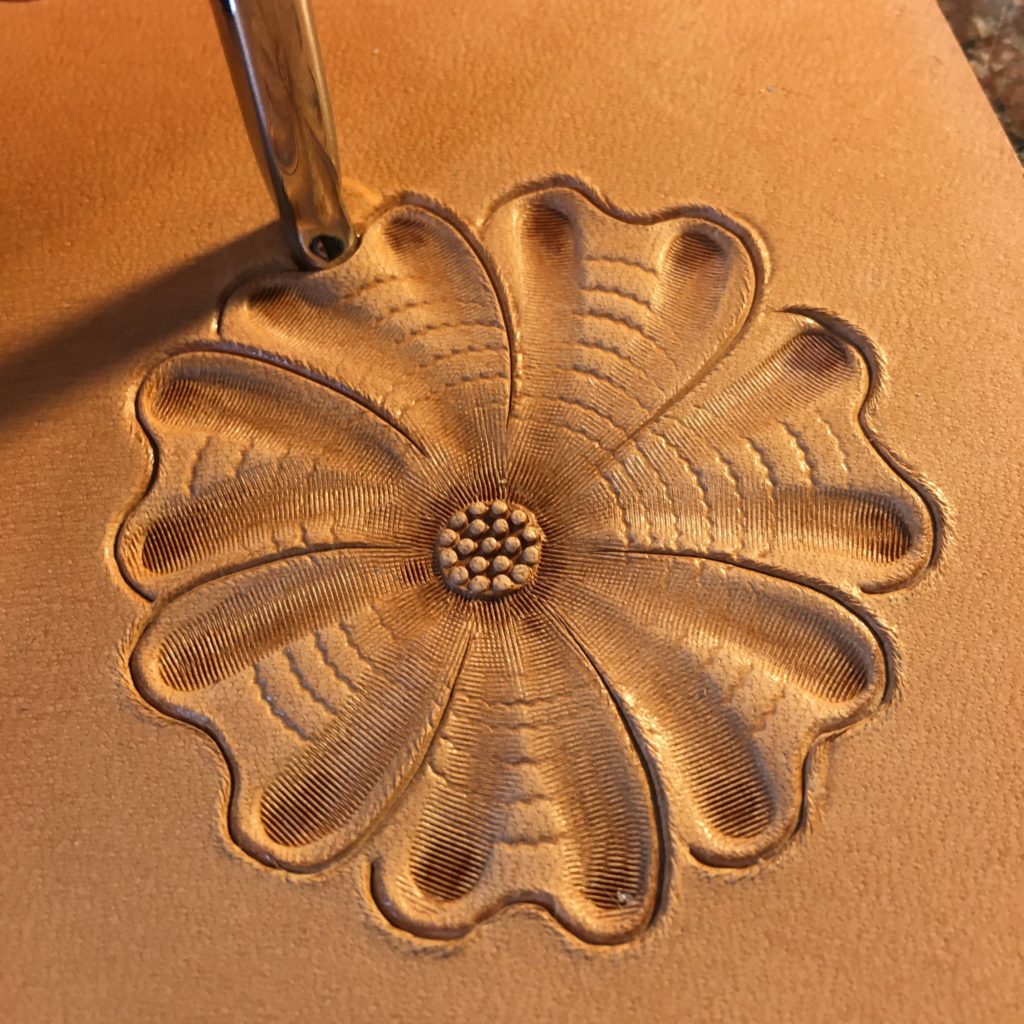
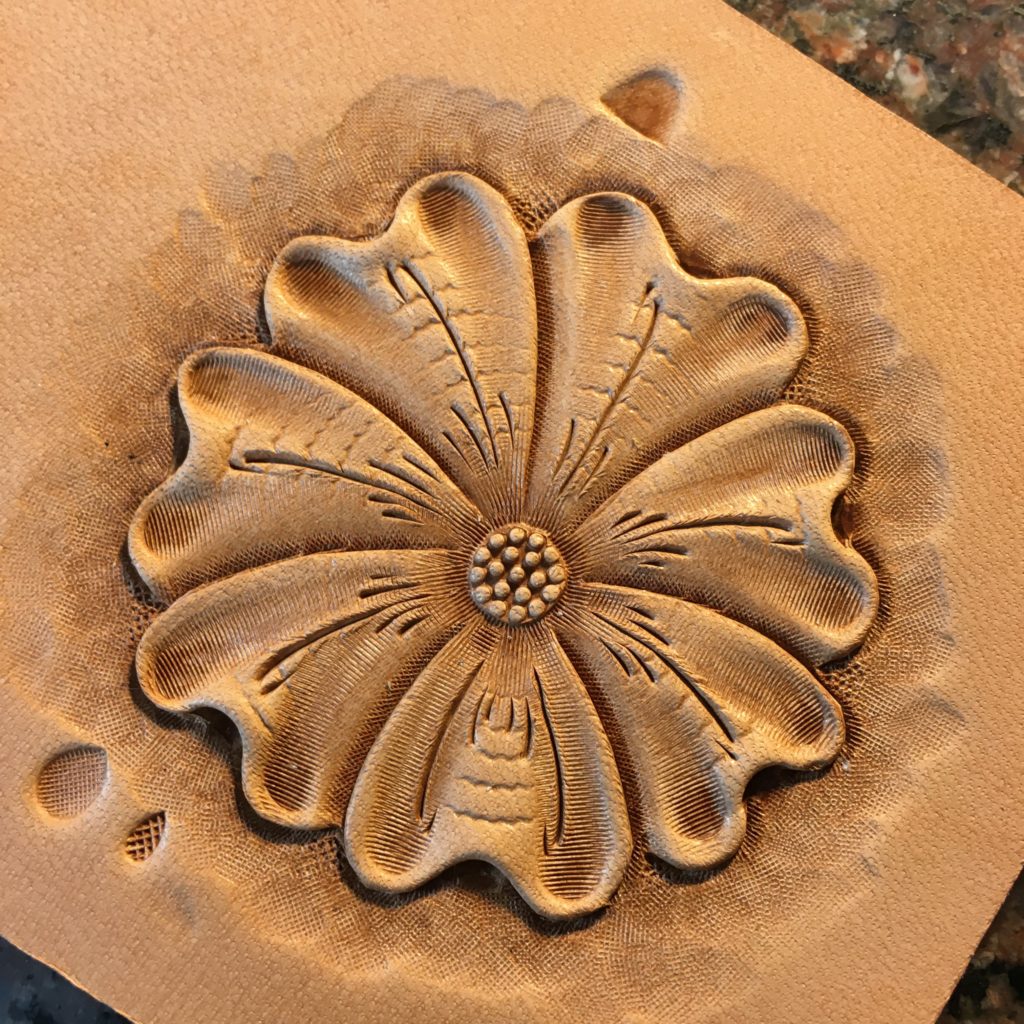
Step 13:  Decorative cuts.  I finished the flower off with some decorative cuts on the petals.

Floral carving in leather

Note I actually skipped a few steps on this one.  I didn’t matte down the beveling ridges on the flower petals like I did in step 9 of the first flower carving tutorial, and I didn’t background around the flower either.  This was mostly because I got in a hurry and forgot.  But if you want to see those steps done properly, check out the first tutorial.

Northwest Style Flower Carving Tutorial – In a nutshell.

There you have it! Another complete and simple flower carving tutorial. Feel free to ask questions and I will do my best to answer all of them.

Great Leather Craft Books

Walt Disney is quoted as saying “There is more treasure in books than in all the pirates’ loot on Treasure Island. And best of all, you can enjoy these riches every day of your life.”

Leather working may be an old art form but it has embraced modern technology. Since the inception of YouTube people have posted how to videos on every subject imaginable, including leather craft. There are some good and some not so good videos out there, but I wanted to talk about some of the great leather books.

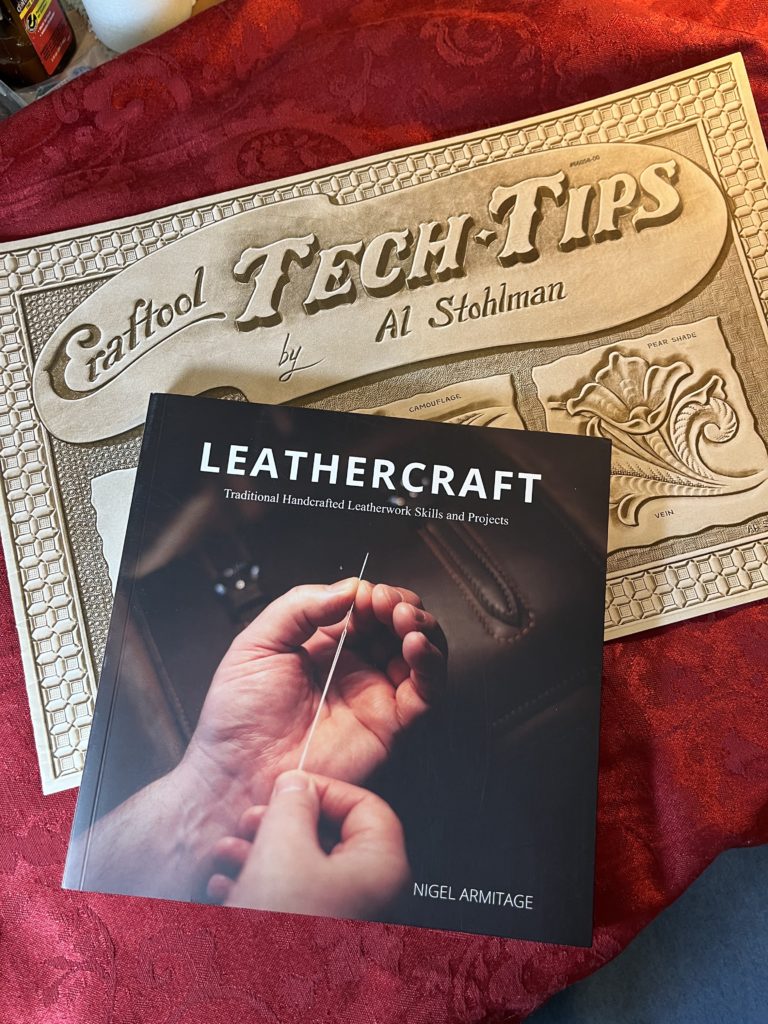
Craftool Tech-Tips by Al Stohlman

One of my favorite books is a simple book called Craftool Tech Tips by Al Stohlman. This book (more of a large magazine type format) is only 22 pages but packed into those pages were hundreds of tips and techniques from Al Stohlman on floral and figure carving as well as stamping with geometrics. In addition to showing how to use the stamping tools there are side notes about proper use of the tools. When I was just starting out this simple book was a treasure trove showing me how to use the tools I had and teaching about tools I discovered I needed.

Flower Carving in leather with a veiner tool
Using the veiner on flower petals.

When I first started working with leather by main interest was in carving and I used to spend hours going over this book to learn the techniques. I can still pick up pointers from it to this day and I consider this to be one of the best books I own. I was fortunate to pick up a copy early in my leather carving career.

This first book has been around a long time (it was first published in 1969) but my second favorite book is much more recent.

Leathercraft by Nigel Armitage

Leathercraft by Nigel Armitage is a much newer book, published in 2020, and its a much different book from the first one. While the first book talks all about carving leather this book talks about basic construction techniques, particularly hand stitching leather. It is written by a master leather worker with over thirty years experience and it gives a really good insight into English leather working techniques. Since my early education in leather craft had been focused on carving and stamping, this book was a catalyst to improving my construction skills, refining hand stitching and improved pattern making. It is a well written book that is easy to follow and understand and will improve the skills of any leather crafter. It has exposed me to techniques and skills that I did not know about and it has broadened my capabilities as a leather crafter. I can’t say enough good things about it.

These are both excellent leather craft books that will serve you well during your journey to explore leather crafts and arts. I highly recommend adding both of these books to your library! And check out many of the other books out there. Some of them were written over 50 years ago but they contain descriptions of techniques that sometimes aren’t documented any where else. With so many leather craft books out there you can find something that informs you on the areas of leather crafts that interest you and will enhance your skills.

Where to get these leather craft books?

Leathercraft by Nigel Armitage is available through Amazon or Barnes and Noble, or through your local book seller. Craftool Tech Tips was published by Tandy Leather but as of this writing seems to be unavailable through their website. You can find copies available on both Amazon and eBay but you might also be able to find a copy at a brick and mortar Tandy store if you get lucky. Hopefully this book will be available again soon on the Tandy site.

How to: Leather Carving Tutorial!

This is a step by step process showing how I take a blank piece of leather and create a floral carving on it. In this particular case it is a simple flower but the same techniques work for any kind of carving in leather.

Leather carving tools and veg tan leather
This picture shows a piece of leather to be carved and some of the tools to get started including a swivel knife.

For this leather carving tutorial I’m just going to carve and tool a simple flower with seven petals. The picture above shows the piece of leather with the flower outline already carved into it with my swivel knife. I’ll go step by step over each tooling step that I make to get the final flower.  Feel free to grab a small piece of vegtan leather and follow along. Though it looks like there are a lot of steps and details here, it really doesn’t take too long to do each of these. Stay with me through this whole post and I guarantee you will pick up something useful!

A note on tools:  It’s more than likely you won’t have all of the tools that I show here.  For the most part I’m staying away from very specialized tools as much as possible but for doing traditional floral carving there are a couple of fairly specialized tools that are used to get very specific effects (like a center shader.)  If you don’t have all these tools don’t worry.  Where possible I’ll point out alternate tools you could use.  In almost every case these tools are available at your local brick and mortar leather shop or online at your favorite tool maker.  It’s sometimes possible to find these tools used from reputable online sources for very reasonable costs.

Leather Carving Tutorial: Step by Step

Step 1:  Trace the flower outline onto your leather and carve it with your swivel knife. The picture at the beginning of this leather carving tutorial shows this step. I transfer my carvings to tracing paper but I’ve also taken the paper drawing and traced it directly to the damp leather by putting a layer of kitchen plastic wrap over the leather to protect my paper. Also, this first picture shows the design carved in with the swivel knife.

Step 2:  Work from the foreground to the background!  There are a lot of good reasons for this but the main one is to keep from having to redo any areas you have already tooled.  

Floral Leather Carving with flower center tool
Flower Center stamped.

When looking at a flower like this, we treat the center as the closest part to the viewer and stamp that first.  It also helps to guide the beveling of the flower petals that will come next.  We want the impression that the petals (or more correctly their edges) come down to the flower center.

My flower center in this case is a stamp, but you can do something similar if you have a seeder and can stamp the seeds in a small circular area.  In one of the later tutorials we’ll actually use a seeder to make a more complex flower center.

Step 3:  Center shading.  This was one of the first ‘Sheridan Style’ tools I got once I could get more professional tools.  When I saw how this tool changes the look of the flower center I had to have one. 

Leather Floral Carving with Center Shader tool
Center Shader used on the flower center.

It’s a lined tool designed to work around the flower center stamp and matte it down, making it look like a cone shape.  It really enhances the depth the flower center has and makes it look like center is deep down in the center of a real flower.  You can’t really tell from the picture but this stamp has a slightly curved heel to help it fit around the center stamp and press the leather down right up to the edge of the center.  The lines on the stamp help to enhance the illusion of depth and will capture antique later (if you antique the piece.)

If you don’t have a center shader, a small beveler used carefully around the center can get a similar effect.

Step 4:  Using a veiner on the petals.  Floral carvers do this to add a visual texture to the petals as well as enhance the appearance of roundness and depth in the flower. 

Flower Carving in leather with a veiner tool
Using the veiner on flower petals.

You can use either a veiner or a camouflage tool for this.  Originally the camouflage tool was the tool of choice for this but as Sheridan Style developed using a veiner for this job became more common.  It’s a matter or your preference and style as to which you prefer.  I usually use a small veiner like the one shown here.

Step 4A:  Petals after all the veiner lines have been stamped.  I usually try to have my veiner marks line up around each petal though I’m not very precise about this. 

Floral carving showing veiner usage
All petals lined with veiner.

Also, I try to put the marks a little closer together near the center and have them gradually space farther apart as I get closer to the edge.  I think this enhances the visual illusion that you are looking at a 3D cone shape that gradually opens up and flattens out as you get close to the petal tips.

Step 5:  Thumbprint or pear shader on the petal tips.  This is one of the steps that is very stylized for floral carving and doesn’t really represent a feature in a real flower.  We do it to give texture to the petals and more visual impact. 

Thumbprint tool used on leather carved flower
Thumprint tool shading flower petals

This tool goes by several names.  Typically in Tandy Craftool catalogs it is referred to as a Pear Shader.  Most Sheridan Style carvers will call this a thumbprint, and the two do have some differences.  Pear Shaders are actually ‘pear’ or teardrop shaped and often smooth.  Thumbprints are usually longer, shaped more like a loaf of French bread and they are usually lined.  Thumbprints also are designed so that the inner end is narrower that the outer end, giving the user two sizes of thumbprint in one tool.  That is a nice benefit!

This particular tool is a thumbprint.  Notice how I start at the outer edge of the petal and walk it back toward the center, hitting it a little lighter as I go.

Step 6:  The undercut or undershot beveler.  This tool makes it easy to bevel those round concave areas on the flower petal.  Also, because of the way it is shaped, it pushes the leather up above the cut line, giving a lift to that part of the petal.  That is why these tools are often called ‘petal lifters.’  This was another one of those floral carving tools that I had to have once I saw how it was used.  To me this was the key tool that made professional carver’s work stand out.  

Floral carving with a petal lifter
Petal lifter for the petal edges

I’ll use this tool inside the slight inward curve on each flower petal to lift that part of the tip up.  Compared to the areas on either side of the lifted area where I’ve already used the thumbprint, that center part of the petal will really look like it’s standing up above the leather surface.

Petal lifter in place to lift a petal
Showing how the tool fits at the petal’s edge

Step 6A:  After stamping in all the scalloped areas of the petals.  I do this as the first step in the beveling process.  

All petals have been lifted using the petal lifter
All petals lifted

Step 7:  Beveling the petals.  First I focus on the long cuts to the flower center.  I use a wider beveller for this because you get smoother beveling when you can use a wide beveller.  The smaller the width of your tool the easier it gets to have uneven beveling and to leave undesirable tool marks.  You always want to use the widest tool you can.  The beveller in this picture is a ¼ inch wide.

Beveling the flower petals in a leather floral carving
Starting the petal beveling
All the central parts of the flower have been beveled
Flower center beveled all around.

Step 8:  Beveling around the petal tips.  To do the more rounded petal tips my larger beveler is too big to easily do the job, so I switch to a 1/8 wide beveller.  This makes it easier to go around the curves but you do have to take more care to use an even amount of force so you get an even and smooth beveling line.

Beveling the tips of the flower
A smaller beveler is used for the flower tips.

Step 8A:  Petal beveling complete! The flower is almost done at this point.

The flower petals have been beveled in this example
Beveling complete!

Step 9:  Matting down the beveling ridges.  Notice that there is a very pronounced ridge on the flower petals where I beveled the petal edges that lead down to the flower center.  I want to smooth out that ridge so the petals look more flat and I’m going to use the figure beveller at the top of the picture to do it. 

Figure beveler used to matte down the ridges left from beveling
A figure beveler to knock down the beveling ridges

Figure bevellers were specifically designed to matte down leather in figure carving and are great at removing ridges like this.  I stamped an impression of the tool next to it so you could clearly see the shape of the tool.  If you don’t have one of these tools a modeling spoon will do the same job for you.   Really any smooth rounded tool could be used like a modeling spoon to smooth the leather out.

Step 9A:  Everything smoothed down.  The petals now have a much smoother and more natural looking surface.

Flower Carving in leather showing all the beveling steps
Beveling ridges smoothed out.

Step 10:  The same kind of ridge exists around the outer edge of the flower thanks to our beveller and the carving will look better if we matte that down too.  Since this will be the background of the flower, we usually want this surface to be textured to make the flower stand out from it.  The texturing will capture antique when you antique your piece making it much darker than the flower, but even if you don’t antique your work the texture itself will separate the background from the floral carving.  

Starting to background around the flower carving
Backgrounding the flower.

First, I’m going to start with a small pointed checkered backgrounder to matte down the small pointed areas between the petals.  For this carving I’m going to use a checkered backgrounding tool. You can see an impression of the mark this backgrounder leaves next to the tool.  It is true that some floral carving experts will say that the only ‘professional’ backgrounding tool for floral work is a bargrounder but I say use whatever you are comfortable with.  I’ll have an example using bargrounders in a later tutorial.

Step 11:  Once I matte down the tight spaces I’ll switch to a larger tool so I can cover more area.  I stamped the larger tool next to the smaller one for comparison and I’ve started matting down the area along the top of the flower so you could see the difference.  

More backgrounding tools to shade around the flower
Expanding the backgrounded area.

Step 11A:  Here I’ve matted all the way around the flower.  Please note for this leather caring tutorial I wasn’t taking the time to do my best to matte this area down evenly and fade the edge out as smoothly as I could.  As a result, the matting on this background looks choppy.  If this was something I was making for a customer I would spend more time making the matting look smooth.

Matting around the flower has been completed.
Backgrounding completed.

Note how the backgrounding makes the flower stand out, like it’s actually above or separate from the leather. Because of the texturing in the background if you antique this leather it will make the flower stand out even more.

A side view of the floral carving showing off the backgrounding
Closer view of the backgrounding around the flower.

Step 12:  Decorative cuts.  Typically this is the last step in the project.  I usually finish all the carving before I come back and do this step.  Decorative or ‘dress’ cuts are intended to give extra detail to the flower and are another stylized effect for floral carving that doesn’t quite match a part on a real flower.  I for one think the flower looks much better with the cuts than without.  

Decorative cuts suggest veins on an actual flower and add visual interest to the carving.
Decorative cuts on the flower petals.

There are lots of different styles and ways to do these cuts.  Each carver usually find one that he likes and can do well and sticks with them.  I’ve never felt I was very good with these cuts and I stick to these basic ones most of the time.
That’s the whole thing!  Any questions?

Custom Wallets and Money Clips

For the past few years custom wallets and money clips have been a big part of our business.  People still enjoy having a wallet or money clip that matches their individuality.  At C and B Leather we specialize in handmade leather items that are built to your specifications.  Whether you want specific artwork on the outside, a special arrangement of pockets or a special size, let us know what you want and we will make our best effort to make it a reality!

One of the key benefits of having a wallet custom made is the quality you will receive as a result.  Our wallets are made to last a lifetime out of the highest quality materials by a craftsman who cares about his results.  These are not mass produced with the cheapest materials available.  Each one is made specifically with you in mind,

We have many more wallets like this in our Etsy Shop! If you see something there you like but want it customized, contact us and let us know.

Custom Work for Past Customers

These are some examples of our past creations.

“This wallet looks spectacular and is made to last a lifetime!”

-a former customer.


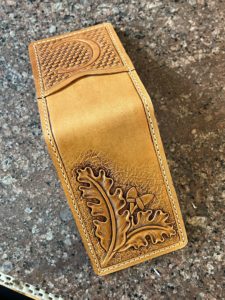
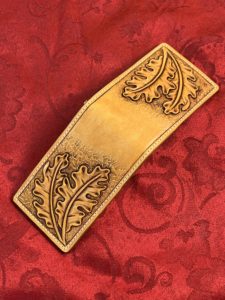
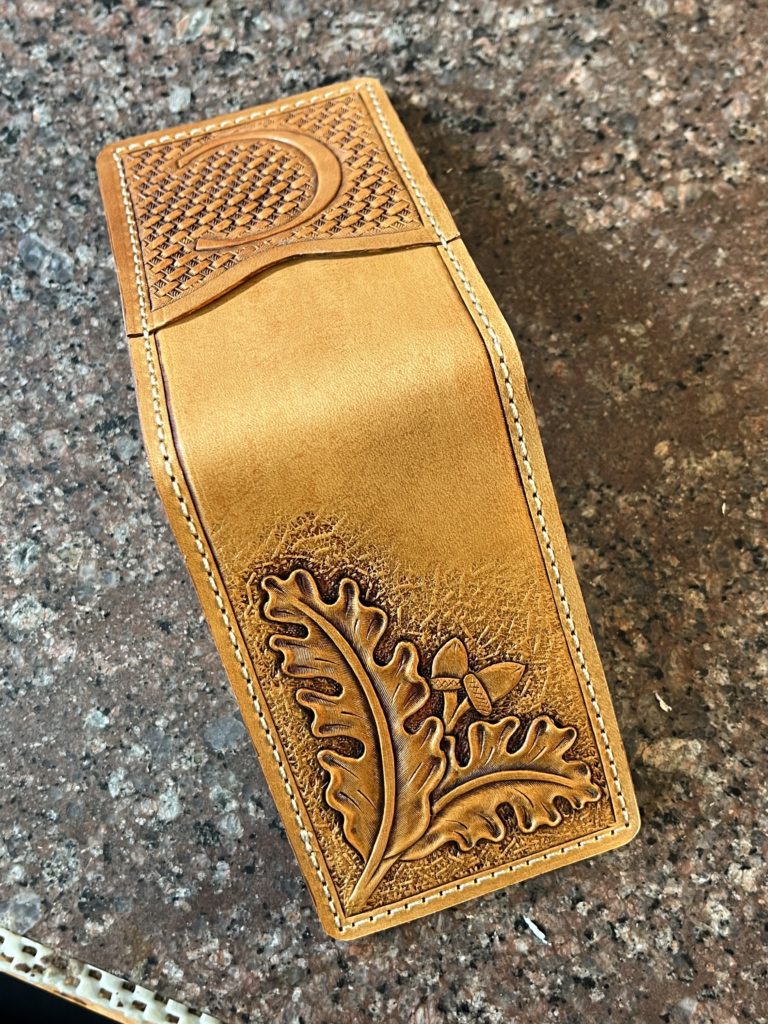
Oak leaf money clip with customer’s initial on it.

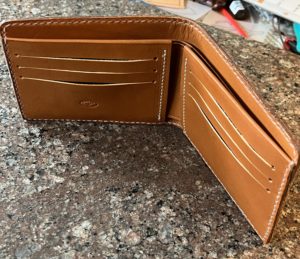
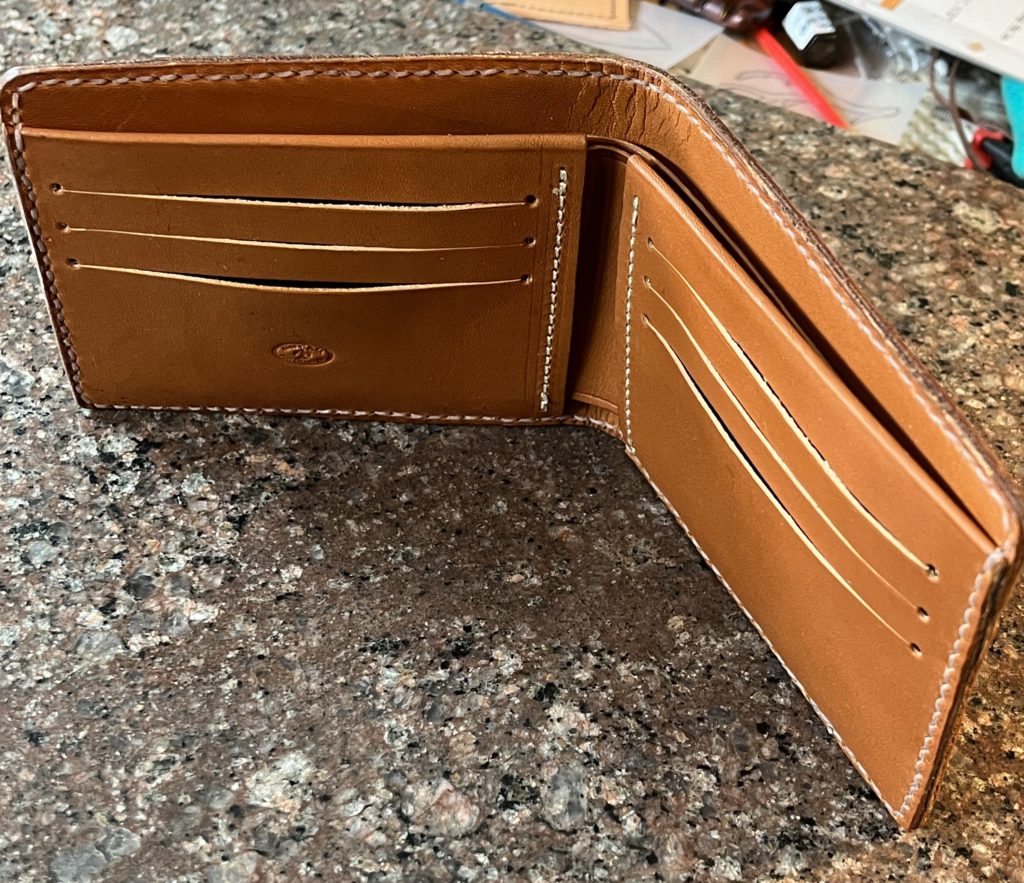
Leather Bifold Wallet
Hand made bifold wallet.

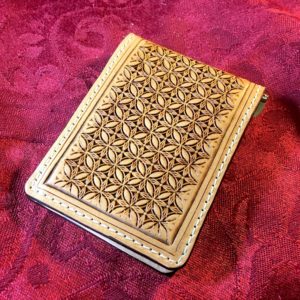
Money Clip with Geometric Design

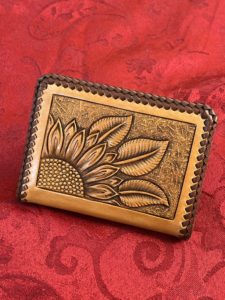
Carved Leather wallet with Sunflower design
Minimalist wallet with sunflower design.

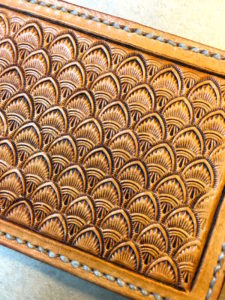
Shell stamped design on a small wallet.

Leather money clip with oak leaf carving
Leather money clip with oak leaf carving designs.

Made for your personality

We can make a wallet or money clip that shows off your interests and personality.  Contact us with your ideas and we can make them a reality.

Quality to last a lifetime and beyond

All of our products are made with top quality leathers and they are made with a commitment to craftsmanship that is rare these days.  While our products may cost more they will last you many many years beyond the typical big box store wallet or money clip.

Visit our shop!

On Etsy:  C and B Leather

How is Leather Made?

Leather Tanning 

So how is leather made?


While leather is made from the hides of cows, the way it’s processed is different depending on the type of leather to be made.


Most leather is made for use in clothing and it’s tanned using chrome salts.  This is a fairly quick and cost effective process that makes most of the kinds of leather you run into in your daily lives.


The kind of leather used for the carving my artwork is made in a different way.  It is called vegetable tanned leather (or veg tan for short) and it goes through a much longer process.  Vegetable tanned leather gets its name from the fact that plant parts like bark are used to do the tanning.  This process gives the leather much different properties than the kinds of leather used for shoes or clothing.


Veg tan leather carving
Floral carving in leather.

” Vegetable tanned leather gets its name from the fact that plant parts like bark are used to do the tanning.”

The video at left is a tour of the Hermann Oak Tannery in St Louis Missouri.  This tannery has been making leather since 1881 and is one of the premier leather tanneries in the US today.  The vegetable tanned leather they produce is the preferred choice of many US saddle makers and other leather workers.  This video is a fascinating tour showing all the processes for making leather from raw hides to finished leather.  


Thanks to Weaver Leather for posting this informative video!


Happy New Year 2022!

It’s a brand new year and a time to look back at the custom leatherwork of the past year. This past Christmas season was a very busy one here at C and B Leather and we had lots of custom orders for our customers. This is just a sample of some of the special items we made for our clients.

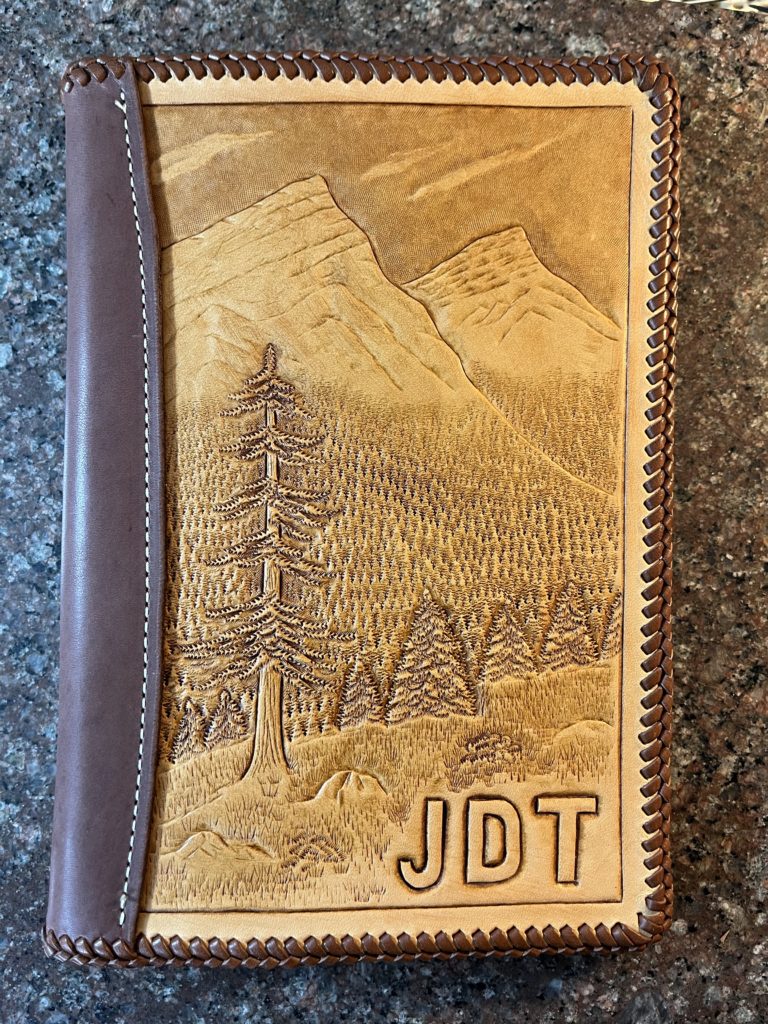
A 5×8 leather notebook with a mountain carving.

This customer wanted a small notebook with a mountain scene and her husband’s initials on it. The artwork was tailored to the kinds of scenery they can see near their home in Montana. I make several different sizes and styles of these notebooks and the carvings on them are always made to customer request. Notebooks like these are intended to be something the new owner will get a lifetime of service out of, and each one is unique to it’s new owner.

Custom Oak Leaf money clip with the customer’s initial carved on the pocket.

When the person this money clip was made for received it on Christmas morning I’m told he immediately through his old store bought wallet in the trash! Apparently he absolutely loved this new money clip wallet that was personalized just for him.
Hand made leather bifold wallet.
We make a variety of different kinds of wallets for both men and women. All our wallets can be customized with different kinds of designs.

Custom Leatherwork is our Specialty!

Making bespoke items is our specialty. If you have an idea for a personal gift for a loved one or yourself, contact us to talk about your ideas. Leather notebooks or wallets like these make excellent gifts that will last for many years and are absolutely unique. Very often these will become heirloom items that can be passed down to the next generation. Click on the ‘Contact’ menu at the top of the page to get things started!

Winter (Holidays) are Coming

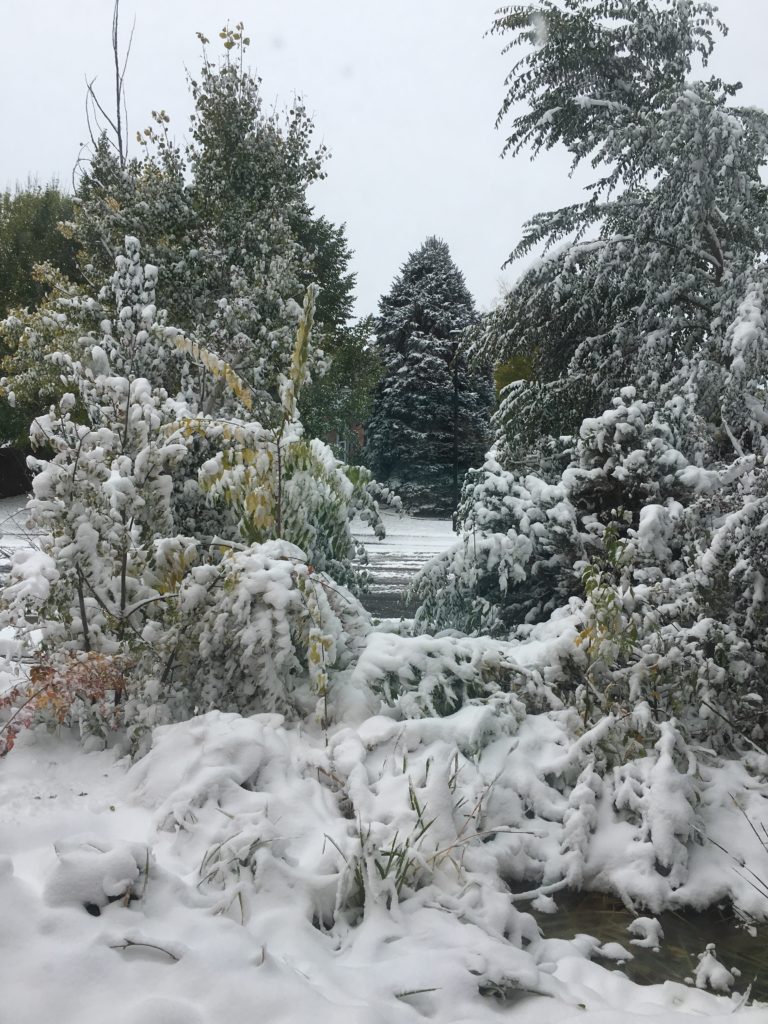
Last night here in Fort Collins, CO we got our first taste of winter. Thunderstorms with small hail and then light rain and falling temperatures. This morning many cars and decks were covered in ice. Just to the north of us in Wyoming they got blizzard conditions last night and this morning. It was in the 80’s here just a couple of days ago.

A wintery day in Fort Collins, CO

Note: This picture wasn’t from today. I had to dig through my photos to find a good snow picture to use. Hopefully we’ll get some heavy snows like this during the winter to cut down on our drought!

Custom Leather Christmas Orders

All of these changes in the weather has us thinking about the upcoming holidays. Its actually not all that long until Christmas. If you are thinking about a custom leather order as a holiday gift for a loved one or for yourself you need to get the order in soon. We’ll be closing the books on new orders in the next few weeks. Most custom orders take several weeks to make so I won’t be taking any new orders after November 15 for Christmas delivery. If we get a lot of Christmas orders in the next few weeks this date may have to move up so if you have something in mind you would like to have made, make sure to contact me as soon as possible!

Custom leather Christmas orders are always a big part of our business here. We are always getting requests for custom leather items in the last few days before Christmas and we always have to disappoint those people because it takes more than a couple of days to make quality leather goods. Please don’t be disappointed this year. Contact us now to get your order in!

We make a variety of leather wallets, clutch purses, notebooks and custom knife sheaths and we would be thrilled to make a special item for you!

Leather Tools of the Trade

Working with leather is a very old art form. It’s perhaps the oldest profession (or at least one of them) and there are many special leather tools that have been developed over time for cutting and working leather. Here at C and B Leather we use many different tools to make the custom leather items that you order. Below are some of the most important ones.

Round Knives

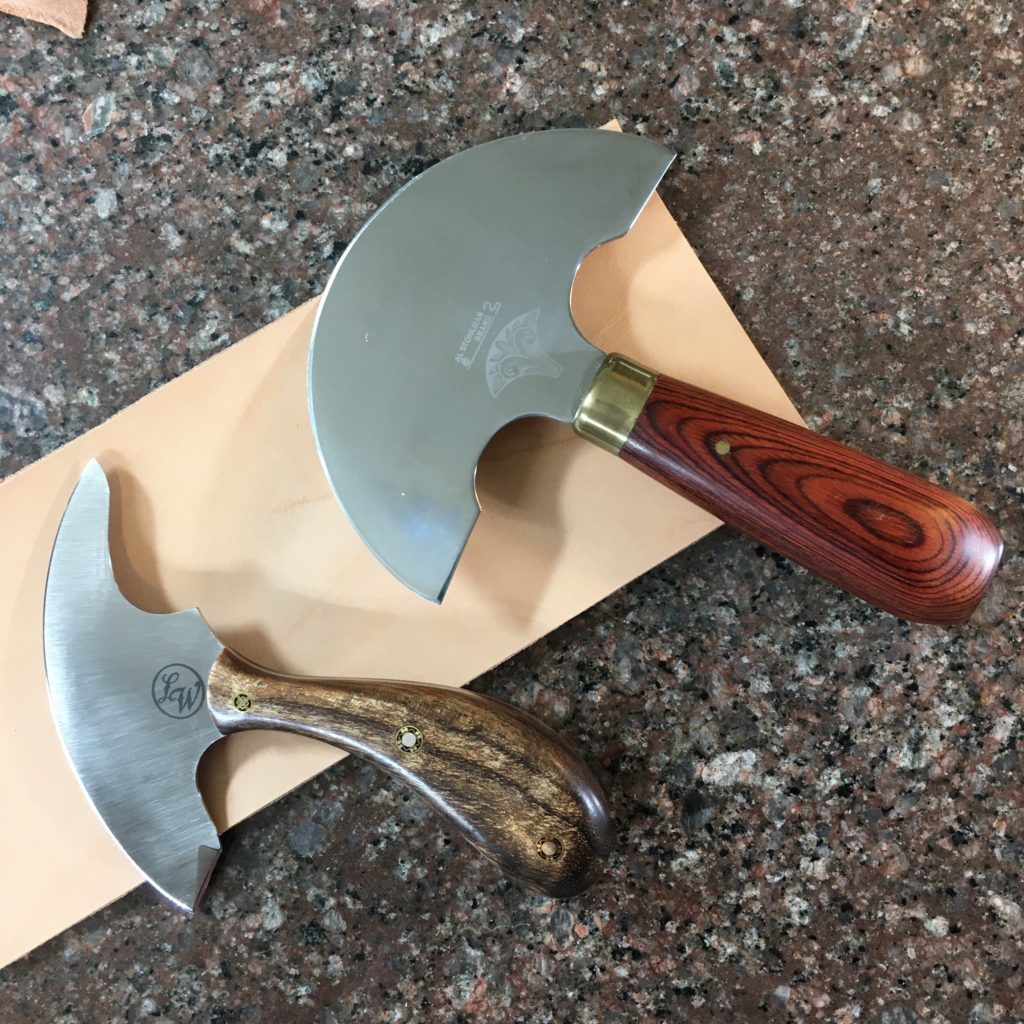
Leather Round Knife
These are two examples of different kinds of leather round knives. Top is an Al Stohlman model from Tandy Leather, bottom is a Leather Wranglers model.

One of the most iconic tools is the round or head knife. The design of this knife is centuries old and in the middle ages the shape of this knife was a symbol of leather workers and leather working guilds. The curved design is optimized for cutting leather into pieces from the hide. The sharp points on the blade are adapted to cutting tight curves while the long curved blade is good for straight cuts.

Swivel Knives

A more modern development is the swivel knife. This knife is used for carving a design into leather, and is only used with special types of leather that can be carved and stamped. This kind of leather is called vegetable tanned and it possesses unique properties that allow it to take stamp impressions or to be carved when wet.

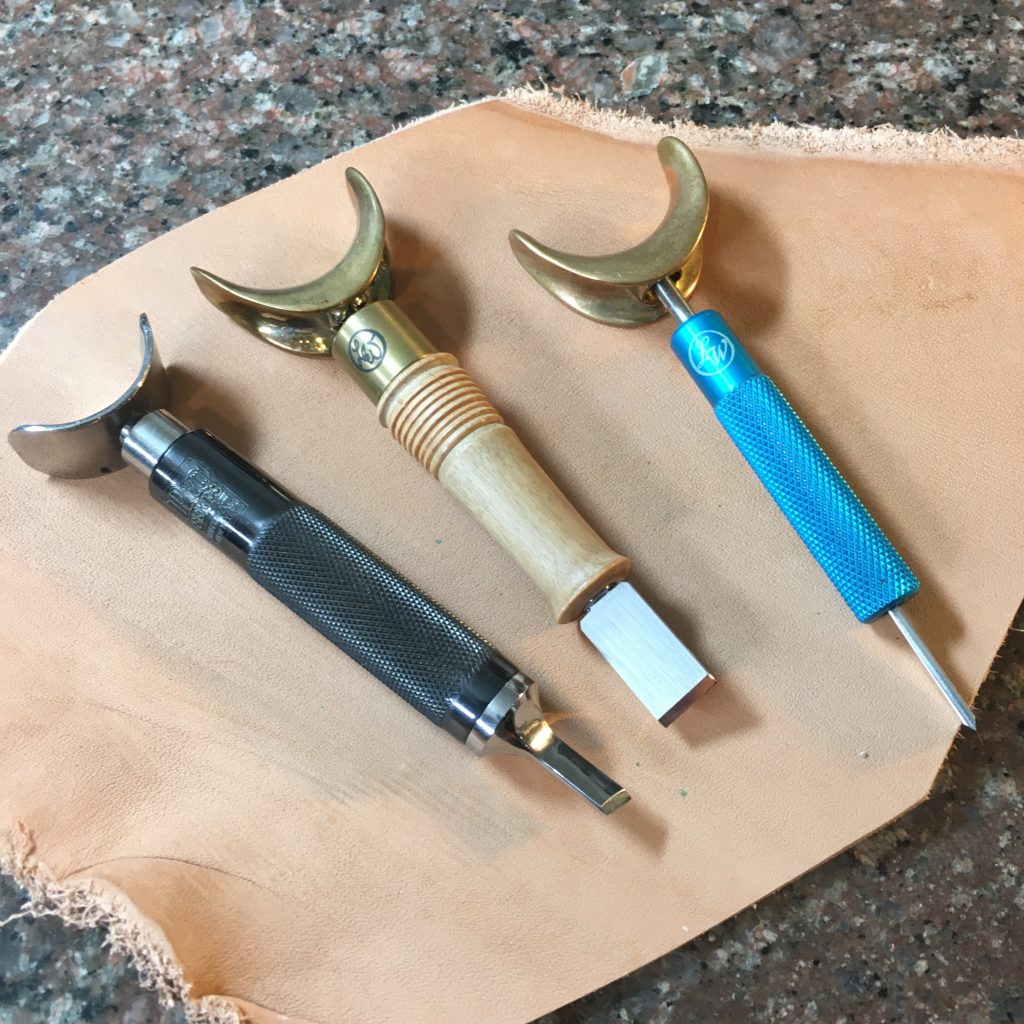
Leather Swivel Knives
Three kinds of swivel knife. From left to right, Robert Beard Pro Tools knife, Leather Wrangles SK-V and SK-3 knives.

Swivel knives get their name because the top finger rest of the knife can swivel and turn. When used the carver rests their index finger on the top part which is commonly called a ‘yoke’ and uses this finger to press down into the leather. The body of the knife where the blade in mounted can be turned or ‘swiveled’ by the other fingers and thumb, allowing the knife to carve intricate designs into the damp leather. Usually (but not always) other tools called stamps are used along these cut lines to create a relief sculpture in the leather.

Leather Stamps

Leather stamps are used with vegetable tanned leather to create designs in the leather. They can create simple geometric or basket weave designs or they can be used to create more complex bass relief carvings. These kinds of stamps are very specialized to create certain effects, and it takes a lot of skill and experience to use them properly and create works of leather art.

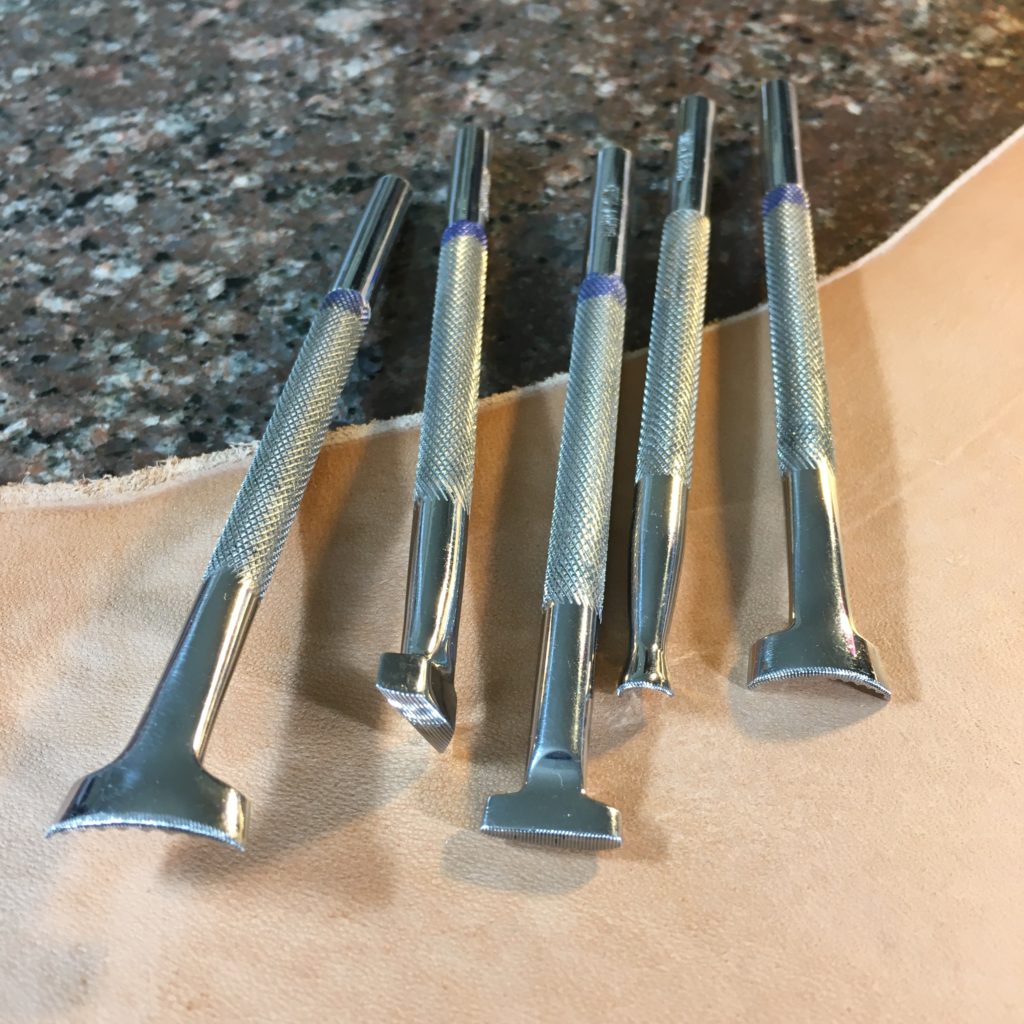
Stamping tools used for creating a carved design in leather.

Having Quality Leather Tools

It isn’t necessary to buy the most expensive leather tools but having quality tools is definitely important. The old saying ‘it’s a poor craftsman that blames his tools’ is very true, but quality swivel knives and stamps make the job of rendering your work of art much easier. It is our goal at C and B Leather to make you the highest quality custom leather item we can, whether you are looking for a custom wallet, notebook or handbag. Our focus is on making your imagination come to life in an heirloom quality item that will be a family keepsake for years to come.

Floral carving in leather.

Happy National Leather Craft Day!

Hand Sewing Leather
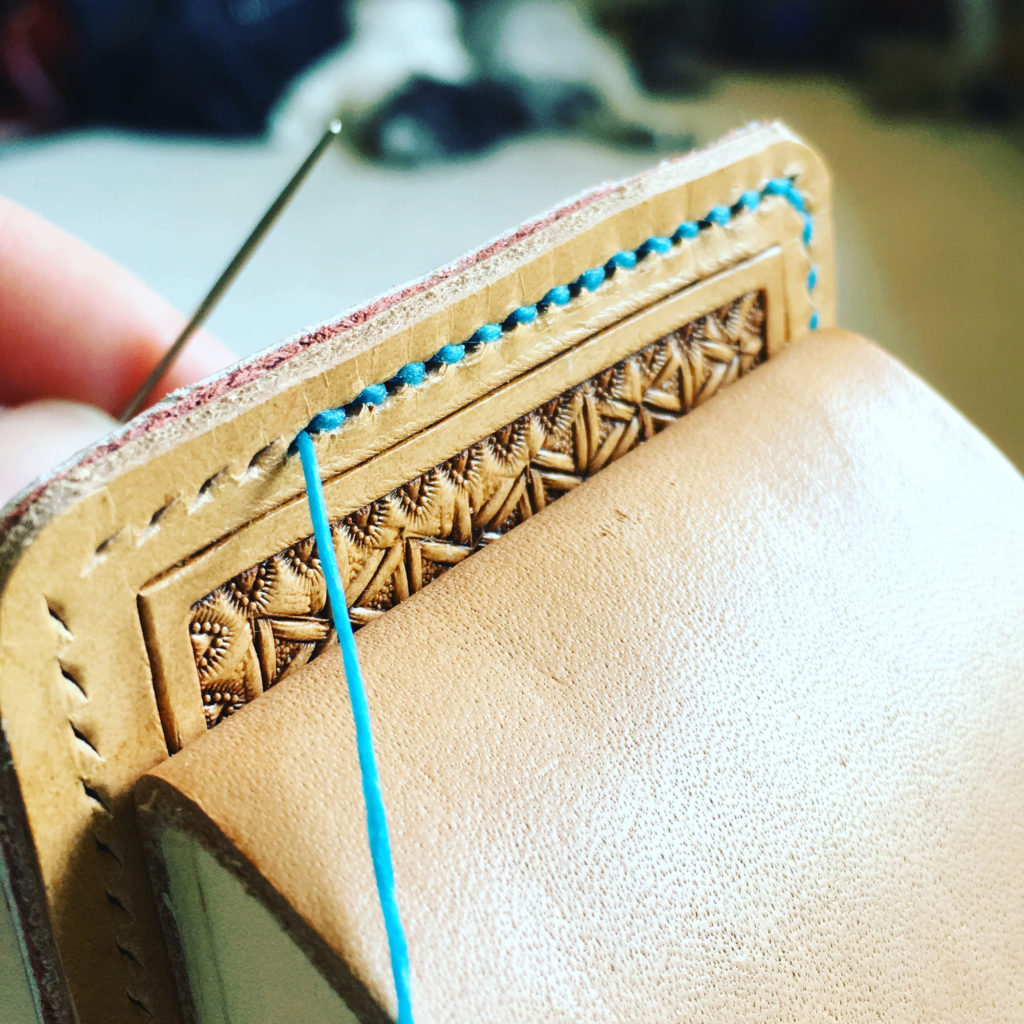
Hand Stitching a Leather Wallet with a traditional saddle stitch.

Did you know that August 15th is apparently National Leather Craft Day? Apparently back in 2018 this day was established as a day that “honors the rich heritage, artistry, and skill of leathercrafting.” Certainly no argument from me there. Working with leather is a wide ranging subject and there are so many things you can do with it. My main focus of carving leather is just a small part of what people all over the country do to work with leather on a daily basis.

According to the website National Day Calendar this holiday was created:

National Leathercraft Day recognizes the dedication and creativity of leather workers. Passionately, their inspiration comes alive through their designs and time-honored traditions. When a leatherworker designs a piece, expect outstanding quality and skill. 

www.nationaldaycalendar.com

According to the site you can try taking a class to learn leathercraft or you can order a handcrafted item from your favorite leather worker. In case you want to order anything from me, you can check out my Etsy shop at: https://www.etsy.com/shop/CandBLeather

If you want to see more of the description of this day of celebration you can click here: https://nationaldaycalendar.com/national-leathercraft-day-august-15/

Leather Carving As An Art Form

Carving or embossing leather is an art that is as old as man’s use of animal hides. It was probably something that mankind learned to do as soon as they learned how to tan leather. Leather carving as an art form has been embraced by almost all cultures in Earth’s history, each providing their own unique cultural spins.

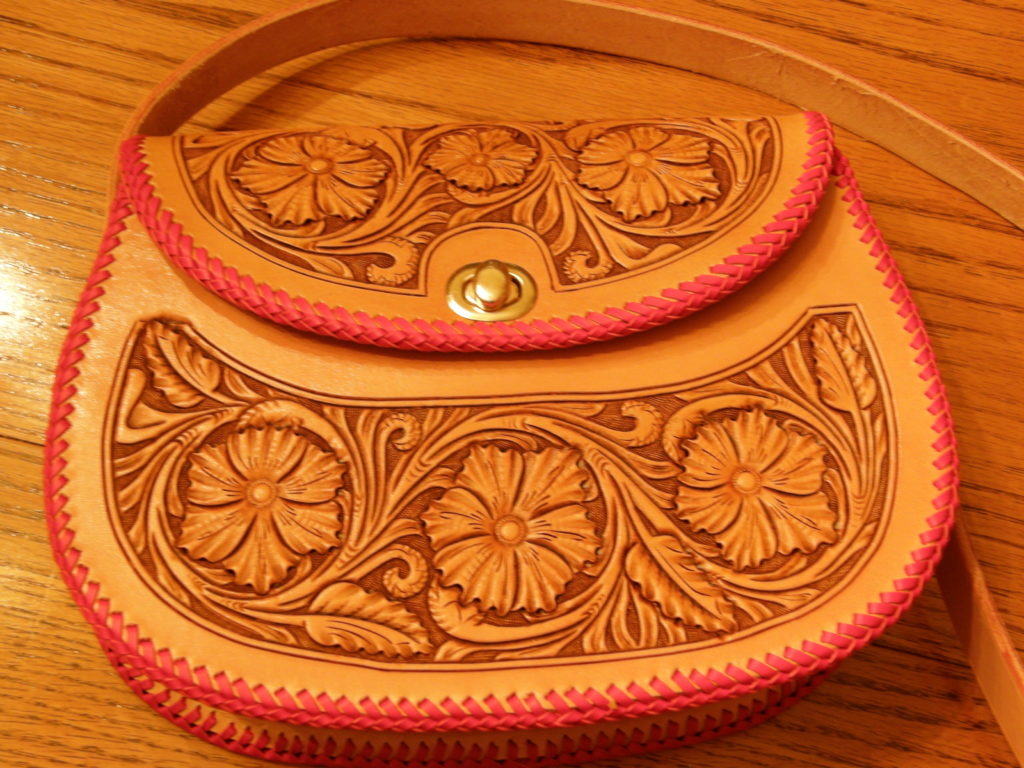
Carved Leather Purse by C and B Leather

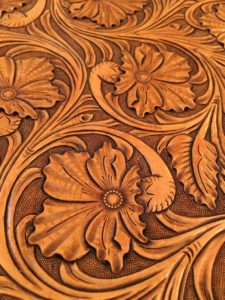
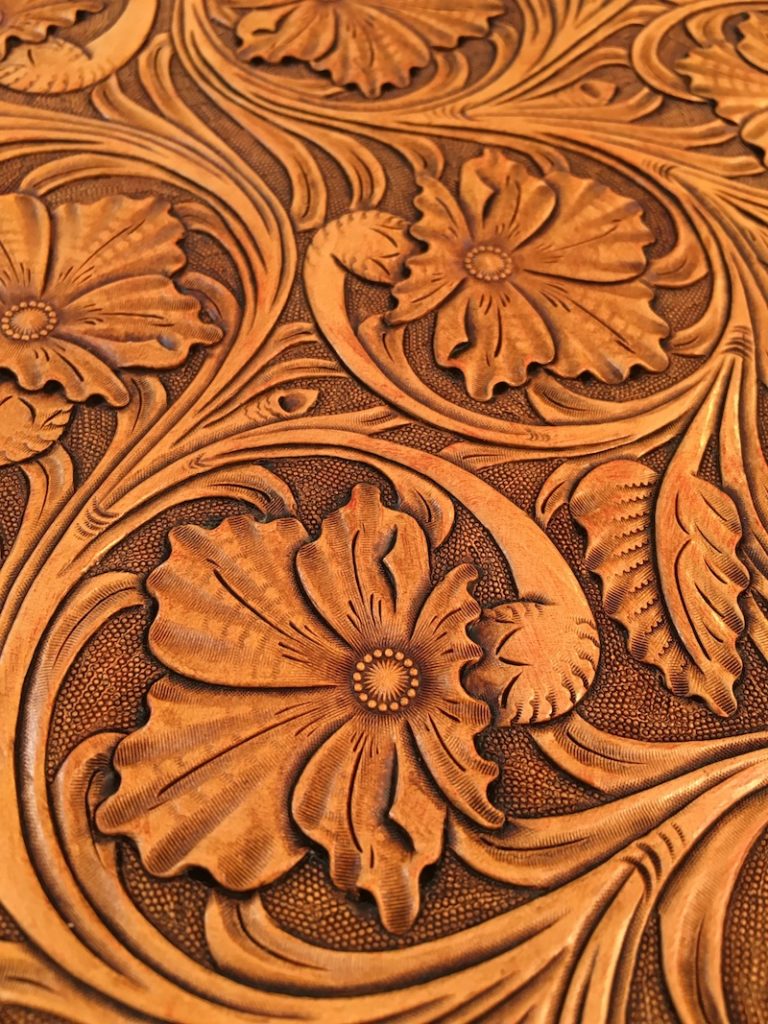
The image of the purse above is one that we made that uses the Western floral carving style that was developed by saddle makers in the US. Though this is a common leather carving style seen these days in the US, it’s not the only style we’ve made.

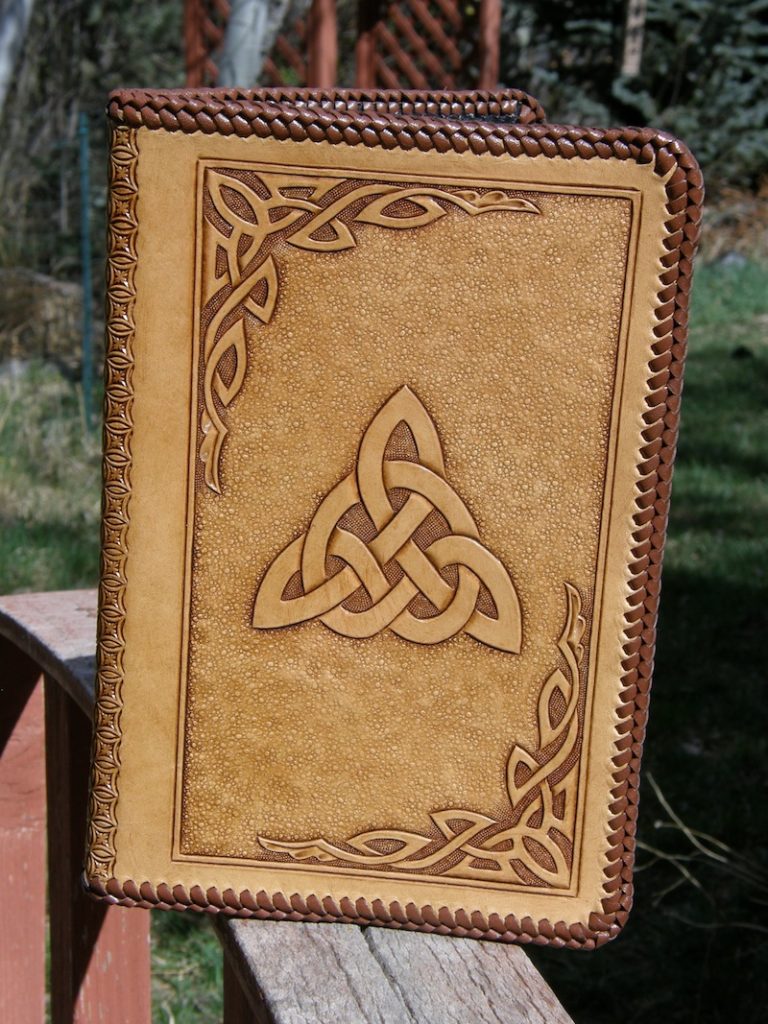
Celtic Trinity Knot Notebook by C and B Leather.

This notebook has a traditional Celtic Trinity Knot design flanked by other Celtic Knot designs in the corners. Celtic knot designs in leather, as well as in stone, wood or on paper, have been a popular art form for many centuries, and still hold their allure today in leather art. Celtic designs are very popular to this day and we are often requested to make customer leather items that use Celtic knots or images.

Carved Celtic Cross notebook by C and B Leather

One of the most common forms of making leather into art is by stamping a design into it. Geometric designs can be simple lines to complex geometric forms. Most often they are stamped into the leather with a single tool that is used to make multiple impressions across the surface of the leather.

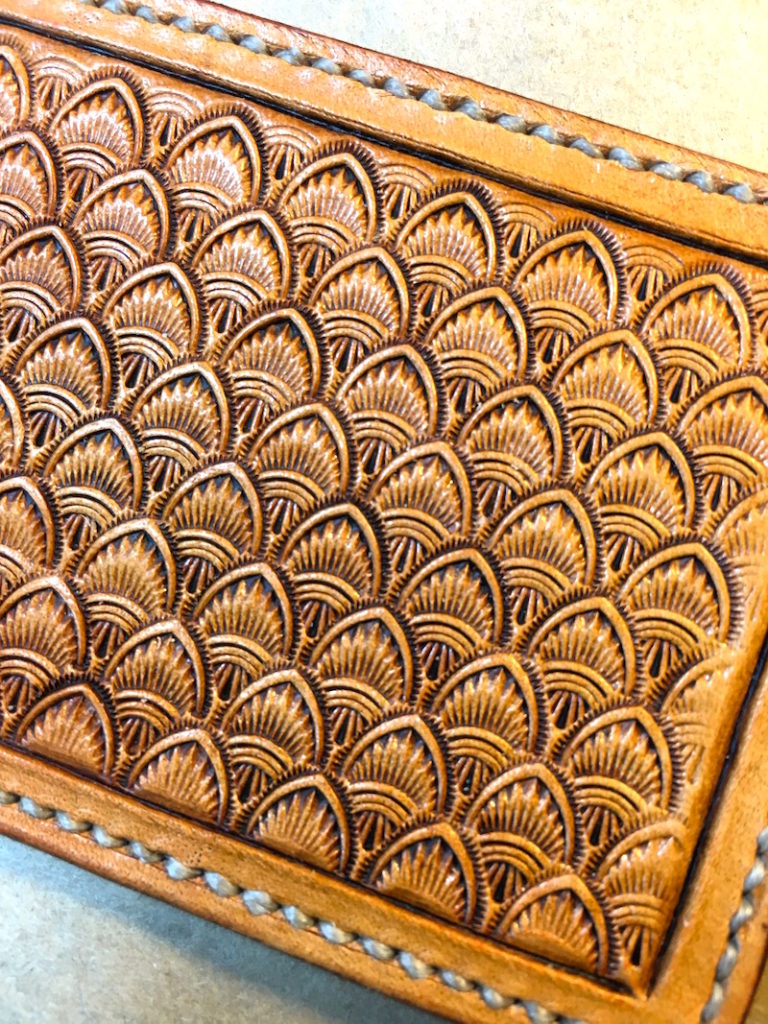
Shell stamped design in a small wallet.

This particular design on a minimalist leather wallet was achieved with two separate tools being used together across the wallet’s outer surface. It’s a complex task that takes a lot of skill to execute well.

Custom leather work is what we do at C and B Leather and bringing your artwork ideas to life is our goal with every project.

Bob Blea, owner, C and B Leather