What does ‘Genuine Leather’ mean?

What’s up with Genuine Leather?

You will often see the term ‘Genuine Leather’ on items you find a stores, but what does this really mean?

If you go to a department store or other big box retail store, you will often run across leather items like belts or wallets that are stamped with the term ‘Genuine Leather’ but is this really any kind of quality guarantee?   Not really.  In fact it is one of the lowest grades of the types of leather you can purchase.

Genuine Leather is usually made from the lower quality parts of a hide that are removed from higher quality leather hides.  Often it is made from the parts shaved off of the back of a leather hide that are then glued together for strength and have a leather texture embossed onto the surface.  These are basically rejected parts from higher quality items that are recycled into something useful for the mass consumer market.  This kind of leather doesn’t have much strength or the ability to wear well because it doesn’t include the grain surface of the leather from the original hide. The grain surface is where most of leather’s strength resides.  Thus items made from ‘Genuine Leather’ won’t hold up well and tend to wear out or break down quickly.  It’s only suitable for items where strength and durability are not required.


Other Types of Leather

Top Grain is the next step up and while it’s better, it still has some drawbacks.  Top Grain still has the grain surface on the leather but that surface has been ‘corrected’.  Leather naturally has slight imperfections on the grain surface.  These are usually marks or scars the animal picked up on its hide over it’s lifetime.  On Top Grain leather the gain surface is sanded to remove these marks so it looks like a higher quality leather but this removes some of the strength from the leather.  To repair the damage to the surface, paints and sealants are sprayed on the surface.  Often a grain design will be embossed onto the leather as well.  These treatments can make this leather hold its color well and be water resistant, but often lower quality hides are used because the finishing steps mask the imperfections.

Top Grain leather is the kind of leather used in most luxury brand handbags, wallets or briefcases.  It wears better than Genuine Leather but that’s partially due to the surface treatments that are added to it.  It doesn’t have the strength and resistance to wear that Full Grain leather does because the top of the grain surface has been damaged by the sanding.


Full Grain Leather

Full Grain leather is the highest quality of the types of leather used in making personal items.  This leather has the original grain surface of the hide intact which gives it all the strength and wear resistance leather is known for.  It may have slight blemishes and imperfections but a skilled maker can work around them in the hide.  Full Grain leather is preferred for heavy duty items that need to be rugged and wear resistant.  However in a skilled craftsman’s hands the same leather can be used for handbags, wallets, belts and other personal items that will wear very well and last for many years.  If you want an item that will be durable and last a long time, this is the leather you want to use.  Full Grain leather is usually more expensive because it has to be a higher quality hide to start with.  This initial expenses is usually more than offset by the lifetime the finished product will have.


Understanding these differences helps to explain why hand crafted items from a reputable maker like C and B Leather cost more than the mass produced items you find at a department store.  The quality of the full grain leather we use is one reason for a higher price, but the experience and skill we bring to your project are also a factor.  If you have a personal item you would like custom made out of high quality full grain leather, please contact us to make your idea a reality.


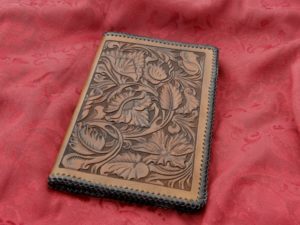
5×8 Floral Carved Notebook


Basket Weave Leather Stamping Tutorial

Basket weave leather stamping is really intimidating to many people but it doesn’t have to be difficult.  I have been working on a way to explain the techniques I use in my basket stamping (and really any stamping with a basket weave or geometric stamp) and I’ve come up with this tutorial as a starting point.  I decided to begin with the simplest form of basket stamping where you are stamping in a straight line across the leather.  Later I’ll write up a tutorial on angled basket weave stamping, which is more complicated but what I use most of the time.

Step 1:

Here is the cased leather I’ll be using for this tutorial.  It’s a money clip wallet back and I’m going to place a straight line of basket weave stamping down the length of it.
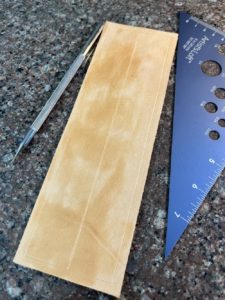
NOTE: I am right handed so all the descriptions and directions are what works for me.  If you are left handed most likely you will do everything in the opposite direction from what I’m writing here.  

I start out by making a faint line across the middle of the leather.  This will be my guide line for the first row of stamps.   Note that I made this line very bold for this picture.  Normally I would try to make this a faint mark but in this case the stamp will always be placed over the line so no part of the guideline will be left once I’ve stamped the whole piece.

I’ve also marked the border on the piece because later I will need to make sure I don’t stamp past the border lines.

Step 2:
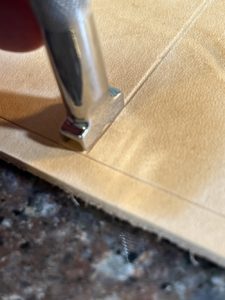
Basket stamp on leather

I start by placing the basket stamp with one side right on the line and with the back edge right up against the border.  Take your time and line this up carefully.  This first row is the base for all the stamping on the rest of the project and any problems here will lead to more problems across the rest of the project.


Step 3:
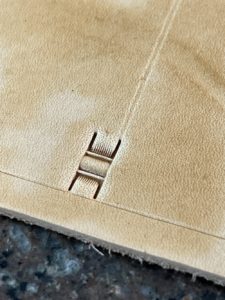
Here is the first stamp impression.  Note the legs of the basket stamp are right on the line I marked on the leather.  You want to keep the stamp aligned straight with the guide line as much as possible.


Step 4:

Time for the next stamp impression.  Move the tool so you are making an impression with the other side of the stamp on the guideline as shown in the picture.  The next impression will still be along the guideline but with the back leg of the basket stamp overlapping the first impression.  The leg of the second impression should drop in perfectly to the leg of the first impression.  As long as the side of the stamp is lined up along the guide line, you will keep your stamps going in a straight line.
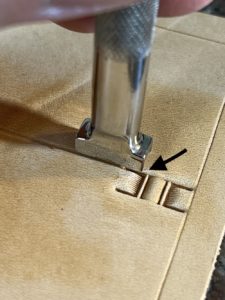
Here is main secret to how I stamp and keep the whole project straight and uniform.  Note the black arrow in the picture pointing at where the back of the stamp is sitting.  There is a slight gap between the back of the stamp and the center bar in the first stamp impression.  This is very intentional and it’s about the width of the leg of the stamp.  This extra space is a bit of play we will keep between all of the impressions.  As things get a bit off or crooked, this amount of play will allow us to adjust and keep things from getting far off.  If we stamped the impression right against the center bar there would be no room for error in the stamps around it and eventually you would end up with stamps crowding each other and the overall project would be crooked.


Step 5:
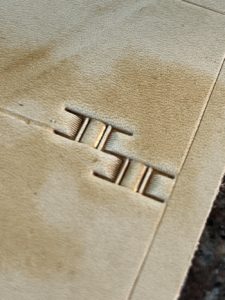
Here is the second impression.  It’s on the other side of the guide line but still has its legs lined up with the guideline.  Again, take you time making each of these first impressions and make sure they line up.  The time and patience you show here at the start will pay off in the end.


Step 6:

Now it’s time to repeat back on the other side of the line.  Again place the legs of the stamp in the last impression and make sure you have the same small gap between the back leg of the stamp and the center bar of the last impression.  It’s important to try and be as consistent with each impression as possible and to try and keep that slight gap the same for each impression.  Again your patience will be rewarded.
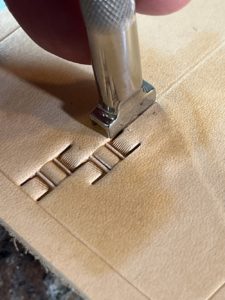
Also note that while I’m stamping this first row this is basically my view.  I’m always looking from the side to see how well it lines up with the guide line.  Once I finish this first row I’ll change how I look at the leather but for now I want to focus on making sure each impression lines up along the line and has the right spacing.

Step 6A:

First three impressions made.  About a few hundred to go.
 

Step 7:

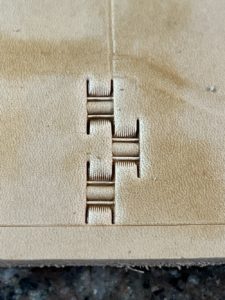
This view shows more stamps running along the line as I continue to work my way across the piece of leather.  Again, keep the legs of the stamp on the guideline and try to make the space consistent between each impression.  
 

Step 8:
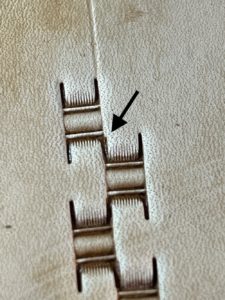
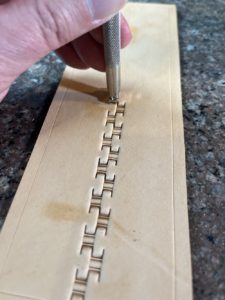
This pictures shows how even when you are trying to carefully line things up slight accidents will still happen.  The black arrow is pointing to where the previous impression was slightly off the line and you can see it is not quite lining up with the next impression.  We are all human so slight errors like this are UNAVOIDABLE.  This slight error causes the row next to it to be slightly off.  As you expand the stamping the errors like this compound which is why we tend to start off nicely but end up with our basket stamping being all over the place by the time we finish.  It’s that slight gap between the back of the stamp and the center bar that allows us the freedom to correct this kind of problem as we go along.


Step 9:
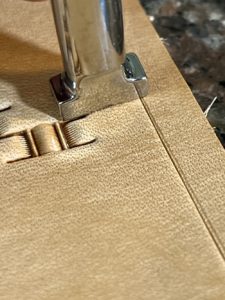
Once we reach the other side most of the time the stamp isn’t going to line up with the border.  In this case I tip the tool on end so I’m just making a partial impression.  I line up the legs just as before but tilt it up slightly so that when I strike the tool I only make an impression inside my border. 
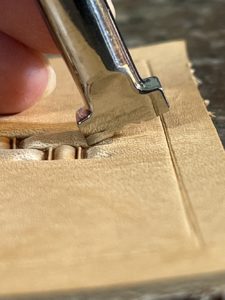
The second picture here shows the tilt from the side and I’ve exaggerated how much I tip it, but you do need to tip it more than you think.  If you don’t you’ll end up accidentally making faint marks on the other side of the border.

Step 9A:
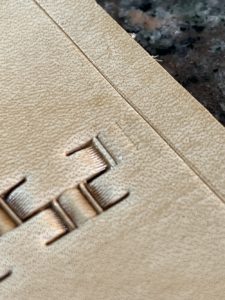
Here’s the impression of the tipped stamp.  Don’t worry that there is a pretty large gap between the partial stamp impression and the border.  We’ll fill that in with a border stamp later.


Step 10:
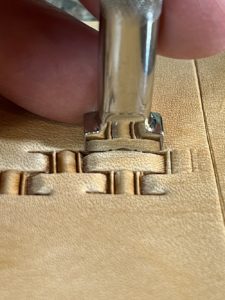
Now that I have my baseline across the project, I start stamping the area to one side of it. To do this I’m going to reverse the direction I’m adding new stamps.  I now will be stamping from right to left (I’m right handed but you are left handed you will most likely reverse this) I start by lining up the legs of stamp inside the two stamps that are already on the leather.  Note that I’ve rotated the project about 90 degrees and this is how I view the project in these two views.  This way I can most clearly see where the stamp sits in the existing impressions.
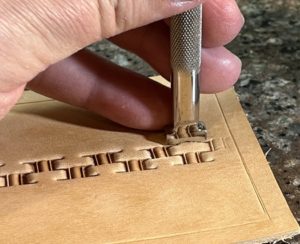
Here is another key trick I use to keep things straight and neat.  In the closeup picture you can see I’ve lined the stamp up with equal amounts of extra space on either side of the stamp.  This is where having that small gap between the stamps pays off.  From now on whenever you make an impression always try to keep the extra space on either side of the stamp equal, or stated another way keep the stamp centered between the two existing impressions.  Also try to keep the stamp running in a straight line with the existing impressions.  If you do these two things each time you stamp a new impression, it will help average out any slight errors we’ve made already and keep the stamp impressions form crowding each other.  Paying attention to these two key details will go a long way to improving your basket stamping.


Step 11:
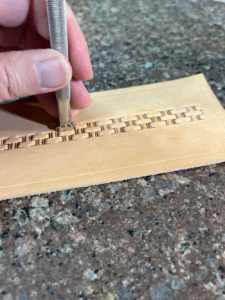
This shows several impressions I’ve made as I follow along my existing row of stamps, working from right to left.  On each one I try to center the stamp between the two existing stamps and keep the stamp aligned with the existing stamps.   This stamping will go faster than the initial row.


Step 12:
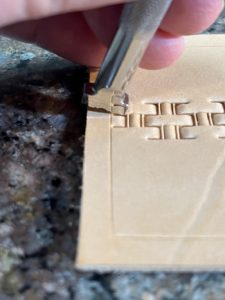
I’ve reached the end of the line again and again the stamp is running over the border.  Just like before I tilt the stamp so I only make a partial impression.  The second picture shows I only get an impression of the legs of the basket weave, but that leg impression is what I’ll use to line up the next row.
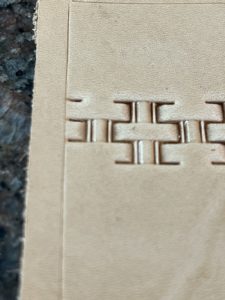
 

Step 13:
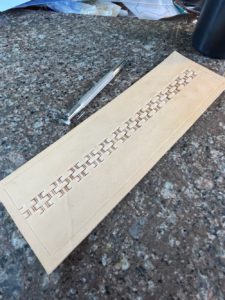
Here’s where we are at this point.  We stamped a straight line across the project from left to right and then stamped one row of stamps back across from right to left.  For the next row I’ll go back to the right and stamp another new row, tilting the stamp up at each end as necessary.  I’ll keep doing that until I have filled up that side of the project and it looks something like…


Step 14:
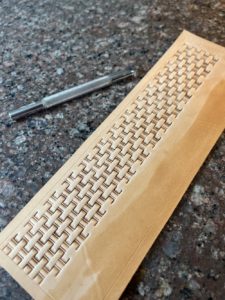
Here I’ve added all the full rows I can on one side of the project and I’m bumping up against the border.  For each stamp I’ve followed my process of making sure each new impression is centered between the two existing stamps and I check to make sure I’m keeping the stamp aligned straight with the existing rows.  Fortunately it has come out pretty even with the border.


Step 15:
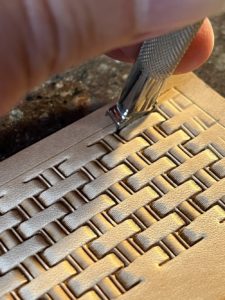
Now I am working on stamping as close to the border as possible by tilting the stamp towards me and making partial impressions.  I still make sure to place the stamp centered between the two existing impressions and keep the stamp straight with the other impressions.  I just want to be careful to leave as few marks as possible in the border area.
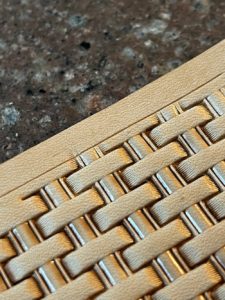
This closeup shows the partial stamp impressions and if you look carefully you’ll see I left a slight impression of one of the legs in the border.  You can get rid of this by using a modeling spoon to gently rub the mark out.
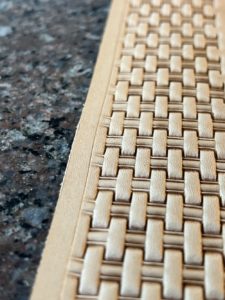
 

Step 16:
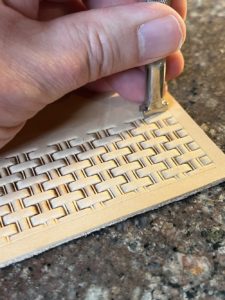
Now I flip the whole project around and repeat the process on the other side.  Again I start on the right and add impressions moving toward the left.
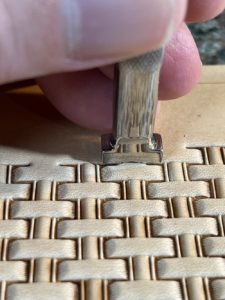
Just like before I center the stamp between the two impressions and keep the side of the stamp aligned straight with the existing impressions.


Step 17:
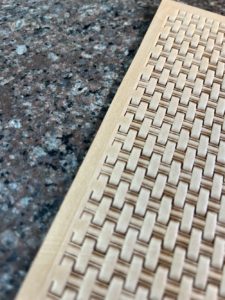
The other side is filled with impressions just like we did on the other side.


Step 18:
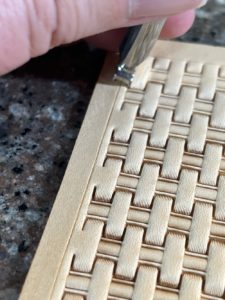
This time the whole stamp impressions came out pretty close to the border.  I could probably get by without stamping any more but I’m going to go ahead and stamp partial impressions along the border by tilting the tool.  I always try to get my stamps as close to the border as possible.

Step 18:
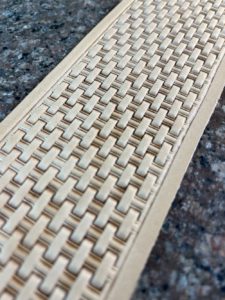
The basket stamping part is finished.  Now to finish things up I bevel the border all around the edges of the basket stamped area.  

Step 19:
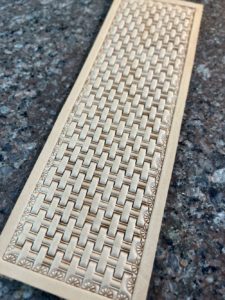
Finally, pick a border stamp and stamp it around all the edges.

That is all the steps I go through,  Yes there are a lot of details to keep track of and at first things go pretty slowly but after a little practice doing these steps becomes routine and it goes much quicker and 
Jazz Up Your Wardrobe with Leather Money Clips!

Money Clips are an old idea.  Historians say that the original idea for the money clip dates back to 323 BCE in ancient Mesopotamia where a clip was used to keep track of notes that described amounts of grain.  These notes could be traded as a form of currency based in grain.  The idea for holding the notes with a clip of some kind spread to other cultures and we’ve had variations on the money clip idea ever since.

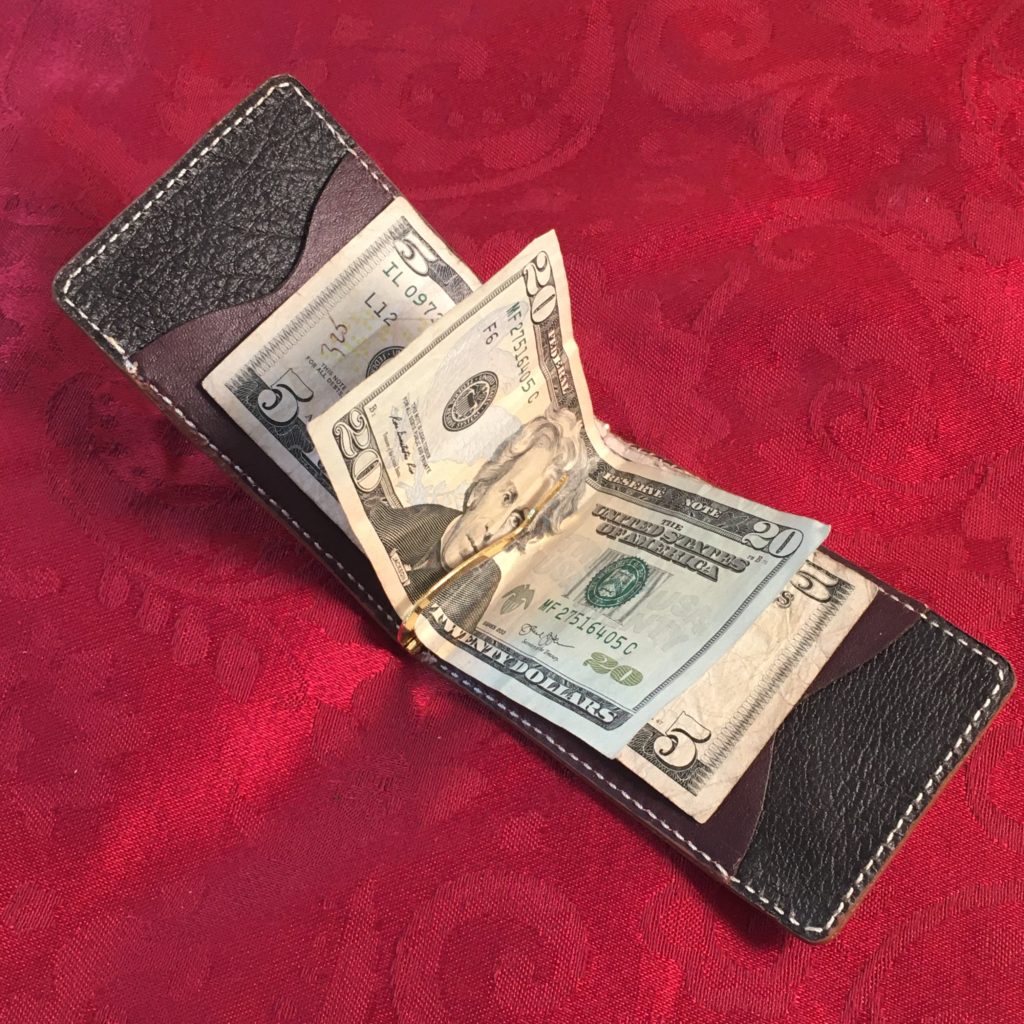
Leather money clip with cash.

The kind of money clip I specialize in is a kind of hybrid money clip and wallet combination. The clip for holding the bank notes is attached to a minimalist leather wallet that can hold several credit cards and an ID. But just because the wallet is minimalist doesn’t mean that it can’t have style or flair! Money clips like this can be made to show off any personality or style. From Celtic knots to sports teams, monograms or fantasy themes, money clips like this can be customized to almost any interest.

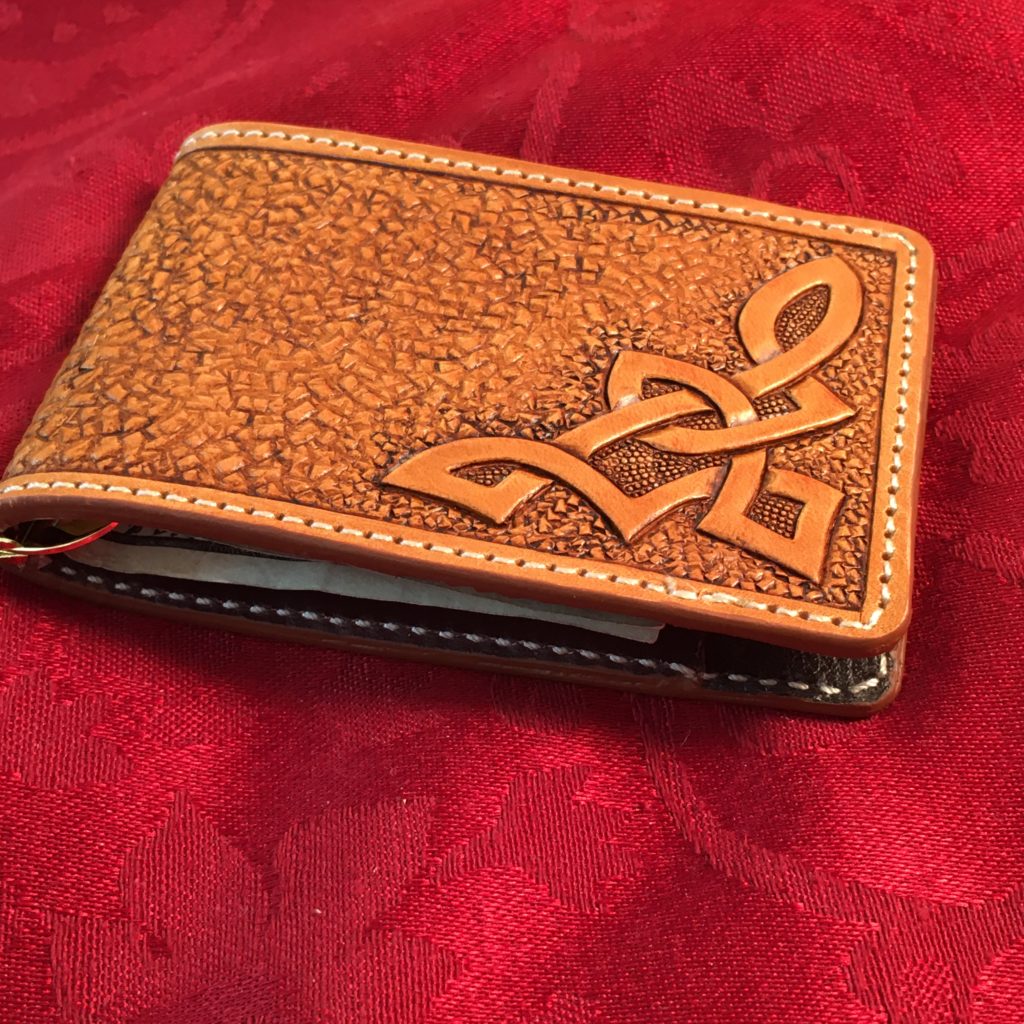
Carved leather money clip wallet with Celtic knot design
Money clip with Celtic knot design

Custom Leather Money Clips

I make many kinds of leather money clips and I’m happy to customize them to whatever fits your interests. From special artwork to monograms to inlays, I strive to bring a customer’s imagination into reality.

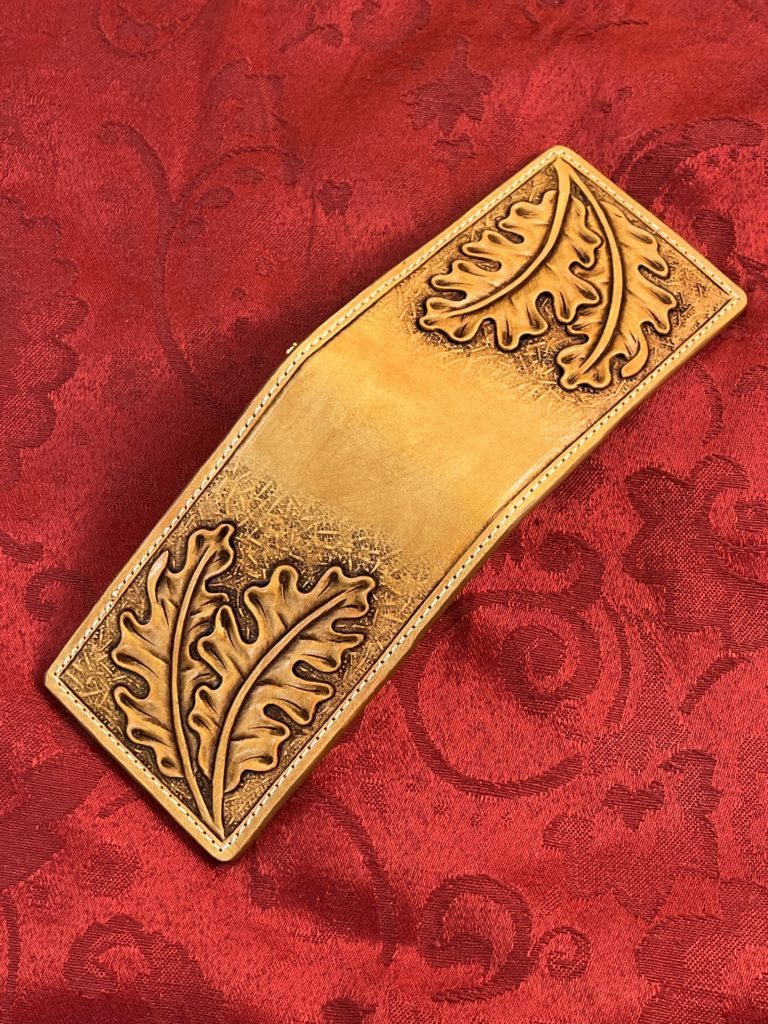
Leather money clip with oak leaf carving
Leather money clip with oak leaf carving designs.

Not only can the artwork be made to your specification, but I can customize the money clip with your choice of interior or exterior pockets. Interior pockets can be decorated too, and even special sizes are an option. Just let me know what you are interested in.

If you have a special gift in mind for someone I can make that gift a reality. Custom designs based on your ideas are our specialty! Contact us to start making your special gift.

How is Leather Made?

Leather Tanning 

So how is leather made?


While leather is made from the hides of cows, the way it’s processed is different depending on the type of leather to be made.


Most leather is made for use in clothing and it’s tanned using chrome salts.  This is a fairly quick and cost effective process that makes most of the kinds of leather you run into in your daily lives.


The kind of leather used for the carving my artwork is made in a different way.  It is called vegetable tanned leather (or veg tan for short) and it goes through a much longer process.  Vegetable tanned leather gets its name from the fact that plant parts like bark are used to do the tanning.  This process gives the leather much different properties than the kinds of leather used for shoes or clothing.


Veg tan leather carving
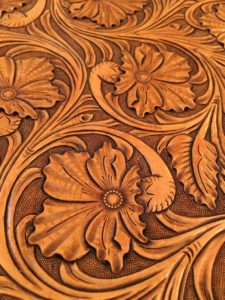
Floral carving in leather.

” Vegetable tanned leather gets its name from the fact that plant parts like bark are used to do the tanning.”

The video at left is a tour of the Hermann Oak Tannery in St Louis Missouri.  This tannery has been making leather since 1881 and is one of the premier leather tanneries in the US today.  The vegetable tanned leather they produce is the preferred choice of many US saddle makers and other leather workers.  This video is a fascinating tour showing all the processes for making leather from raw hides to finished leather.  


Thanks to Weaver Leather for posting this informative video!


Happy New Year 2022!

It’s a brand new year and a time to look back at the custom leatherwork of the past year. This past Christmas season was a very busy one here at C and B Leather and we had lots of custom orders for our customers. This is just a sample of some of the special items we made for our clients.
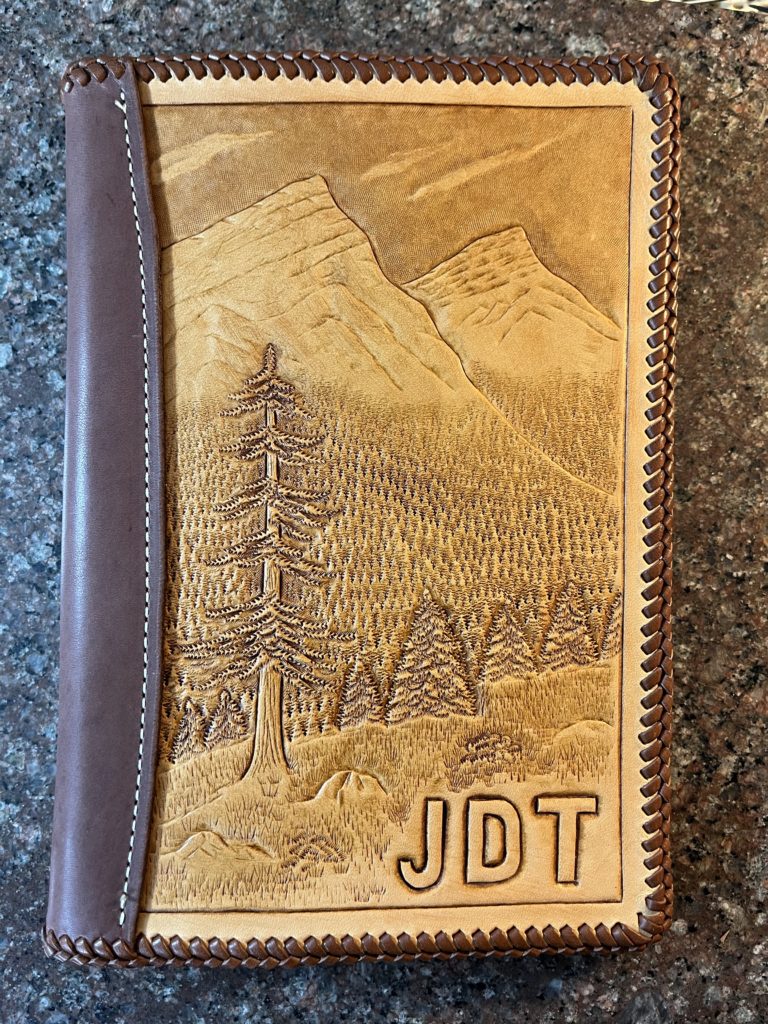
A 5×8 leather notebook with a mountain carving.

This customer wanted a small notebook with a mountain scene and her husband’s initials on it. The artwork was tailored to the kinds of scenery they can see near their home in Montana. I make several different sizes and styles of these notebooks and the carvings on them are always made to customer request. Notebooks like these are intended to be something the new owner will get a lifetime of service out of, and each one is unique to it’s new owner.
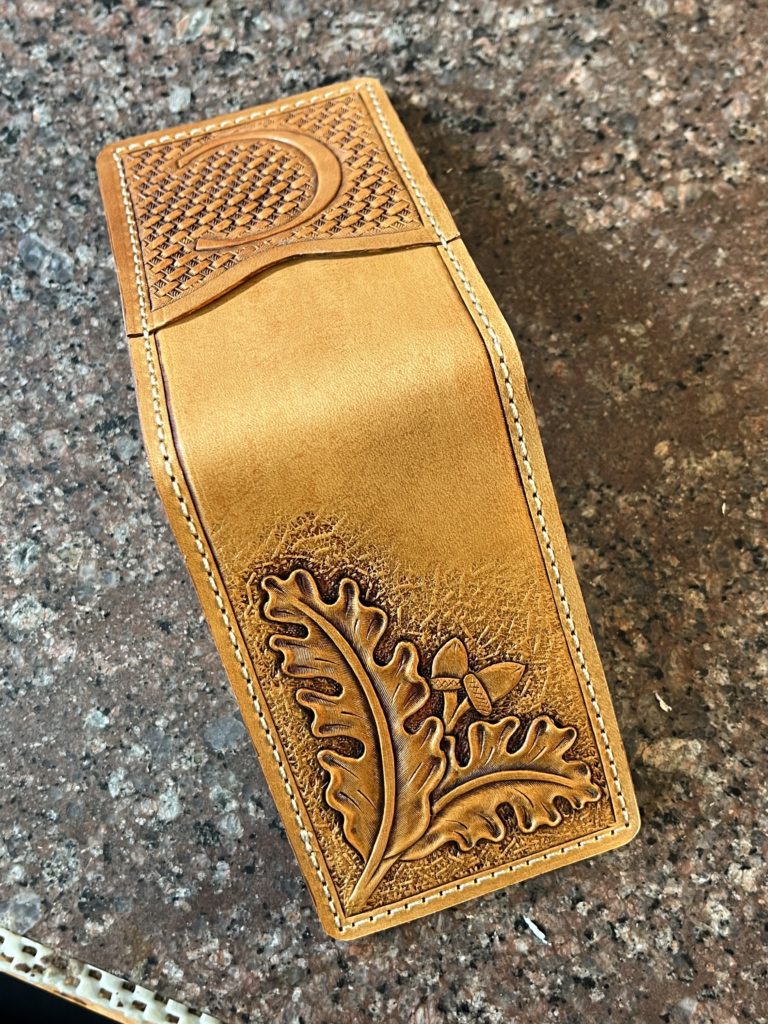
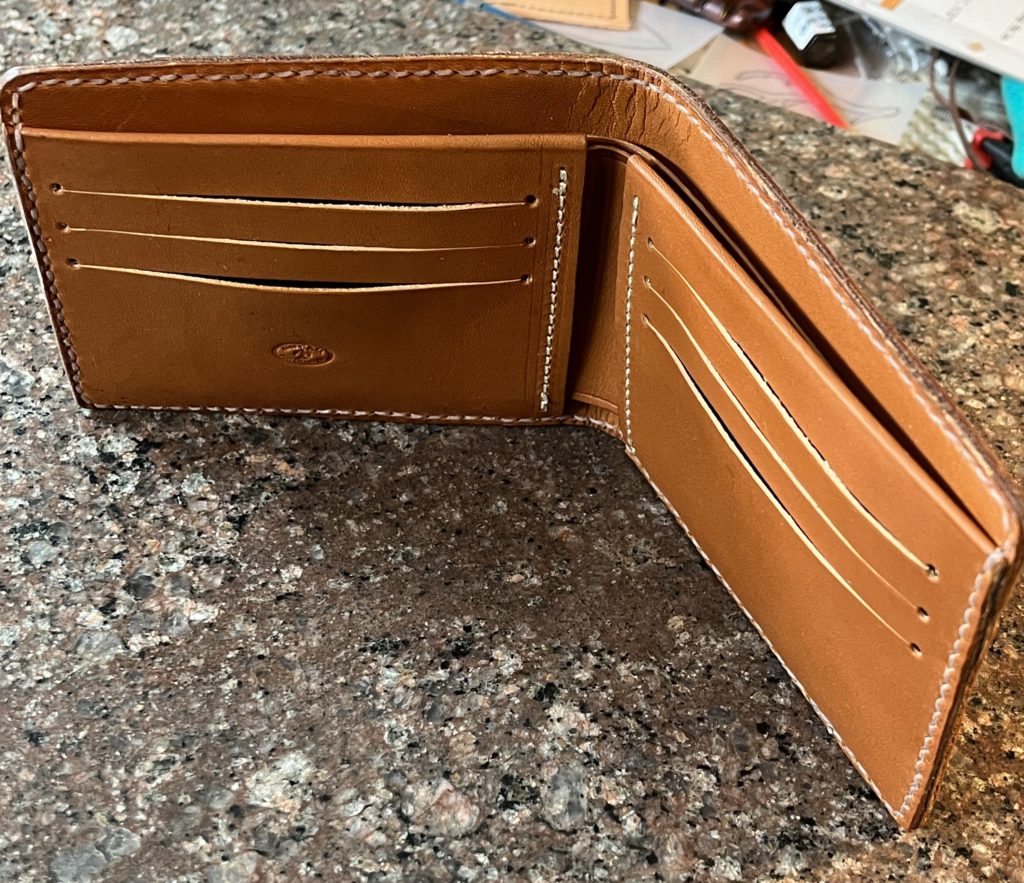
Custom Oak Leaf money clip with the customer’s initial carved on the pocket.

When the person this money clip was made for received it on Christmas morning I’m told he immediately through his old store bought wallet in the trash! Apparently he absolutely loved this new money clip wallet that was personalized just for him.

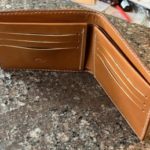
Hand made leather bifold wallet.

We make a variety of different kinds of wallets for both men and women. All our wallets can be customized with different kinds of designs.

Custom Leatherwork is our Specialty!

Making bespoke items is our specialty. If you have an idea for a personal gift for a loved one or yourself, contact us to talk about your ideas. Leather notebooks or wallets like these make excellent gifts that will last for many years and are absolutely unique. Very often these will become heirloom items that can be passed down to the next generation. Click on the ‘Contact’ menu at the top of the page to get things started!

Leather Tools of the Trade

Working with leather is a very old art form. It’s perhaps the oldest profession (or at least one of them) and there are many special leather tools that have been developed over time for cutting and working leather. Here at C and B Leather we use many different tools to make the custom leather items that you order. Below are some of the most important ones.

Round Knives

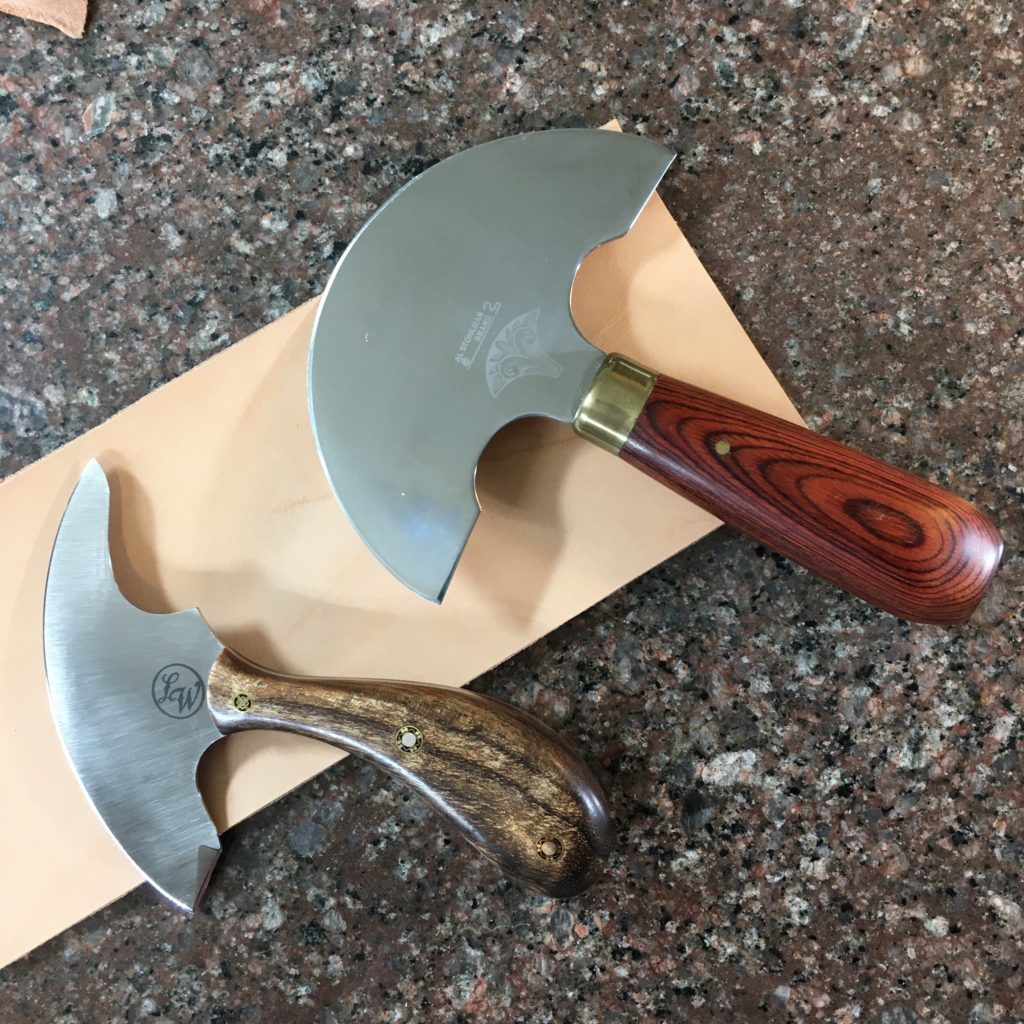
Leather Round Knife
These are two examples of different kinds of leather round knives. Top is an Al Stohlman model from Tandy Leather, bottom is a Leather Wranglers model.

One of the most iconic tools is the round or head knife. The design of this knife is centuries old and in the middle ages the shape of this knife was a symbol of leather workers and leather working guilds. The curved design is optimized for cutting leather into pieces from the hide. The sharp points on the blade are adapted to cutting tight curves while the long curved blade is good for straight cuts.

Swivel Knives

A more modern development is the swivel knife. This knife is used for carving a design into leather, and is only used with special types of leather that can be carved and stamped. This kind of leather is called vegetable tanned and it possesses unique properties that allow it to take stamp impressions or to be carved when wet.

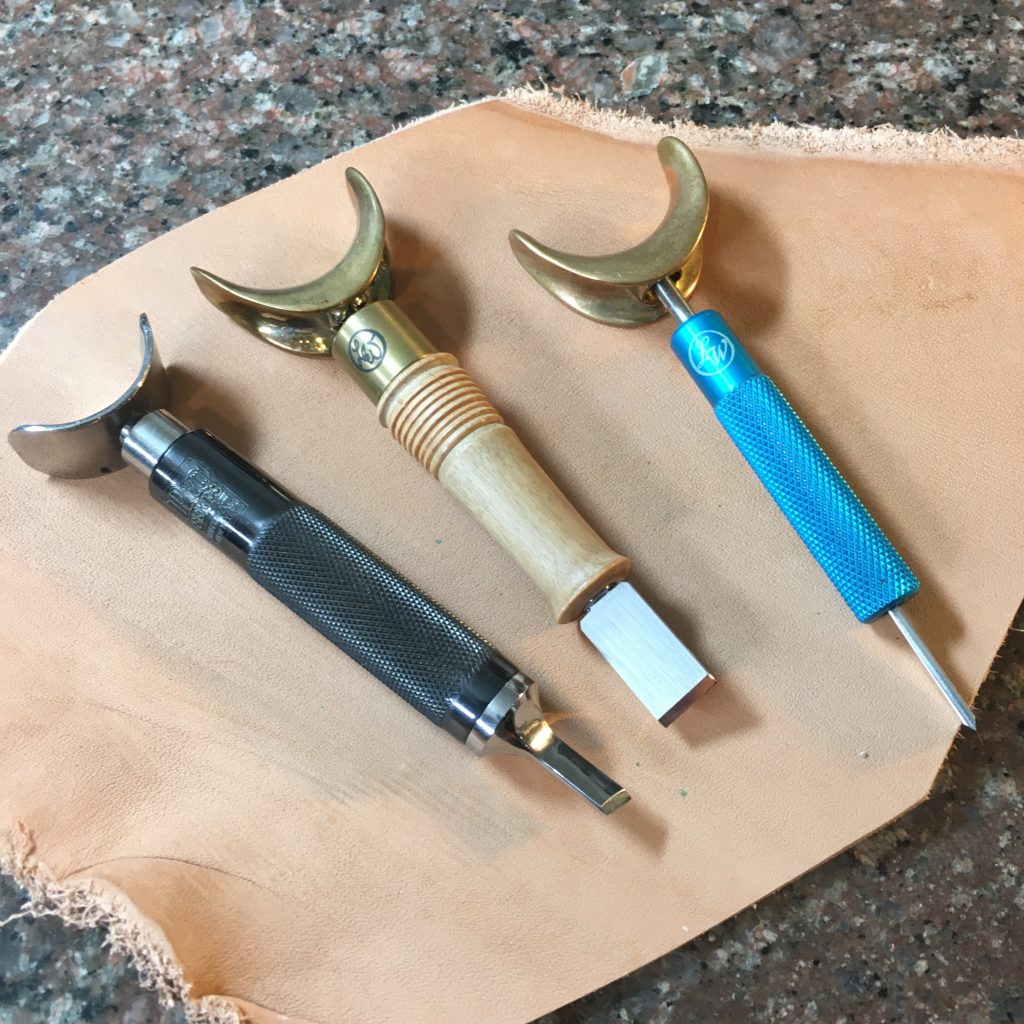
Leather Swivel Knives
Three kinds of swivel knife. From left to right, Robert Beard Pro Tools knife, Leather Wrangles SK-V and SK-3 knives.

Swivel knives get their name because the top finger rest of the knife can swivel and turn. When used the carver rests their index finger on the top part which is commonly called a ‘yoke’ and uses this finger to press down into the leather. The body of the knife where the blade in mounted can be turned or ‘swiveled’ by the other fingers and thumb, allowing the knife to carve intricate designs into the damp leather. Usually (but not always) other tools called stamps are used along these cut lines to create a relief sculpture in the leather.

Leather Stamps

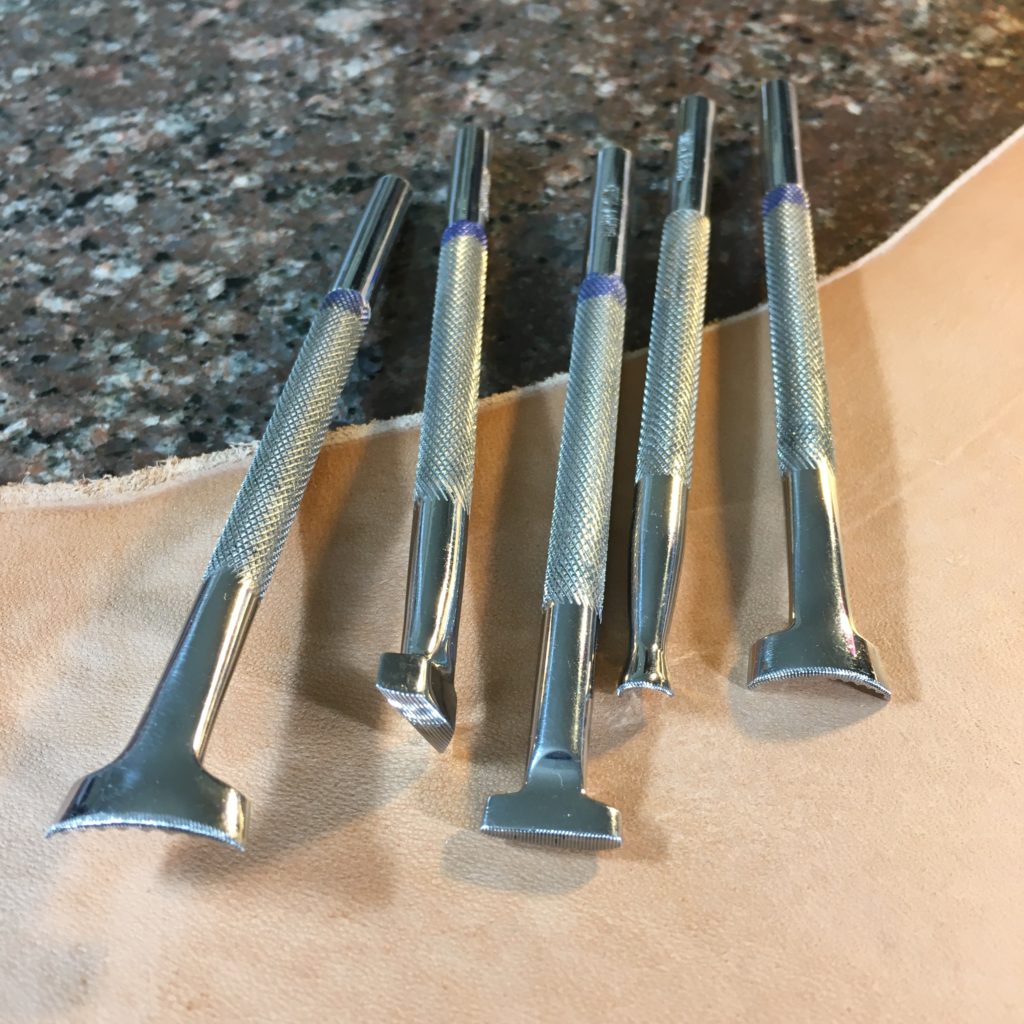
Leather stamps are used with vegetable tanned leather to create designs in the leather. They can create simple geometric or basket weave designs or they can be used to create more complex bass relief carvings. These kinds of stamps are very specialized to create certain effects, and it takes a lot of skill and experience to use them properly and create works of leather art.

Stamping tools used for creating a carved design in leather.

Having Quality Leather Tools

It isn’t necessary to buy the most expensive leather tools but having quality tools is definitely important. The old saying ‘it’s a poor craftsman that blames his tools’ is very true, but quality swivel knives and stamps make the job of rendering your work of art much easier. It is our goal at C and B Leather to make you the highest quality custom leather item we can, whether you are looking for a custom wallet, notebook or handbag. Our focus is on making your imagination come to life in an heirloom quality item that will be a family keepsake for years to come.

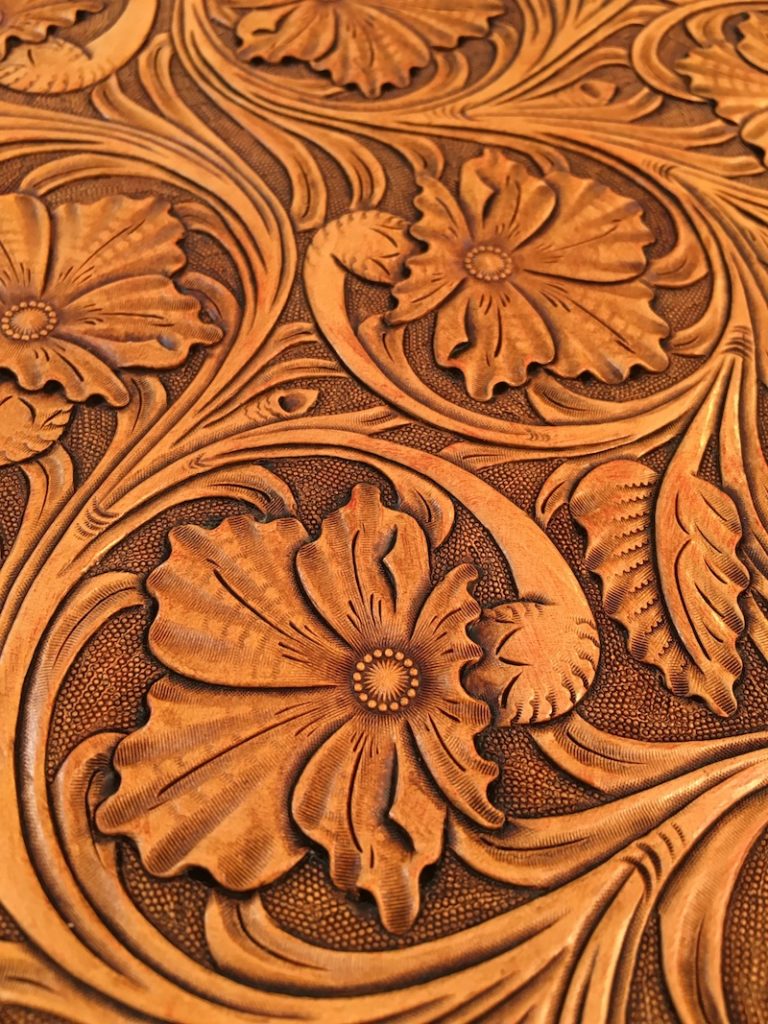
Floral carving in leather.